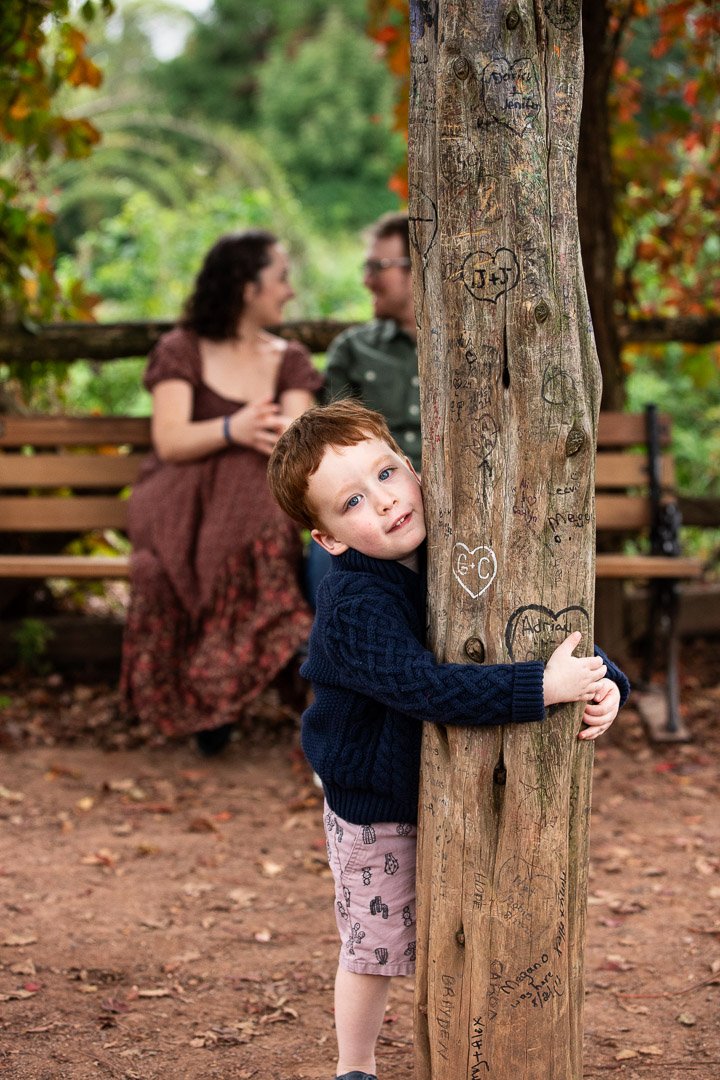
Cheap and easy chicken meal prep

Meal prepping made fast and easy! A mostly hands-off process yields lots of rich chicken stock and shredded chicken so you can be prepared for busy weeknights, but also be flexible about what you eat and when. #meandthemoose #mealprepping #chicken #…

If the idea of “meal prepping” makes you roll your eyes, then this post is for you! A mostly hands-off process yields lots of rich chicken stock and shredded chicken that allows you to be flexible with your week’s meals while also being prepared for busy weeknights.

Take me to the chicken!

Meal prepping made fast and easy! A mostly hands-off process yields lots of rich chicken stock and shredded chicken so you can be prepared for busy weeknights, but also be flexible about what you eat and when. #meandthemoose #mealprepping #chicken #…

October is Hunger Awareness Month and it’s honestly kind of embarrassing that we even need an “awareness” month for a problem that’s so huge. According to the USDA, in 2019, over 13 million households experienced food insecurity including 2.4 million households with children. On top of those stats, unemployment in the US hit an all-time high in April 2020, so that’s a lot more people facing food shortages this year.

To that end, over on Instagram, Chelsea from The Dancer’s Pantry has created a new account which highlights original meals from different food bloggers, each costing less than $10 and aiming to serve at least 2 adults, but most serve 4 or more. There are vegetarian and carnivorous meals; breakfasts, lunches, and dinners; and I’m contributing this meal prep strategy! Check out Feed for 10 to see more.

Meal prepping made fast and easy! A mostly hands-off process yields lots of rich chicken stock and shredded chicken so you can be prepared for busy weeknights, but also be flexible about what you eat and when. #meandthemoose #mealprepping #chicken #…

I finally wrote down the ratios and cooking times for my favorite (and basically only) weekly meal prep. I don’t like rigid meal planning because, while I’m a devoted rule follower most of the time, when it comes to food rules, (even ones I make for myself!) I have a real “burn it all down” vibe.

Also, with kids it’s important to be able to pivot when suddenly they HATE something that was previously a favorite.

Enter: This easy, cheap, and mostly hands-off meal prep strategy. You come away with a huge amount of rich chicken stock that is so much more delicious and filling than the boxed stuff or a bullion cube. It freezes well and lasts frozen for 6 months. It also makes soups and stews much richer, which is helpful when you’re trying to make things stretch. I use this stock in any recipe that calls for stock, obviously, but also to cook these super easy and fast one-pot pastas because it really boosts their flavor.

The shredded chicken is also a lifesaver on busy nights. Throw it into tacos or enchiladas (if you’re feeling ambitious), stovetop mac and cheese or any other simple pasta dish, or smother it with your favorite BBQ sauce and have some messy but delicious pulled chicken sandwiches. The chicken also freezes well if you want to save it for later dinners.

Meal prepping made fast and easy! A mostly hands-off process yields lots of rich chicken stock and shredded chicken so you can be prepared for busy weeknights, but also be flexible about what you eat and when. #meandthemoose #mealprepping #chicken #…

$10 Meal prep (chicken stock and shredded chicken)

Time: 1 hour, 45 minutes, mostly hands off +15 minutes for straining 
Yield: 11 cups stock, 4 cups cooked, shredded chicken

1 chicken, cut into pieces (about 3½-4½ lbs) $11.95 from Trader Joe’s (I bought a pre-cut chicken, but there were whole chickens available for $7-$9)
1 large bag frozen veggie and aromatic leftovers (save everything from the previous week’s cooking in a large bag in the freezer including onion skins, garlic skins, tiny cloves of garlic, leek and fennel fronds, lemon rinds, dried up fresh herbs, unused parts of celery, carrot peels, potato peels, etc)
14-18 cups water (enough to cover the chicken and veggies entirely, but the full amount will depend on how much chicken and veggies you use) 
3 Tbsp kosher salt

Place everything into a large stockpot and bring to a boil over a high flame, about 20 minutes. 

Once boiling, reduce the heat to medium-low or just high enough to achieve a low rolling boil. Cook, uncovered, until the water has reduced by ¼, about 1 hour. 

Add enough water to return to roughly the original amount (about 4 cups) and turn the flame back to high. Stir the mixture and check the seasoning. Add more salt if necessary.  Bring the mixture back to a boil and then reduce back to a low rolling boil.  

Boil for 20 more minutes. Let cool.

Remove the large pieces of veggies and chicken bones. Strain the broth into a large container. Save all of the cooked chicken meat. 

Warm potato salad

This quick, warm potato salad is a little creamy, a little crunchy, a little herbaceous, a little spicy, and very delicious. #meandthemoose #sidedishes #potatoes #potatorecipes #warmpotatosalad #potatosaladrecipes

Potato salad might be the perfect transitional food: It’s reminiscent of the BBQs and long summer days that we’re leaving behind, but as we head towards fall, what’s more comforting than a bowl of starchy goodness?

Bring me to the potatoes!

This quick, warm potato salad is a little creamy, a little crunchy, a little herbaceous, a little spicy, and very delicious. #meandthemoose #sidedishes #potatoes #potatorecipes #warmpotatosalad #potatosaladrecipes

Phew. I am in the thick of this motherhood in a pandemic thing, y’all. (While also trying to be okay with what we have [in-person school half of the time; outdoor, distanced playdates], and what we don’t [travel, grandparents without preplanning, sports, activities]. I was about to actually start this blog post asking, “from where is our worth derived?” And then I said to myself: GET A GRIP BECCA, THIS IS JUST A FUCKING FOOD BLOG.

One thing I’m really missing, and I think we can all relate to this somewhat, is that sense of having discreet portions of the day. I blame the pandemic, the world being both literally and figuratively on fire, and being home all the time, but having a 5.5 month old baby who is, thus far, schedule resistant, also doesn’t help.

Whatever the cause, I miss those few downbeat moments every day where you could switch from one mode to the next. Now I feel like I’m never able to focus on one thing completely. I can’t just test a recipe or take some photos. Instead, I’m doing that while comforting a crying baby and finding a very specific episode of Paw Patrol on the DVR and getting some water and searching for a missing Lego and nursing and and and.

On the flip side, I find myself not tuning in to my kids entirely either, which makes me really upset with myself and this fucking situation we’re in. I think that fear, anger, resentment, and frustration makes it hard for me to find the bandwidth for a really involved pretend game or art project or science experiment. But that sucks for my kids because they aren’t responsible for the pandemic. But I’m also human and I can’t be the perfect mom all day, every day. * PRIMAL SCREEEEAAAAAMMMMM *

This quick, warm potato salad is a little creamy, a little crunchy, a little herbaceous, a little spicy, and very delicious. #meandthemoose #sidedishes #potatoes #potatorecipes #warmpotatosalad #potatosaladrecipes

But anyway, time marches on and suddenly summer has turned into fall. I don’t know what we did with the warm months. Did they even happen? Who knows.

This quick, warm potato salad is a little creamy, a little crunchy, a little herbaceous, a little spicy, and very delicious. #meandthemoose #sidedishes #potatoes #potatorecipes #warmpotatosalad #potatosaladrecipes

We did celebrate summer produce thanks to our prolific cucumber, zucchini, and basil plants AND our favorite farm stand. Now that fall is bearing down on us, there’s nothing like a meal to mark the changing of the seasons and this potato salad is the culinary equivalent of a light jacket: A nod to both warm and cold, casual and cozy.

While potato salad might seem relegated to side-dishery, I topped this with a runny egg for an unexpectedly fab breakfast. Try it!

This quick, warm potato salad is a little creamy, a little crunchy, a little herbaceous, a little spicy, and very delicious. #meandthemoose #sidedishes #potatoes #potatorecipes #warmpotatosalad #potatosaladrecipes

Warm potato salad 

Time: About 15-20 minutes, mostly active
Yield:
about 3-3.5 cups of salad

1½ lbs small potatoes (new, fingerling, red, etc; cut any larger ones so that most pieces are about the same size) 
¼ cup mayonnaise or Greek yogurt 
3 Tbsp dijon mustard
¼ cup chopped red onion (about 1 thick slice from a medium or small onion) 
2 Tbsp finely chopped chives
1/4-1/2 tsp kosher salt
¼ tsp smoked paprika
Dash of red wine vinegar or 1 tsp of chopped capers 

Microwave the washed potatoes in a glass bowl covered with plastic wrap on high for 10 minutes. Or cover the potatoes with cold water until they’re just submerged. Heat over a high flame until boiling. Boil, lowering the flame slightly to avoid the water boiling over, until fork tender, about 12-14 minutes. 

While the potatoes are cooking, combine the rest of the ingredients in a large bowl and mix well. 

Once the potatoes are fork tender, add them to the mixture and stir to combine. Taste and adjust seasoning as needed.

Tomatillo gazpacho

This barely cooked soup combines the best of summer vegetables like tomatoes, cucumbers, and zucchini and manages to be both light and filling. #meandthemoose #summer #nocookrecipes #soup #gazpacho #tomatorecipes

Make the most of summer produce with a tangy gazpacho that manages to be both light and surprisingly hearty.

Take me to the soup!

This barely cooked soup combines the best of summer vegetables like tomatoes, cucumbers, and zucchini and manages to be both light and filling. #meandthemoose #summer #nocookrecipes #soup #gazpacho #tomatorecipes

The calendar has turned to September, friends. Most years I’m desperate for the fall to come. I’d be happy if it was sweater weather and apple season all year round.

But this year I sort of wish I could freeze time (but also, skip over the next bit entirely). We still have a week before Kindergarten starts for M, which means, I’m not yet worrying about an email from the school saying that someone has Covid. And Z is at the perfect baby stage where he’s sleeping more, crying less (sort of), and has a personality, but isn't yet mobile.

I hate this instinct of mine to imagine that whatever is coming will be bad. Or that if I imagine all the possible bads, that I can stop them from coming. What is that? Did I inherit some DNA from great great great great-grandmother Esther who escaped the pogroms?

Anyway, I’ve been dealing with all this dread by eating gobfulls of not-great food. I’m not even trying to food shame myself. I don’t think anyone would classify my current eating regimen as “balanced.” And I’m certainly not eating only things that taste absolutely delicious. I’m eating for the sole purpose of thinking about something other than my fears. It’s not great, Dan.

Consequently, I’m trying to come up with meals that are a little more veg-heavy while still being fun and tasty and most importantly, simple. Because, though I’m cooking and eating to stop myself from worrying, I’m also deeply committed to worrying and thus, don’t want to take too much time away from the task of imagining any and all worst-case-scenarios. You know, in case I CAN stop them from happening with my imagination.

This barely cooked soup combines the best of summer vegetables like tomatoes, cucumbers, and zucchini and manages to be both light and filling. #meandthemoose #summer #nocookrecipes #soup #gazpacho #tomatorecipes

So, this gazpacho. I used to hate gazpacho. As Lisa Simpson described, it’s tomato soup served ice cold. But when it’s good, it’s oh so much more than that. Our favorite farmstand had tons of beautiful tomatillos, so I bought some and threw them into the toaster oven (but you can obviously use a real oven too) and then threw them into the soup. The rest is really your standard Spanish gazpacho with none of the American faff that we often add. Think veggies at their peak, aromatics, salt, vinegar, and lots of olive oil.

I also realized that, while straining is a pain and you end up throwing out a lot of stuff that you could otherwise eat, it also makes the texture SO MUCH BETTER. So now I strain even though it’s a pain. But you certainly don’t have to. It saves time and this recipe yields a lot more soup when it includes the tougher stuff.

This barely cooked soup combines the best of summer vegetables like tomatoes, cucumbers, and zucchini and manages to be both light and filling. #meandthemoose #summer #nocookrecipes #soup #gazpacho #tomatorecipes

A couple of notes:

  • Please don’t reduce the oil content in this soup. It gives the dish its body and staying power. Without it, you might as well open a can of V8.

  • Tomatillos are a little sour and as such, give another dimension to the soup. But you can absolutely skip them and use all tomatoes.

  • Start with 1/2 tsp of kosher salt. I’ve found that this soup can easily taste too salty if you go overboard.

Tomatillo Gazpacho

Yield: about 3.5 cups (depending on how juicy your veggies are) 
Time: 25 minutes, all active (less if you choose not to strain the soup)

¼ lb tomatillos, husks removed, rinsed of the sticky residue, and halved
1¾ lb heirloom, plum, or other red tomatoes
1 small cucumber, peeled and roughly chopped
1 small zucchini, roughly chopped
3 large scallions, green and white parts roughly chopped
2 Tbsp red wine vinegar
1/2-1 tsp fine sea salt
½ cup olive oil

Preheat the oven or toaster oven to 350. On a parchment or foil covered baking sheet, place the halved tomatillos face down. Bake for 5-7 minutes or until the tomatillos have softened a bit, but aren’t completely mushy.

While the tomatillos are cooking, roughly chop the rest of the vegetables.

Add the tomatillos, tomatoes, cucumber, zucchini, scallions, vinegar, and salt to your blender and blend on high for 2 minutes. 

While the blender runs, add the olive oil in a slow stream until it’s completely incorporated, about 2 more minutes. 

Strain the soup through a fine mesh sieve.

Test for seasoning and add more salt or vinegar if needed.

Chill for 2 hours or up to 1 week.

Broccoli tacos

Roasted broccoli, poblano and meunster cheese sauce, and broccoli micro greens make for a quick, nutritious, and lip-smackingly good meatless monday or taco tuesday meal. #meandthemoose #vegetarianmeals #tacos #broccoli #tacorecipes #broccolitacos #…

Roasted broccoli, poblano and meunster cheese sauce, and broccoli micro greens make for a quick, nutritious, and lip-smackingly good meatless monday or taco tuesday meal.

Take me to the tacos!

Roasted broccoli, poblano and meunster cheese sauce, and broccoli micro greens make for a quick, nutritious, and lip-smackingly good meatless monday or taco tuesday meal. #meandthemoose #vegetarianmeals #tacos #broccoli #tacorecipes #broccolitacos #…

A few weeks ago, M decided that he didn’t like tacos. He still liked tortillas and all of the fillings, but brand anything as a “taco” and he was not interested. I only cared because often, the easiest route to dinner goes right through fridge-clearing-taco-ville. Maybe if I’d offered a Chocotaco he would have been into it? We’ll never know.

But while I was making these broccoli babies for the first time, he commented, “that smells really good.” Dear reader, he ate it. The whole thing. It was definitely the poblano cheese sauce, which I would like to put on everything for the rest of my life.

Instead of making a queso with cornstarch added at the end, I make a roux to start and added the cheese once the milk had thickened. I’m sure going the traditional queso route would also have been delicious. I just chose something else because life is about choices.

Roasted broccoli, poblano and meunster cheese sauce, and broccoli micro greens make for a quick, nutritious, and lip-smackingly good meatless monday or taco tuesday meal. #meandthemoose #vegetarianmeals #tacos #broccoli #tacorecipes #broccolitacos #…

A couple of notes:

  • Keep an eye on the broccoli after about 15 minutes. The cooking time really depends on how fresh your broccoli is, how large your florets are, and how hot your oven runs.

  • Add in any other bits and bobs to the tacos that you want. I used broccoli because its a favorite in our house, but other roasted veggies or proteins would be delicious here.

  • Double the cheese sauce. Just do it. This recipe makes enough for about 6 tacos, but the sauce makes a delicious dip for chips or raw vegetables.

Roasted broccoli, poblano and meunster cheese sauce, and broccoli micro greens make for a quick, nutritious, and lip-smackingly good meatless monday or taco tuesday meal. #meandthemoose #vegetarianmeals #tacos #broccoli #tacorecipes #broccolitacos #…


Broccoli tacos

Yield: 6 tacos
Time: About 40 minutes, mostly active

1 lb broccoli florets (buy 1.5 lbs because you’ll cut off the stalks)
3-4 Tbsp olive oil 
Large pinch of salt 
1 large poblano chili (or 1 small can of pre-roasted chili) 
1 Tbsp butter 
1 Tbsp flour 
¾ cup whole milk 
3 oz muenster cheese 
1 oz cheddar cheese 
½ tsp sea salt 
¼ cup minced poblano chili 
6 corn soft taco shells
Broccoli microgreens 

Preheat the oven to 425. Spread out the broccoli florets on a baking sheet and toss with the olive oil and large pinch of salt. Roast for 20-25 minutes, or until the broccoli is as crispy as you’d like. Stir the florets around on the sheet pan halfway through cooking. 

While the broccoli is roasting, make the sauce. 

Roast your poblano pepper. Turn on the stove burner and place the washed and dried pepper directly on the flame. Have a pair of tongs handy and turn the pepper every 30 seconds or so to ensure that it’s charred everywhere. This usually takes me about 5 minutes.

Once the skin is blistered all over, place the pepper in a large bowl or paper bag and either cover it with plastic wrap or a tea towel or close the paper bag tightly at the top. Let the pepper stand for 5-10 minutes until the steam has loosened the pepper’s skin. Check by pinching some of the pepper and the skin should slip off easily. If it doesn’t, let it steam for a few more minutes and try again. 

Once the pepper has steamed, remove as much of the skin as you can, the top, and the inner seeds. Chop the pepper into small pieces. One pepper should make a scant ½ cup of chopped, roasted peppers. 

In a small pot, melt the butter over medium heat. Whisk in the flour and let the mixture bubble lightly until it has turned a medium golden color, about 5 minutes. 

Whisk in the milk and stir thoroughly to combine. Continue to stir as the milk bubbles very slightly on the edges. If the milk bubbles up too vigorously, turn down the heat. When the milk mixture has visibly thickened and coats the back of a spoon, add the salt and cheese and stir until the cheese has melted.  

Stir in the chopped roasted poblanos.

Assemble the tacos.

Heat up the tortillas in a hot, dry pan for about 1 minute each. When hot, fill the shells with the roasted broccoli and top with the cheese sauce. Top with the broccoli microgreens, avocado, grated cotija cheese, and any other toppings you like.

Macadamia nut brittle no-churn ice cream

This no-churn Macadamia Nut Brittle Ice Cream is easier than it looks and so much better than the sum of its parts: A perfect quarantine project and summer dessert rolled into one. #meandthemoose #icecream #nochurnicecream #macadamianuts #macadamian…

Since we’re all still social distancing this summer, cut down on your trips out for ice cream by making this simple, but fancy-seeming caramel-y, nutty, and creamy no-churn ice cream at home.

Take me to the recipe!

This no-churn Macadamia Nut Brittle Ice Cream is easier than it looks and so much better than the sum of its parts: A perfect quarantine project and summer dessert rolled into one. #meandthemoose #icecream #nochurnicecream #macadamianuts #macadamian…

This dish is the epitome of “looks harder than it is” cooking. There are some tricky parts, but all told, the ice cream base only takes 10 minutes to put together and the brittle is about 10 minutes of prep and then 10 minutes of watching like a hawk and then you’re done!

So why should you bother with this recipe if it’s tricky? Well, it’s the best combination of a '‘project” because we all need things to fill the day, especially when those things result in delicious ice cream, and something simple. You won’t end up with hundreds of dishes and the ingredients are pretty easy to come by. (I mean, so far, there’s no run on sweetened condensed milk, but who knows. I got everything through a curb-side order from Target.)

This no-churn Macadamia Nut Brittle Ice Cream is easier than it looks and so much better than the sum of its parts: A perfect quarantine project and summer dessert rolled into one. #meandthemoose #icecream #nochurnicecream #macadamianuts #macadamian…

I also love no-churn ice cream because, even if you have one, who really wants to haul out an ice cream maker? The texture falls somewhere between soft serve (the love of my life) and hard ice cream,

This is also a great kids’ cooking project. Maybe do the scalding-hot-sugar portion yourself, but the rest (smashing brittle to pieces! whipping cream! Gently folding the two together!) is 5-year-old approved.

And best of all, the final ice cream is so much better than the sum of its parts. I literally couldn’t stop eating it. It’s caramely and crunchy, but also super creamy. It’s sweet, but not overly sugary. And for my husband, it brings him right back to childhood when he used to eat this now discontinued Haagen Dazs flavor with his dad.

This no-churn Macadamia Nut Brittle Ice Cream is easier than it looks and so much better than the sum of its parts: A perfect quarantine project and summer dessert rolled into one. #meandthemoose #icecream #nochurnicecream #macadamianuts #macadamian…

A couple of notes:

  • I barely adapted this recipe for the brittle from Bon Appetite, and added copious notes to demystify this process (don’t be put off by the length of the recipe below! it’s actually really simple!). Caramel is basically just-burned-enough sugar, but it goes from perfectly browned to acrid in a matter of seconds. So, to save you from redoing the brittle a few times and wasting ingredients, I’ve added a lot of notes within the recipe itself.

  • Read the directions through one or two times before making this. It’ll really streamline the process and help you anticipate what’s happening with the super hot sugar.

  • I’ve used salted nuts and salted butter, but both are optional: Use what you can find. If opting for unsalted nuts and butter, add some salt to the dry brittle ingredients (see note in the recipe).

This no-churn Macadamia Nut Brittle Ice Cream is easier than it looks and so much better than the sum of its parts: A perfect quarantine project and summer dessert rolled into one. #meandthemoose #icecream #nochurnicecream #macadamianuts #macadamian…

Macadamia nut brittle no-churn ice cream


Yield: 2½ cups brittle; about 5 cups ice cream  
Time: About 20-25 active minutes for the brittle; 10 minutes for the ice cream; 8 hours freezing time

For the brittle
(Adapted from Bon Appetite)

1 cup roasted, salted macadamia nuts, roughly chopped into peanut-sized pieces (you can also use unsalted, raw nuts, but you’ll need to roast them yourself in a 400 degree oven until they start to smell nutty and are slightly golden; and add ½ tsp of sea salt to the dry mixture)
1 Tbsp butter (salted or unsalted), straight from the fridge and chopped into 9 pieces
1 tsp baking soda
1 cup sugar
½ cup water (plus an extra ½ cup for wiping the sides of the saucepan while cooking)
2 Tbsp light corn syrup

Line a baking sheet with parchment paper and set aside.

Grease a spatula with butter and set aside.

Place a trivet or oven mitt on an area of your counter.

Fill a cup with some water and unearth your pastry brush. Set aside.

In a medium bowl, combine the chopped nuts, butter, and baking soda. Set aside.

In a medium-sized, but deep (not wide) saucepan, combine the sugar, water, and corn syrup. Stir to combine with a second spatula (other than your greased one). Place over a medium-high flame and stir until the sugar dissolves and you can’t feel any grit, about 2-3 minutes.

Leave the flame at medium-high and let the mixture come to a big, rolling boil for anywhere from 7-9 minutes. Do not stir.

  • The sugar usually turns from a clear, light-ish yellow to a golden camel color in about 8 minutes, but if your flame is slightly cooler or hotter than mine, it may take an extra minute or one minute less.

Every minute or so, wipe the insides of the pan with a wet pastry brush to remove thin layers of sugar water that may have splashed up the sides of the pan. Start with your brush about an inch away from surface of the hot sugar and then work your way down the sides of the pan with the wet brush, shimmying it from side to side, dissolving that thin layer as you go. Re-wet the brush often.   

  • It’s hot in there, so be careful. If the water bubbles or crackles so much that it spits onto your skin when you touch the sides with the wet brush, the pan is too hot. Turn down the flame slightly and try again in 30 seconds.

  • However, if you brush the insides of the pot with the water and it doesn’t make any hissing sound, your pan isn’t hot enough. Turn up the flame slightly and try again in 30 seconds.

  • Another temperature gauge is the steam or smoke coming off of your pan. You DO want some steam, you DO NOT want smoke. It can be hard to tell the difference. For me, the volume of that vapor is the easiest way to tell: Really visible, obvious steam that looks at all smoky means that your pan is too hot.

  • Once you’ve found a comfortable angle for wiping the sides, rotate the pan to ensure that you get everywhere, but aren’t sticking your hand awkwardly over burning hot sugar.

  • This cleaning method isn’t perfect and you’ll likely smell some burning sugar. Don’t let it fool you into thinking that your sugar is cooked too early. Just try to find the burning spot and give it an extra brush with water.

Let the pan bubble until the sugar turns that medium camel color. Every 30 seconds to 1 minute, give the pan a few swirls to make sure the sugar browns evenly. The edges of the sugar will cook faster than the center.

  •  These swirls should be vigorous enough to really mix the sugar, but not so vigorous that you splash more sugar onto the pan’s sides than necessary. Rotate the pan occasionally too.

  • If the bubbles make it hard to judge the color, use a rubber spatula to gently move the bubbles to one side and try to spot the color underneath.

Once you reach your desired camel color, remove the pan from the heat. (Don’t just turn the flame off, actually move the pan to the trivet we placed earlier. The caramel can burn quickly.)

Using the buttered spatula. stir in the nuts, butter, and baking soda and combine vigorously. It may take a minute for the butter to melt completely. The mixture should bubble up a bit thanks to the baking soda.

Immediately dump the mixture onto the parchment and spread into a thin layer with the buttered spatula. Let harden and cool completely while you make the ice cream base.

When it has completely cooled, smash the brittle into lots of small, pea-sized pieces. I use a kids’ hammer for this part.


For the ice cream
(Adapted from literally hundreds of recipes for no-churn vanilla ice cream)

2 cups heavy cream (1 pint)
14 oz sweetened condensed milk (1 small can)
1 tsp vanilla extract
1 generous pinch salt

In a large bowl or the bowl of stand mixer, combine all of the ingredients. Whisk slowly to combine.

Gradually increase speed until you’ve reached the highest setting or second highest setting on your hand mixer or high speed on your stand mixer. It will splatter either in the bowl of the mixer or all over your kitchen if using a hand mixer. Keep mixing..

Slowly, you’ll begin to see tracks in the cream from the whipping of the whisk attachment. When those tracks deepen and remain after the whish has gone through the cream, keep whisking for one more minute.  

This entire process should take about 5 minutes.

When the cream is whipped to “stiff peaks” stage (when you run a spoon through it, the indentation from the spoon should stay firmly in place), Gently fold in 1¾ cups of the brittle.

Move to the container you’ll use for freezing the ice cream. Top with another ¼ cup of brittle.

Freeze for at least 8 hours or overnight.