Grilled lamb kebabs with haloumi and apricots

Grilled lamb kebabs with haloumi and apricots | Me & The Moose. Shake up your grill routine with chunks of fatty, savory lamb; melty, salty haloumi cheese; and tart, sweet apricots. #meandthemoose #grilling #lamb #kebabs #haloumi #dinnerrecipes …

Shake up your grilling routines with these savory, herby, sweet, and fatty lamb, haloumi, and apricot kebabs that hit all the right notes— fast.

Take me to the recipe!

Grilled lamb kebabs with haloumi and apricots | Me & The Moose. Shake up your grill routine with chunks of fatty, savory lamb; melty, salty haloumi cheese; and tart, sweet apricots. #meandthemoose #grilling #lamb #kebabs #haloumi #dinnerrecipes …


What is a kebab? Sometimes it’s cubes of meat and/or vegetables on a stick (think shish kebab). Other times, a kebab is a mountain of meat cooked on a rotating stick and then shaved off and served (think doner kebab, shawarma, or al pastor). And, confusingly, sometimes what is considered “kebab” is meat cooked and served nowhere near a stick.

For our purposes, we’re sticking close to a shish kebab.

But here’s what I don’t like about this method: Not all ingredients cook at the same rate. Why should I have to choose between undercooked meat/crispy vegetables and cooked meat/disintegrating vegetables? I say, we don’t have to.

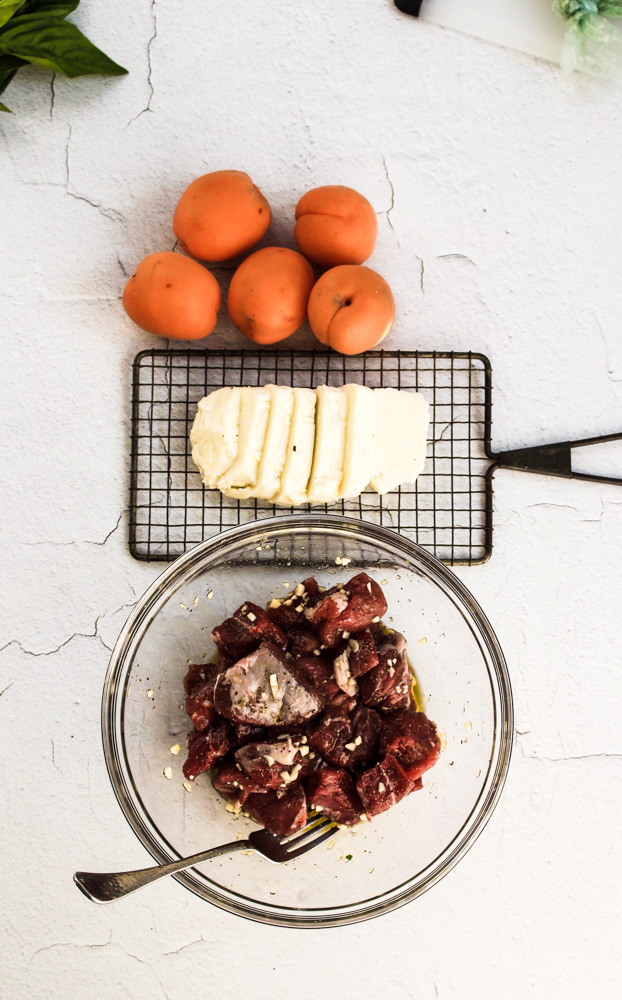
My solution is to cook the meat on a skewer, cook the cheese and apricots directly on the grill, and then skewer them all for serving. Good, right? RIGHT! I mean, it’s not perfect. Some of the meat cooks faster because the cubes aren’t exactly the same size. And it’s important to leave a little bit of space between the cubes so that the heat gets all around. But you control the doneness far more when the kebab elements are cooked individually.

A note about halloumi: If you’ve never had this squeeky, salty cheese, please change that immediately. This cheese adds so much flavor and seasoning to any dish. But when it’s cold, it makes a squeaking noise when it’s chewed, which can throw off anyone with any sort of sensory sensitivity around food. Eating it hot off of the grill or pan makes it more gooey than squeeky, which is why the cheese cooks longer than the meat in this dish.

A note on the kid-appeal of these kebabs: It’s fun to eat things off of a skewer! This dish also has plenty of salty and sweet elements with the grilled cheese and fruit, which can also be appealing to kids. But mine wouldn’t touch this. I found it too delicious not to post, so this may be one for the grownups and not the kids. But who knows? Next month, they might gobble these up. Who can say?

Grilled lamb kebabs with haloumi and apricots | Me & The Moose. Shake up your grill routine with chunks of fatty, savory lamb; melty, salty haloumi cheese; and tart, sweet apricots. #meandthemoose #grilling #lamb #kebabs #haloumi #dinnerrecipes …

Grilled lamb, haloumi, and apricot skewers

Total time ime: 30 minutes (all active- 15 minutes of prep and 15 of cooking)
Yield: 4-5 skewers

1 lb boneness leg of lamb (if you can only find bone-in, that’s fine! You’ll just need to buy more and cut away the bones. Save them for a stock or soup.)
2-3 Tbsp olive oil
1 Tbsp red wine vinegar
½ tsp salt
¼ tsp pepper
2 large garlic cloves, minced
4-5 medium apricots, ripe, but not falling apart, quartered
8 oz haloumi cheese, cut into 1/4-inch thick slices

Heat your grill to low.

Place the lamb cubes in a large bowl. Top with the olive oil, red wine vinegar, salt, pepper, and garlic and mix up. Let sit while you prepare the rest of the ingredients.

Cut the haloumi into 6-8, 1/4-inch slices. Halve the apricots.

Make the sauce. (See directions below.)

Skewer 5-6 lamb cubes onto sticks. Try to keep like-sized pieces together and don’t crowd the pieces together.

Bring all of your ingredients out to the grill and cook with the following timing:

  • Cook the haloumi for 2 minutes.

  • Add the lamb skewers and cook everything for 3-4 minutes.

  • Flip both the haloumi and the lamb.

  • Add the apricots, cut side down and cook everything (fruit, cheese, and meat) for 3-4 minutes.

  • Check the lamb. If it has reached an internal temperature of 145 and you don’t see any obvious rare spots, take the skewers off of the grill. If they need more time, keep them on the grill while you continue cooking the fruit and cheese.

  • Flip the apricots. Continue cooking the fruit and cheese for 2-3 more minutes.

Your aim is for medium-rare meat; cheese that’s a little gooey and has dark brown grill marks, but that’s staying together in one piece; and apricots that are deep orange and soft-er, but not falling apart. If any of the elements seem to be cooking too fast, take them off!

Serve immediately.

Herby sauce
1/4 cup toasted cashews/walnuts/pistachios
1 cup loosely packed fresh basil 
10 fresh mint leaves (fairly large) 
2-3 Tbsp fresh oregano leaves 
5 Tbsp oil 
1 Tbsp lemon juice 
1/2 tsp salt 

Toast the cashews in a large skillet over a medium flame, OR in a 350 degree oven, for about 5 minutes until the nuts are lightly brown and smell aromatic.

Add the nuts and the rest of the ingredients to a food processor or blender and blend until well mixed.

Taste for seasoning and add more salt if needed.

Pickled veggie pasta salad

This pasta salad requires a tiny bit of forethought so that you can let the veggies pickle for a few hours, but it’s well worth the effort for a crowd-pleasing, tangy and bright salad that complements any other BBQ dishes. #meandthemoose #pastasalad…

This pasta salad requires a tiny bit of forethought so that you can let the veggies pickle for a few hours, but it’s well worth the effort for a crowd-pleasing, tangy and bright salad that complements any other BBQ dishes. #meandthemoose #pastasalad #pastarecipes #summerbbq #pickles #pickledveggies

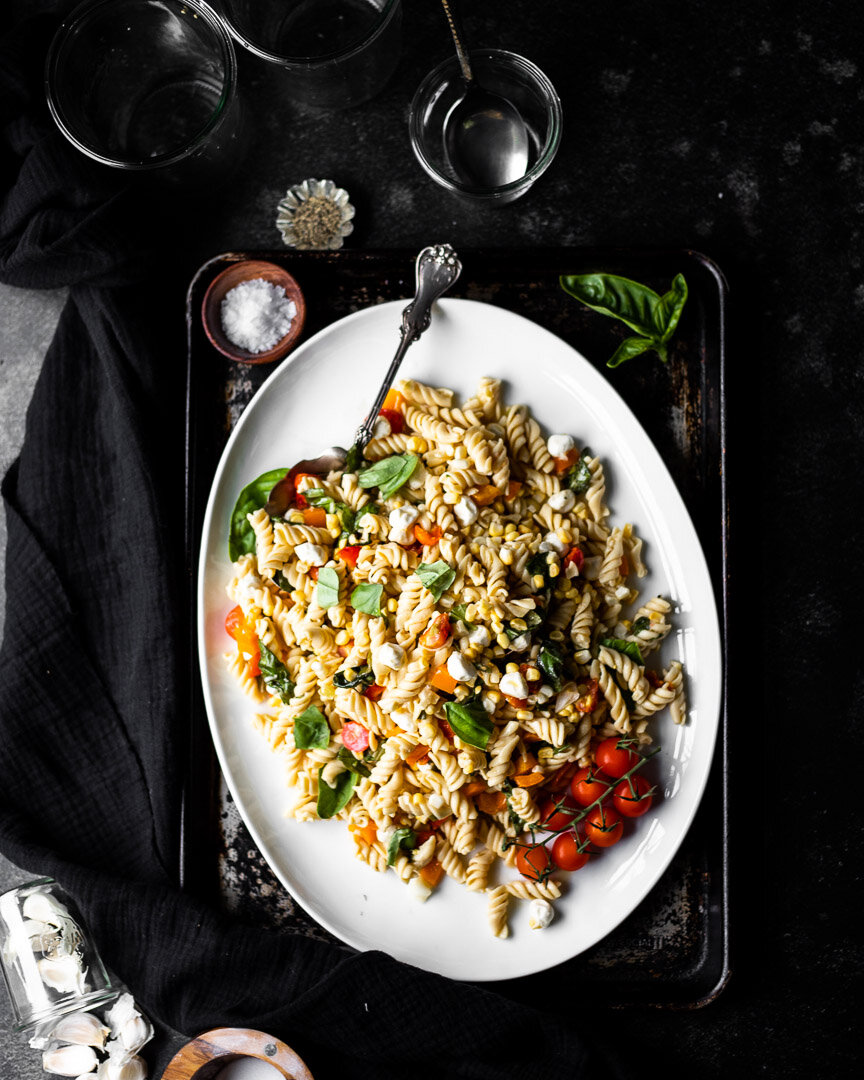
This is my platonic ideal of pasta salad: Tangy, bright, and crunchy, but also a little creamy and, frankly, oily. You can’t help but smell a smoky grill, hear kids laughing, and feel the sun in your face with this salad on your plate.

Just the pasta, please.

This pasta salad requires a tiny bit of forethought so that you can let the veggies pickle for a few hours, but it’s well worth the effort for a crowd-pleasing, tangy and bright salad that complements any other BBQ dishes. #meandthemoose #pastasalad…

This pasta salad requires a tiny bit of forethought so that you can let the veggies pickle for a few hours, but it’s well worth the effort for a crowd-pleasing, tangy and bright salad that complements any other BBQ dishes. #meandthemoose #pastasalad #pastarecipes #summerbbq #pickles #pickledveggies

So, pasta salad is often an underwhelming affair. It feels necessary at BBQs and is easy to produce in huge quantities. And sans eggs or mayo, it keeps in the sun for hours without risking a side of salmonella. But what a waste when it’s totally boring!

This recipe uses a huge quantity of quick-pickled seasonal vegetables and aromatics, which takes a little pre-planning, but is very worth it. My kid also happens to love pickles, which is a pretty good way to get him to eat veggies.

This pasta salad requires a tiny bit of forethought so that you can let the veggies pickle for a few hours, but it’s well worth the effort for a crowd-pleasing, tangy and bright salad that complements any other BBQ dishes. #meandthemoose #pastasalad…

This pasta salad requires a tiny bit of forethought so that you can let the veggies pickle for a few hours, but it’s well worth the effort for a crowd-pleasing, tangy and bright salad that complements any other BBQ dishes. #meandthemoose #pastasalad #pastarecipes #summerbbq #pickles #pickledveggies

The recipe I’ve developed here is best when left overnight, but the veggies can be eaten after about 3 hours and definitely taste pickled. Leaving them overnight helps the garlic to mellow, which can be considered a kindness to your guests, no? But also feel free to omit the garlic if you must.

And while I haven’t included anything but the pasta, dressing, and veggies in this recipe, you can customize this dish in whatever way suits your family. I make this for the three of us with mozzarella balls or feta. I’ve also thought about searing some salmon and flaking it in there or just opening a can of tuna and dumping that in. Also, the pickled veggies remind me of gardiniera, so I’m sure a salami or other Italian cured meat would be amazing in there. Experiment! Go crazy!

This pasta salad requires a tiny bit of forethought so that you can let the veggies pickle for a few hours, but it’s well worth the effort for a crowd-pleasing, tangy and bright salad that complements any other BBQ dishes. #meandthemoose #pastasalad…

This pasta salad requires a tiny bit of forethought so that you can let the veggies pickle for a few hours, but it’s well worth the effort for a crowd-pleasing, tangy and bright salad that complements any other BBQ dishes. #meandthemoose #pastasalad #pastarecipes #summerbbq #pickles #pickledveggies

A couple of notes:

  • I’ve made this salad by putting all of the veggies into one jar and I’ve made them by separating the different veggies into their own jars. If you do the veggies separately, you might need to increase the amount of pickling liquid. Just double or triple the amount of vinegar, sugar, and salt that you mix together and spread it among the different containers.

  • I opted for scallions because, though I LOVE a pickled red onion, they turn the pickling liquid (and everything else that’s being soaked) a bit pink.

  • I also used fresh corn because it’s in season and is so sweet and perfect right off of the cob that I can’t imagine not using it. But I’m sure frozen would do the trick too.

  • I give a range of oil and a range of pasta to use here. Some fancier pasta comes in smaller amounts (12-14 oz is a popular weight), but you can definitely use a whole pound of that’s the amount you have. Obviously, the more pasta you use, the less prominent the veggies will be and the more sauce you’ll need and vice versa.

  • I’ve also made this with chickpea pasta and, dare I say it, I might PREFER the bean pasta to regular white pasta. Shocking, I know.

This pasta salad requires a tiny bit of forethought so that you can let the veggies pickle for a few hours, but it’s well worth the effort for a crowd-pleasing, tangy and bright salad that complements any other BBQ dishes. #meandthemoose #pastasalad…

This pasta salad requires a tiny bit of forethought so that you can let the veggies pickle for a few hours, but it’s well worth the effort for a crowd-pleasing, tangy and bright salad that complements any other BBQ dishes. #meandthemoose #pastasalad #pastarecipes #summerbbq #pickles #pickledveggies

Pickled veggie pasta salad

Active time: About 30 minutes, mostly spent chopping and mixing
Total time: Anywhere from 3 hours to 1 week, depending on how much you let the pickles sit
Yield: About 9-10 cups of salad

¾ cup white vinegar
1½ Tbsp sugar
¾ tsp salt
3 large cloves garlic, peeled and smashed
½ large bunch scallions (about 4-5 large), trimmed and roughly chopped
1 pint cherry tomatoes, halved  
½ large orange bell pepper, roughly chopped
2-3 large ears corn, with kernels removed (or about 1½-2 cups)
12-16 oz dried pasta (depending on the ratio of vegetables to pasta that you prefer)
1/2- 3/4 cup olive oil
2 Tbsp red wine vinegar
½ tsp Dijon mustard
½ tsp kosher salt
¼ tsp fresh pepper
½ tsp dried or 1 tsp fresh oregano, well minced if using fresh
¼- ½ cup fresh basil leaves, torn

For the pickled vegetables:
In a small bowl, combine the vinegar, sugar, and salt and stir until the sugar has dissolved, about 2 minutes. (You won’t hear any more crunching on the bottom of the container.)

In a large container or several smaller containers with a tight fitting lid (see note above about the amount of pickling liquid if making the pickles in separate jars), add the smashed garlic, chopped scallions, and chopped vegetables. Pour in the vinegar mixture, seal the container, and shake a few times.

Place in the refrigerator and leave for 3 hours or up to 1 week.

For the salad:
Cook your pasta according to package directions in well-salted water.

While your pasta cooks, combine the oil, red wine vinegar, dijon mustard, salt, pepper, and oregano in a small container.

Once the pasta is cooked, drain it and add it to a very large bowl. Add half of the olive oil mixture and stir well.

With a large fork or slotted spoon, remove the vegetables from the pickling liquid, transferring as little of the brine as possible (though don’t go crazy). Set aside the garlic cloves and mince the pickled cloves. Add everything to the pasta and stir well.

Add more of the olive oil mixture to taste until you feel that the pasta salad is wet enough.

Mix in and top with the torn basil before serving.

Baked gigante beans with feta and tomatoes

Baked gigante beans with feta and tomatoes | Me & The Moose. This vegetarian dinner, lunch, appetizer, or side is full of fiber, protein, good fats, and sweet syrupy roasted tomatoes. #meandthemoose #dinner #meatlessmonday #vegetarian #bakedfeta…

Anyone out there who might think that a “meatless” meal wouldn’t satisfy them, hasn’t had giant white beans for dinner. This meal is full of fiber, protein, and delicious sweetness from the roasted tomatoes.

Straight to the recipe, please!

Baked gigante beans with feta and tomatoes | Me & The Moose. This vegetarian dinner, lunch, appetizer, or side is full of fiber, protein, good fats, and sweet syrupy roasted tomatoes. #meandthemoose #dinner #meatlessmonday #vegetarian #bakedfeta…

Gigante beans, lima beans, large white beans, whatever you want to call them, these beans make a meal in a way that other legumes don’t always cut it for me.

I’ve only ever seen these beans in dry form, so while I’m averse to most extra work in the kitchen, I don’t see a way around cooking them yourself if you want to use these big guys.

Which leads us to the age old question: Do you really need to soak dried beans? Some will insist that you do. I say, LAZY COOKS UNITE! I have a preschooler and don’t always have that much foresight.

But here’s one caveat: Sans soaking, the simmering times vary WILDLY for these beans. One batch I made from Brand A were ready after about 90 minutes.. Brand B took almost twice as long. And while everyone advises “look for fresh beans,” if you could seriously show me a bag of beans with an expiration date on it, I would give you a million dollars.

Baked gigante beans with feta and tomatoes | Me & The Moose. This vegetarian dinner, lunch, appetizer, or side is full of fiber, protein, good fats, and sweet syrupy roasted tomatoes. #meandthemoose #dinner #meatlessmonday #vegetarian #bakedfeta…

So, here are some handy tutorials that you can peruse and decide if you’re team soak or team no soak:

If I was the meal prepping type I’d suggest making a whole bag of these beans one weekend and freezing them for easy weeknight meals. Because once you cook the beans, this meal could not be easier or faster.

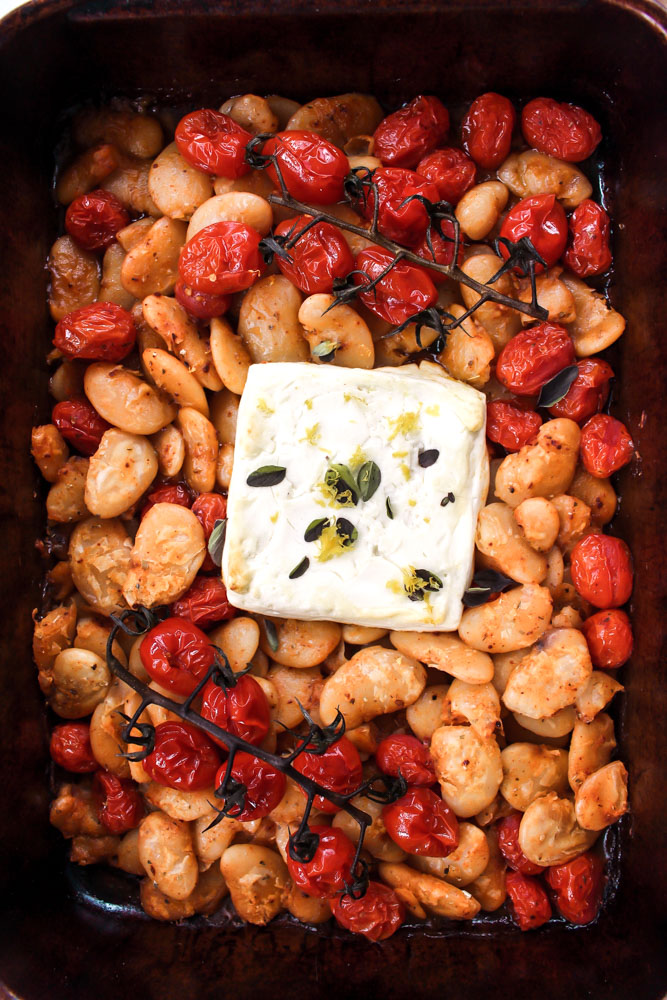
Roasting makes the tomatoes syrupy sweet, the cheese just a little soft and gooey, and the bean skins crispy in a way that is completely satisfying.

Baked gigante beans with feta and tomatoes | Me & The Moose. This vegetarian dinner, lunch, appetizer, or side is full of fiber, protein, good fats, and sweet syrupy roasted tomatoes. #meandthemoose #dinner #meatlessmonday #vegetarian #bakedfeta…

A few notes:

  • I salt the bean cooking water and then don’t add any more salt until serving the beans. They soak up the sodium during cooking, so it’s very easy to over salt this dish. Also, feta is a salt bomb, so we’ve found that the end product needs no extra seasoning.

  • I’ve billed this as a meatless meal, but it could also serve as a side or appetizer just as easily.

  • Do NOT skip the lemon zest in the end. The citrus brightens up the beans and adds a layer of flavor without which, the beans could taste a bit flat.

  • I prefer to use a combo of both dried and fresh oregano, but use what you have on hand.

Baked gigante beans with feta and tomatoes | Me & The Moose. This vegetarian dinner, lunch, appetizer, or side is full of fiber, protein, good fats, and sweet syrupy roasted tomatoes. #meandthemoose #dinner #meatlessmonday #vegetarian #bakedfeta…

Baked feta with gigante beans and tomatoes


Active time: about 20 minutes, on and off
Total time: 90-150 for the beans, 25-30 for the main dish
Yield: 4 dinner servings,

For the beans:
1½ cups dried giant white beans, rinsed
4 cups vegetable stock
1-2 cups water (as needed)
½ tsp sea salt
1-2 bay leaves
4 medium cloves garlic, peeled, but left whole

Yield: 3 heaping cups of cooked beans

Combine the beans, stock, salt, bay leaf, and garlic cloves in a large pot. Bring to a boil over high heat. Reduce flame to low and simmer, covered, for anywhere from 1 1/2 hours to 2 1/2 hours (90-150 minutes), stirring occasionally, until the beans are creamy and soft, but not falling apart and most of the liquid has been absorbed.

Check the beans after 60 minutes and then every 15-30 minutes after that (depending on how your beans are progressing) until the beans are tender throughout. Add more liquid if the water boils off before the beans are fully cooked.

 Drain any remaining liquid from the beans and remove the bay leaves.

For the main dish:
1/2 cup olive oil, divided  
½ tsp Aleppo pepper (optional)
1 tsp dried oregano or 1 Tbsp fresh oregano (or a combination of both dried for cooking and fresh for topping)
½ tsp smoked paprika
2-3 cups cherry tomatoes, whole (about 8-12 oz)
Small block Feta cheese (8 oz)
½ tsp lemon zest (zest of one small lemon)

Preheat oven to 400.

In a bowl or the pot you used to simmer the beans, add 1/4 cup of olive oil, Aleppo pepper, oregano, paprika, and tomatoes to the beans and mix well.

In a 9x13 baking pan (or whatever size you have), spread out the bean and tomato mixture. Clear a hole in the middle and add the feta.

Cook for 20-23 minutes, until the feta is soft and the tomatoes have released their juices AND those juices have become a little syrupy.  

Remove from the heat and top with the remaining 1/4 cup of olive oil, lemon zest, fresh oregano (if using), and sprinkling of flaky sea salt (if needed).

Kale mac and cheese

Kale mac and cheese | Me & The Moose. This vegged-up pasta sauce looks green and packs a nutritional punch, but tastes like cheese. #meandthemoose #macandcheese #kale #greensauce #kidfood #dinnerrecipes #vegetarianrecipes

Mac and cheese is a perennial favorite for a reason. You can quickly make a huge batch and reheat it as needed. It’s perfect filler for lunchboxes or to whip up for dinner. And you can throw in any old proteins or veggies you have lying around. And it gets eaten. Huzzah!

Take me to the recipe!

Kale mac and cheese | Me & The Moose. This vegged-up pasta sauce looks green and packs a nutritional punch, but tastes like cheese. #meandthemoose #macandcheese #kale #greensauce #kidfood #dinnerrecipes #vegetarianrecipes

So! Easter and Passover just happened/are happening. My kiddo is at the age where he asks a lot of questions about everything, the deeper the subject, the better. The other day he hit me with, “Before I was born, where was I?”

Let me be clear: He was NOT asking where babies come from. He was asking a philosophical question about personhood. He wanted to know where his “self” resided before he had a body. He didn’t put it in those words, but that was the gist.

WHAT? WHY?

As you can imagine, religious holidays are tricky for us because this kid is constantly asking questions and we don’t always have great answers. “Why didn’t the Easter Bunny come to our house” was a little easier to handle than “Am I going to die?” but it was still tough! I stayed away from talking about religion and talked more about traditions, but I know that the questions are going to keep coming and get EVEN MORE complicated as his awareness grows.

Kale mac and cheese | Me & The Moose. This vegged-up pasta sauce looks green and packs a nutritional punch, but tastes like cheese. #meandthemoose #macandcheese #kale #greensauce #kidfood #dinnerrecipes #vegetarianrecipes

Since parenting has required so much mental gymnastics for us lately, I want to keep dinner as simple as possible. So, Mac and Cheese!

As you may or may not know, I prefer a stovetop mac and cheese to the baked kind. I feel like the baking process can dry out the sauce, which is not tasty, IMO.

Kale mac and cheese | Me & The Moose. This vegged-up pasta sauce looks green and packs a nutritional punch, but tastes like cheese. #meandthemoose #macandcheese #kale #greensauce #kidfood #dinnerrecipes #vegetarianrecipes

A couple of notes:

  • Do cook the kale a bit before pureeing. The more you cook the greens, the smoother the sauce will be. I only cook it for a few minutes though because I don’t want to lose too many of the nutrients.

  • Turn down the heat when making the sauce. It takes a bit longer, but will hopefully keep the milk solids from separating, which can make dairy-based sauces look curdled.


Kale mac and cheese

Time: About 25 minutes, mostly active
Yield: About 4 cups or 30 oz

1 lb small, dry pasta
1 bunch Lacinto kale, leaves stripped off of the tough center ribs
2 Tbsp butter
2 Tbsp flour
2 cups milk, divided (I used whole, but you can certainly use a lower fat variety if you like)
½ cup reserved pasta/kale cooking water
6-7 cups shredded cheese (combination of any nutty cheese like cheddar, gruyere, gouda, and Parmesan)
1 tsp garlic powder
½ tsp sea salt
Several cracks of black pepper

Cook pasta according to package directions.

While the pasta cooks, melt the butter over medium-high heat in a large sauce pan. Add the flour, stir well, and let bubble for 1 minute.

Turn the heat down to medium-low, add 1 and 1/2 cups of milk, and whisk to combine.

Add garlic, salt, and pepper to the milk and stir to combine. Let the milk heat up until there are small bubbles forming along the sides of the pan, about 3-4 minutes. Add the cheese and stir until melted, allowing the cheese sauce to bubble slowly, but try not to get the sauce too hot, about 4-5 more minutes.

Remove pasta from boiling water and add kale to that same water. Blanch for 2 minutes and remove greens to a blender. Reserve 1/2 cup of the cooking water.

Add the remaining ½ cup of milk to the green in the blender and puree until smooth, adding the reserved cooking water as necessary to puree the kale.

Add the greens to the cheese sauce and stir well. Allow the mixture to come up to a simmer again.

When both are cooked, combine 2 cups of the sauce with the cooked pasta and stir well. Add any additional toppings you might like.

Kale mac and cheese | Me & The Moose. This vegged-up pasta sauce looks green and packs a nutritional punch, but tastes like cheese. #meandthemoose #macandcheese #kale #greensauce #kidfood #dinnerrecipes #vegetarianrecipes

Coconut creamed corn

Creamed corn isn’t generally considered a “healthy” side. But swap in coconut milk for regular old dairy or a heavy bechamel sauce and you have a much lighter version of this classic that celebrates the beauty of late summer corn.

IMG_8536.jpg

This dish also comes together in minutes and is full of herbs and aromatics like garlic, shallot, ginger, lime zest, and basil. Add some quick sauteed shrimp, some grilled or roasted white fish, or a rotisserie chicken and you have a very quick dinner filled with healthy fats and real ingredients. You’re also free of gluten, dairy, sugar, nuts, and soy if you have corn leftovers for tomorrow’s lunchbox.

IMG_8533.jpg

Coconut creamed corn

½ tsp coconut oil
2 medium or 3 small garlic cloves, sliced or minced  
1 very large or 2 smaller shallots, sliced or minced
½-inch piece of fresh ginger, minced or shredded
3 large ears corn with kernels removed from the cob (about 2 heaping cups of kernels)
6 Tbsp coconut milk
Heaping ¼ tsp lime zest
15-20 basil leaves, chopped
¼-½ tsp flaky sea salt
Pepper

Heat the coconut oil over a medium flame and when hot, add the sliced or minced shallots. Saute for 1-2 minutes, until the shallots are translucent and starting to brown.

Turn the heat down to medium low and add the sliced or minced garlic. Saute for another 1-2 minutes until fragrant. If the onions or garlic brown too quickly, turn down the heat.

Add the minced or shredded ginger and sauté for one more minute.

Add the corn kernels and sauté for 4-5 minutes. Add the coconut milk and let bubble for one minute until the milk has reduced to more of a sauce than a milk, but don’t let it disappear.

Remove from the heat. Add the lime zest, minced basil, salt, and pepper and stir to combine. Taste for seasoning and adjust according to your taste.

Yield: 3 servings

IMG_8542.jpg