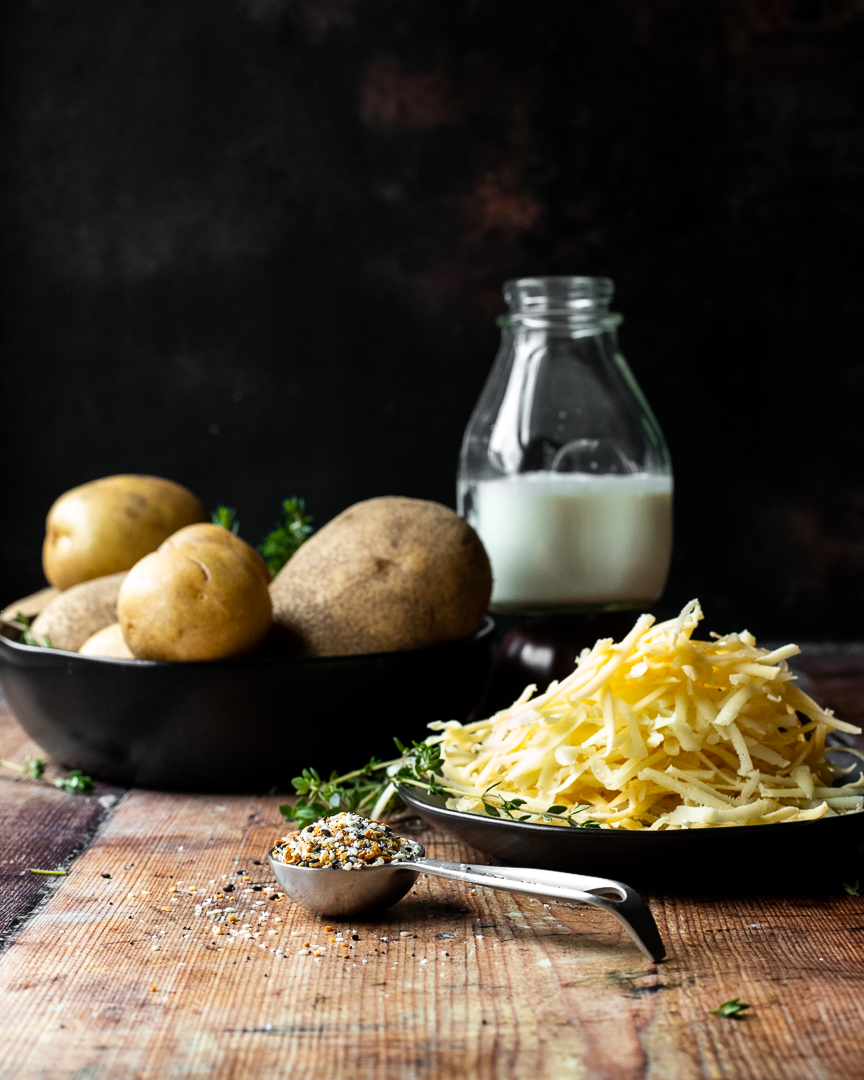
Everything potato gratin

Everything Potato Gratin | This easy side dish is the perfect way to make something that seems fancy (gratin!) while using all the shortcuts (barely any chopping!). #meandthemoose #potatoes #gratin #everythingbagelspice #easysidedishes

This easy side dish is the perfect way to make something that seems fancy (gratin!) while using all the shortcuts (barely any chopping!).

Take me to the recipe!

Everything Potato Gratin | This easy side dish is the perfect way to make something that seems fancy (gratin!) while using all the shortcuts (barely any chopping!). #meandthemoose #potatoes #gratin #everythingbagelspice #easysidedishes

Everything Potato Gratin | This easy side dish is the perfect way to make something that seems fancy (gratin!) while using all the shortcuts (barely any chopping!). #meandthemoose #potatoes #gratin #everythingbagelspice #easysidedishes

Everything Potato Gratin | This easy side dish is the perfect way to make something that seems fancy (gratin!) while using all the shortcuts (barely any chopping!). #meandthemoose #potatoes #gratin #everythingbagelspice #easysidedishes

So, I used Jamie Oliver’s method for a quicker potato gratin. Gratin’s usually need up to an hour in the oven, but by combining cooking methods, you can get a creamy, crunchy, crispy dish in less than 30 minutes. Also, using everything bagel spice means that you don’t have to chop any onions or garlic or really measure much of anything.

Everything Potato Gratin | This easy side dish is the perfect way to make something that seems fancy (gratin!) while using all the shortcuts (barely any chopping!). #meandthemoose #potatoes #gratin #everythingbagelspice #easysidedishes

Just a quick word of warning: Use oven mitts to secure the tin foil over your skillet or tin on the stove. You want a tight seal so that the potatoes steam a bit before going into the oven. ALSO, use caution when removing the foil as the steam is plentiful and HOT.

A note about SALT: I don’t add any in this recipe because most of the pre-made Everything Bagel spice mixes are pretty salty. Check your labels and then decide if you want to add more salt. I would recommend a sprinkle of sea salt over the top of the finished gratin if you feel like it needs more.

Everything Potato Gratin | This easy side dish is the perfect way to make something that seems fancy (gratin!) while using all the shortcuts (barely any chopping!). #meandthemoose #potatoes #gratin #everythingbagelspice #easysidedishes

Everything Potato Gratin

1½ lbs russet potatoes (about 2 very large), peeled and sliced thinly 
½ cup heavy cream 
½ cup water 
2½ Tbsp everything bagel spice, divided
5-6 sprigs of fresh thyme
1½ cups grated cheese (mixture of gruyere, asiago, gouda)  

Time: about 30 minutes, mostly active
Yield: 5 side servings

Preheat the oven to 425. 

In a large oven-proof skillet or tin, spread the thinly sliced potatoes. 

In a large measuring cup, combine the milk, water, and 1 1/2 Tbsp of everything bagel spice. Pour over the potatoes in the skillet. Add the fresh thyme and stir well to combine and to spread out the dried and fresh herbs.

Over a medium-high flame, bring the liquid to a boil. The liquid around the edges of the pan will boil quickly. Look for the first few bubbles in the middle of the pan and turn down the flame to medium-low. 

Carefully wrap a piece of tin foil over the top of the skillet or tin. I wear oven mitts to do this because I want a tight seal, but I don’t want to burn myself. Let cook over a medium-low flame for 6 minutes.

Turn off the flame and CAREFULLY remove the foil being sure to wear oven mitts and to remove the foil away from you to avoid the hot steam.

Top evenly with the grated cheese.

Cook, uncovered, in the oven for 15 minutes. Top with the remaining 1/2 Tbsp of everything bagel spice.

 Let cool slightly and serve.

Weeknight beef stew

A deeply flavored, rich, and cozy beef stew is usually an all-day, multiple-pan affair. But this recipe simplifies the steps so that you can have this stew, which is mostly hands-off cooking, on the table in a maximum of 2 hours. #meandthemoose #beefstew #dinnerrecipes #beefrecipes

A deeply flavored, rich, and cozy beef stew is usually an all-day, multiple-pan affair. But this recipe simplifies the steps so that you can have this stew, which is mostly hands-off cooking, on the table in a maximum of 2 hours.

Take me to the recipe!

A deeply flavored, rich, and cozy beef stew is usually an all-day, multiple-pan affair. But this recipe simplifies the steps so that you can have this stew, which is mostly hands-off cooking, on the table in a maximum of 2 hours. #meandthemoose #beefstew #dinnerrecipes #beefrecipes

Okay, so I’ve tried every beef stew recipe out there. (No, I haven’t, but I’ve tried A LOT.) The best ones require time and effort: Multiple cooking methods, multiple steps, multiple pans, etc. And the results have largely been worth the effort. BUT, if you have a busy family, young kids, a demanding job, or just don’t feel like tending a stew all day, there is a simpler beef stew option!

I did a bunch of research and tried a bunch of tricks. My goal was to achieve a rich flavor without using every pan in my kitchen and without requiring a ton of work. Some of my shortcuts worked and some didn’t. I think I’ve landed at a happy medium that isn’t exactly “set it and forget it” but that will get you a lot more bang for your flavor buck than a quick stew made in, say, the slow-cooker.

A deeply flavored, rich, and cozy beef stew is usually an all-day, multiple-pan affair. But this recipe simplifies the steps so that you can have this stew, which is mostly hands-off cooking, on the table in a maximum of 2 hours. #meandthemoose #beefstew #dinnerrecipes #beefrecipes

My first shortcut was to brown the meat in one batch in the oven instead of searing it in multiple batches on the stovetop. I know searing is the way to lock in moisture and to achieve some caramelization on the outside of the meat, but it takes me FOREVER and my hand gets very tired from holding the tongs and rotating the cubes until they’re evenly browned. So instead, I patted everything dry and roasted it at high heat in the oven for a few minutes to get that caramelization.

AN IMPORTANT NOTE ABOUT SALT: I found that if I didn’t salt the meat at all before the roasting, the end results were slightly bland. However, when I over salted the meat before roasting, it dried out because too much moisture came out during that initial cook. So, use a judicious pinch of salt before roasting and then generously salt the rest of the dish at various points in the cooking.

A deeply flavored, rich, and cozy beef stew is usually an all-day, multiple-pan affair. But this recipe simplifies the steps so that you can have this stew, which is mostly hands-off cooking, on the table in a maximum of 2 hours. #meandthemoose #beefstew #dinnerrecipes #beefrecipes

Then, I stirred in some flour right after that initial roast and along with the onions and carrots. I found that adding in the flour at this stage rather than at the end, allowed the flour to cook and thicken the sauce without any added fuss.

A deeply flavored, rich, and cozy beef stew is usually an all-day, multiple-pan affair. But this recipe simplifies the steps so that you can have this stew, which is mostly hands-off cooking, on the table in a maximum of 2 hours. #meandthemoose #beefstew #dinnerrecipes #beefrecipes

My next major shortcut was to whizz a majority of the ingredients in a blender and pour it all over the meat and veggies before a long, slow braise. Less chopping! No garlic fingers! Win win! But, if you don’t want to dirty your blender or food processor (which I completely understand) a traditional chop will do just fine.

A deeply flavored, rich, and cozy beef stew is usually an all-day, multiple-pan affair. But this recipe simplifies the steps so that you can have this stew, which is mostly hands-off cooking, on the table in a maximum of 2 hours. #meandthemoose #beefstew #dinnerrecipes #beefrecipes

Weeknight beef stew

Time: 1 3/4- 2 hours
Yield: 4-6 servings

2 lbs stew beef cubes
1 Tbsp kosher salt, divided (see note above)
3 Tbsp butter 
2 Tbsp flour 
2 cups beef stock 
1 cup red wine 
2 anchovies 
6 large garlic cloves, divided 
1/2 tsp dried thyme 
1/2 tsp black pepper 
1 large onion 
2 large carrots 

Optional topping:
1/2 lb mushrooms (optional) 
1 Tbsp olive oil or butter, or a combination
1 tsp balsamic vinegar


Preheat oven to 500. Pat the beef cubes dry. Add in a single layer to a large Dutch oven. Top with 3 Tbsp of butter cut into 6-9 small cubes. Sprinkle very lightly with salt. Roast, uncovered, for 15 minutes. Remove from the oven.

While the beef is roasting, add the beef stock, wine, anchovies, 3 cloves garlic, thyme, 1-2 very large pinches of salt, and pepper to a blender or food processor and whizz for 30 seconds.

Once the beef is quickly caramelized, turn the oven down to 375. Sprinkle 2 Tbsp of flour over the meat and mix. Add the onions and carrots and remaining 3 large garlic cloves to the pot. Sprinkle with another judicious pinch of salt. Stir.

Top with the liquid and bake in the oven, uncovered, for 1¼-1½  hours, stirring once halfway through the cooking time. The dish is done once the liquid has cooked down and thickened into a gravy-like consistency.

Optional topping:
While the beef is cooking, chop or slice the mushrooms and sauté in butter and olive oil. Once they have released their water and that water has evaporated, add the vinegar and cook for 1-2 more minutes until the vinegar has also evaporated.

Pumpkin and persimmon butter

Cooking down some canned pumpkin and a few persimmons with maple syrup and spices will make your house instantly smell like the holidays and spice up even the most basic meals. #meandthemoose #pumpkinrecipes #persimmonrecipes #dessert #fruitbutter

Cooking down some canned pumpkin and a few persimmons with maple syrup and spices will make your house instantly smell like the holidays and spice up even the most basic meals.

Take me to the recipe!

Cooking down some canned pumpkin and a few persimmons with maple syrup and spices will make your house instantly smell like the holidays and spice up even the most basic meals. #meandthemoose #pumpkinrecipes #persimmonrecipes #dessert #fruitbutter

I’m a sucker for persimmons. I can’t help myself when they arrive in the grocery stores. But I never know what to do with them. I love baking with them, but I’m trying to have fewer baked goodies hanging around in preparation for baked-goodies-hanging-around season. And if I’m going to eat them on their own or in a salad, they need to ripen, which, in my frozen kitchen, takes forever and a day.

This is my grand compromise: A cooked down “butter” that’s thick and slightly sweet that pairs with toast, graham crackers, apple slices, pretzels, Dutch babies, regular babies, cornbread, muffins, oatmeal. etc. One could also use this “butter” as a fruity addition to an autumnal cheesecake or mix it with an ice cream or other custard. My favorite way to use it is mixed with mascarpone and a couple of eggs and then baked with a pie shell for a spin on pumpkin pie.

The best part about this concoction is that you don’t need to ripen the persimmons. You heard me. As long as you use fuyu and NOT HACHIYA*, you’re fine with unripened persimmons. Of course, the more you let them ripen, the better they taste, so it does behoove you to wait at least a little while before making this butter.

*Why not Hachiya, you ask? Well, those are the larger, more ovular persimmons and if you don’t wait until they’re almost completely mushy to eat them, the tannins in the fruit make your mouth feel gluey and dry. It’s awful, trust me.

Anyway, whatever you choose to do with it, you’re only 20-30 minutes away from the endless possibilities, so get to it!

Cooking down some canned pumpkin and a few persimmons with maple syrup and spices will make your house instantly smell like the holidays and spice up even the most basic meals. #meandthemoose #pumpkinrecipes #persimmonrecipes #dessert #fruitbutter

Pumpkin persimmon butter

Time: 25 minutes, mostly active
Yield: 2 cups, depending on how much you cook down the mixture 

1 can pumpkin puree
4 fuyu persimmons 
1 Tbsp dark brown sugar (light is also fine)
¼ cup maple syrup
½ tsp cinnamon
¼ tsp ground ginger
1/8th tsp ground cloves
1 tsp vanilla extract or vanilla bean paste
1 large pinch of kosher salt
½ cup water

Peel the persimmons and cut into quarters. 

Add all ingredients to a blender or food processor and blend until smooth. Transfer to a large pot. 

Heat over a medium-low flame until just beginning to bubble. Turn the heat down to low and cook, stirring frequently to prevent burning, until the persimmons totally break down and the mixture has thickened slightly, about 20 minutes.

Apple cider slushee

Deal with a fall heatwave with these frozen cider slushees! They can be spiked, spiced, or enjoyed plain! #meandthemoose #cider #falldrinks #frozentreats

Deal with a fall heatwave with these frozen cider slushees! They can be spiked, spiced, or enjoyed plain! #meandthemoose #cider #falldrinks #frozentreats

Move over pumpkin spice latte, apple cider slushee is coming for your “best fall drink” title! This easy bev can be spiced, spiked, or enjoyed straight up.

Take me to the recipe!

Deal with a fall heatwave with these frozen cider slushees! They can be spiked, spiced, or enjoyed plain! #meandthemoose #cider #falldrinks #frozentreats

Deal with a fall heatwave with these frozen cider slushees! They can be spiked, spiced, or enjoyed plain! #meandthemoose #cider #falldrinks #frozentreats

This may be a very Northeast specific rant, but why is it so hot at the beginning of fall? I feel like September, much like that other “changeover” month March, is a tease. Occasionally it’s chilly and crisp and then BAM — humid and gross. It rains and then the sun comes out immediately to really perfect those sweatbox conditions. It feels slightly chilly at 7 am, but by 9 it’s 80 and the air is heavy. How do you dress? What do you eat? I want to want all of the cozy things, but it’s too. damn. hot.

Anyway, that’s why you should freeze your apple cider. You get the coziness of fall, but the refreshment of an iced drink!

You can absolutely spice this cider by adding cinnamon sticks, crushed whole cardamom pods, anise pods, or some fresh ginger, bringing the cider to a boil, letting it simmer for 20-30 minutes, and then straining out the spices. I don’t love adding ground dried spices to my cider because I feel like it makes the cider slightly gritty, but it’s not a deal breaker. (Really, nothing is a deal breaker for me when it comes to cider.)

Deal with a fall heatwave with these frozen cider slushees! They can be spiked, spiced, or enjoyed plain! #meandthemoose #cider #falldrinks #frozentreats

Deal with a fall heatwave with these frozen cider slushees! They can be spiked, spiced, or enjoyed plain! #meandthemoose #cider #falldrinks #frozentreats

Deal with a fall heatwave with these frozen cider slushees! They can be spiked, spiced, or enjoyed plain! #meandthemoose #cider #falldrinks #frozentreats

Deal with a fall heatwave with these frozen cider slushees! They can be spiked, spiced, or enjoyed plain! #meandthemoose #cider #falldrinks #frozentreats

Deal with a fall heatwave with these frozen cider slushees! They can be spiked, spiced, or enjoyed plain! #meandthemoose #cider #falldrinks #frozentreats

Deal with a fall heatwave with these frozen cider slushees! They can be spiked, spiced, or enjoyed plain! #meandthemoose #cider #falldrinks #frozentreats

Apple cider slushee

Time: 6 hours, or overnight + 5 minutes active time
Yield: 2 slushees

2 cups apple cider
2 shots Calvados or other apple brandy, optional

Fill a standard ice cube tray with fresh cider. Let freeze for at least 6 hours or overnight.

Chill the cups you plan to use for the slushees in the freezer while you make the drinks.

Add the ice cubes to a blender (the higher powered, the better) and pulse 3-4 times or let run for about 3-4 seconds. Pulse again or run for 1 more second at a time until the cubes are crushed to your liking. In my experience, the cubes crush up very quickly and you don’t want them to re-liquify.

Spoon the crushed ice into the chilled cups and add 1/8-1/4 cup of fresh cider. Add 1 shot of calvados (optional).

Cucumber, seaweed, and soba noodle salad

This easy, light salad combines a few ingredients into a subtle, delicious vegan dish that’s ready fast and is a great lunch or dinner option. #meandthemoose #lunch #dinner #recipes #easyrecipes #vegan #vegetarian

This easy, light salad combines a few ingredients into a subtle, delicious vegan dish that’s ready fast and is a great lunch or dinner option. #meandthemoose #lunch #dinner #recipes #easyrecipes #vegan #vegetarian

Before the well of summer cucumbers runs dry, make this easy, light salad that’s ready in a snap and is, at least in this house, very kid-approved!

Take me to the recipe!

This easy, light salad combines a few ingredients into a subtle, delicious vegan dish that’s ready fast and is a great lunch or dinner option. #meandthemoose #lunch #dinner #recipes #easyrecipes #vegan #vegetarian

This easy, light salad combines a few ingredients into a subtle, delicious vegan dish that’s ready fast and is a great lunch or dinner option. #meandthemoose #lunch #dinner #recipes #easyrecipes #vegan #vegetarian

We eat a lot of Japanese food in our house, so my love for these ingredients runs deep. I absolutely can’t turn down a seaweed salad. Ditto nutty buckwheat soba noodles. Unlike whole wheat or other whole grain noodles, soba doesn’t have that gummy (unless you WAAAAAY overcook it!) or gritty texture that can plague say, whole what spaghetti, so the flavor of the noodles really shines.

Everything about this salad is subtle. There aren’t any overwhelming flavors and all of the elements are in harmony with each other: A little salty, a little sweet, a little nutty, a little tangy, a little briny, and a little cool. The seaweed adds a salty, funky flavor and a little crunch. The cucumber adds even more crunch and and is a cooler counterpoint to the sauce that’s made of soy, rice vinegar, brown sugar, and sesame oil.

While this is a light salad that we usually eat as a side (though I’ve had it alone for lunch and it’s V satisfying), the soba offer some heft that leaves you feeling pretty full. My 6-year-old loves it because he loves anything with soy sauce and my almost 18-month-old loves it because he would eat noodles all day, every day.

But the real key to this salad is getting rid of the excess water from the cucumbers, noodles, and rehydrated seaweed. It’s a funny recipe because you have to add water to each element before you get rid of it. But the more you squeeze out, the more potent the sauce tastes. It’s worth a little elbow grease!

This easy, light salad combines a few ingredients into a subtle, delicious vegan dish that’s ready fast and is a great lunch or dinner option. #meandthemoose #lunch #dinner #recipes #easyrecipes #vegan #vegetarian

This easy, light salad combines a few ingredients into a subtle, delicious vegan dish that’s ready fast and is a great lunch or dinner option. #meandthemoose #lunch #dinner #recipes #easyrecipes #vegan #vegetarian

This easy, light salad combines a few ingredients into a subtle, delicious vegan dish that’s ready fast and is a great lunch or dinner option. #meandthemoose #lunch #dinner #recipes #easyrecipes #vegan #vegetarian

This easy, light salad combines a few ingredients into a subtle, delicious vegan dish that’s ready fast and is a great lunch or dinner option. #meandthemoose #lunch #dinner #recipes #easyrecipes #vegan #vegetarian

A couple of notes:

  • I used hijiki seaweed in developing this recipe because I love it, but have JUST NOW learned that it naturally contains a really high level of inorganic arsenic, which can be carcinogenic to humans. Whoopsie daisy. Instead, sub in wakame, which doesn’t contain the same levels of arsenic and is prepared roughly the same way—just rehydrate in water while you prep the rest of the salad.

  • In the US, you can find dried wakame seaweed in Japanese grocery stores, health food stores, or in the all-purpose grocery store (our Whole Foods has it).

  • Before you add the rice vinegar, check your bottle’s label and see if you have plain rice vinegar or “seasoned” rice vinegar. The “seasoned” variety has some added sugar already, so I decrease the brown sugar a little bit to avoid over-sweetening the sauce. See recipe note for exact changes.

This easy, light salad combines a few ingredients into a subtle, delicious vegan dish that’s ready fast and is a great lunch or dinner option. #meandthemoose #lunch #dinner #recipes #easyrecipes #vegan #vegetarian

This easy, light salad combines a few ingredients into a subtle, delicious vegan dish that’s ready fast and is a great lunch or dinner option. #meandthemoose #lunch #dinner #recipes #easyrecipes #vegan #vegetarian

Cucumber, seaweed, and soba noodle salad

Time: About 35 minutes
Yield: About 6 cups of salad

6 Tbsp dried seaweed (wakame or hijiki, but see note above!)
2 cups hot water
1 large cucumber, thinly sliced
1 tsp salt 
9 oz buckwheat soba noodles (2 bundles)
3-4 Tbsp unseasoned rice vinegar*
1.5 tsp brown sugar*
4 tsp soy sauce
4 tsp sesame oil
2 tsp white or black sesame seeds 


*if using “seasoned” rice vinegar, decrease the sugar to 1 tsp

Combine the dried seaweed with 2 cups of your hottest water from the tap (you can use boiling water, but hot water works just fine, in my experience). Set aside.

Slice the cucumber into very thin slices. Using a mandolin is great here, but if you don’t have one, a vegetable peeler also does the trick. Or just practice your knife skills- whatever works!

Place the cucumber slices in a strainer and top with 1 tsp salt. Massage a little with your hands and let sit in the sink to drain while you make the rest of the salad.

Boil the water. When the water boils, add the soba noodles and cook according to the package directions (usually about 5 minutes).

While the noodles cook, make the sauce. Combine the rice vinegar, sugar, soy sauce, and sesame oil in a small container and shake to combine.

When the noodles are cooked, drain very well. I even use a few paper towels to dab up some of the excess water.

Add the noodles to a large bowl and set aside.

Drain the seaweed really well. Again, I use a few paper towels to soak up some of the excess water, but I DO NOT squeeze out the seaweed.

Add the seaweed to the noodles in a large bowl and set aside again.

Rinse the salt off of the cucumbers and drain well. Add the cucumbers to a paper towel, cheesecloth, or dish towel and squeeze to remove as much excess water as possible. Add to the bowl of noodles and seaweed.

Stir the cucumbers, seaweed, and noodles to combine. Top with the sauce and stir well to coat.

Just before serving, top with sesame seeds.