Me & The Moose

Living thoughtfully with littles.

  • Home
  • Portfolio
    • Food photography
    • Family photography
    • Pet photography
  • Recipe newsletter
  • Blog
  • About
  • Contact

A deeply flavored, rich, and cozy beef stew is usually an all-day, multiple-pan affair. But this recipe simplifies the steps so that you can have this stew, which is mostly hands-off cooking, on the table in a maximum of 2 hours. #meandthemoose #beefstew #dinnerrecipes #beefrecipes

Weeknight beef stew

March 24, 2022 by Rebecca Davis in Cooking, Fall, Food, Kid eats, No refined sugar, Nut-free, Recipes, Toddler eats, Winter

A deeply flavored, rich, and cozy beef stew is usually an all-day, multiple-pan affair. But this recipe simplifies the steps so that you can have this stew, which is mostly hands-off cooking, on the table in a maximum of 2 hours.

Take me to the recipe!

A deeply flavored, rich, and cozy beef stew is usually an all-day, multiple-pan affair. But this recipe simplifies the steps so that you can have this stew, which is mostly hands-off cooking, on the table in a maximum of 2 hours. #meandthemoose #beefstew #dinnerrecipes #beefrecipes

Okay, so I’ve tried every beef stew recipe out there. (No, I haven’t, but I’ve tried A LOT.) The best ones require time and effort: Multiple cooking methods, multiple steps, multiple pans, etc. And the results have largely been worth the effort. BUT, if you have a busy family, young kids, a demanding job, or just don’t feel like tending a stew all day, there is a simpler beef stew option!

I did a bunch of research and tried a bunch of tricks. My goal was to achieve a rich flavor without using every pan in my kitchen and without requiring a ton of work. Some of my shortcuts worked and some didn’t. I think I’ve landed at a happy medium that isn’t exactly “set it and forget it” but that will get you a lot more bang for your flavor buck than a quick stew made in, say, the slow-cooker.

A deeply flavored, rich, and cozy beef stew is usually an all-day, multiple-pan affair. But this recipe simplifies the steps so that you can have this stew, which is mostly hands-off cooking, on the table in a maximum of 2 hours. #meandthemoose #beefstew #dinnerrecipes #beefrecipes

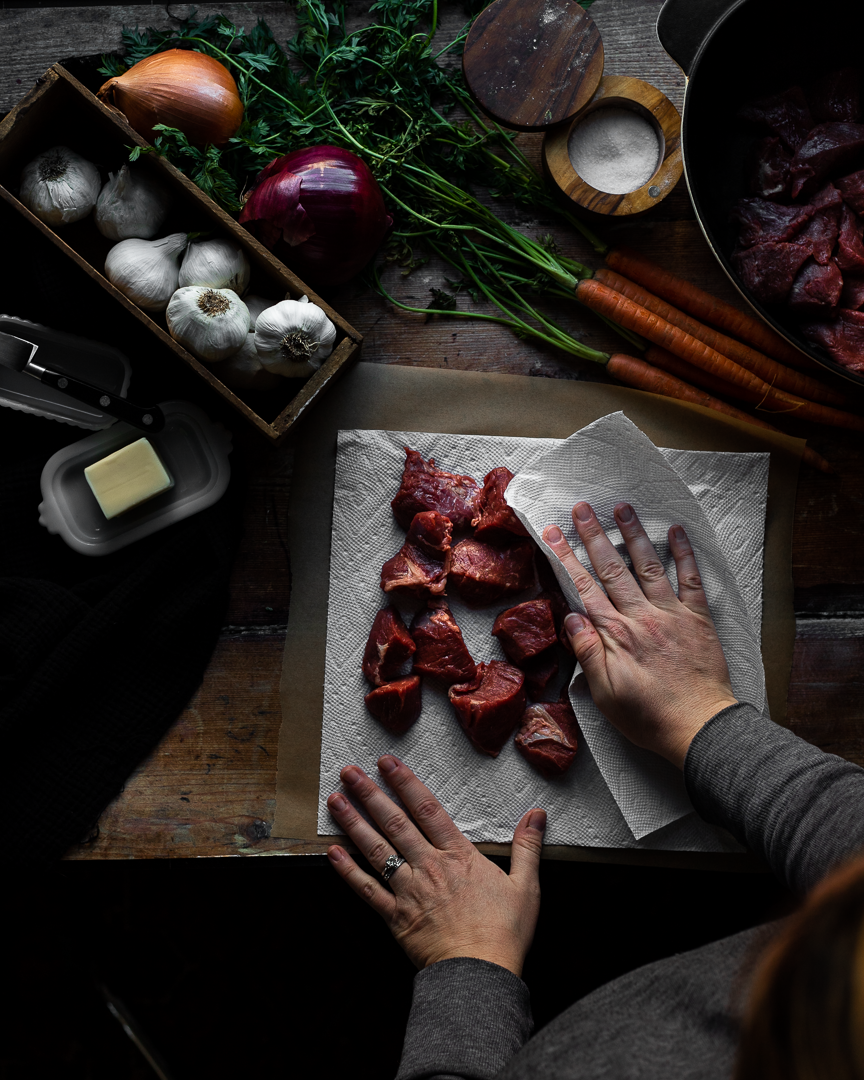
My first shortcut was to brown the meat in one batch in the oven instead of searing it in multiple batches on the stovetop. I know searing is the way to lock in moisture and to achieve some caramelization on the outside of the meat, but it takes me FOREVER and my hand gets very tired from holding the tongs and rotating the cubes until they’re evenly browned. So instead, I patted everything dry and roasted it at high heat in the oven for a few minutes to get that caramelization.

AN IMPORTANT NOTE ABOUT SALT: I found that if I didn’t salt the meat at all before the roasting, the end results were slightly bland. However, when I over salted the meat before roasting, it dried out because too much moisture came out during that initial cook. So, use a judicious pinch of salt before roasting and then generously salt the rest of the dish at various points in the cooking.

A deeply flavored, rich, and cozy beef stew is usually an all-day, multiple-pan affair. But this recipe simplifies the steps so that you can have this stew, which is mostly hands-off cooking, on the table in a maximum of 2 hours. #meandthemoose #beefstew #dinnerrecipes #beefrecipes

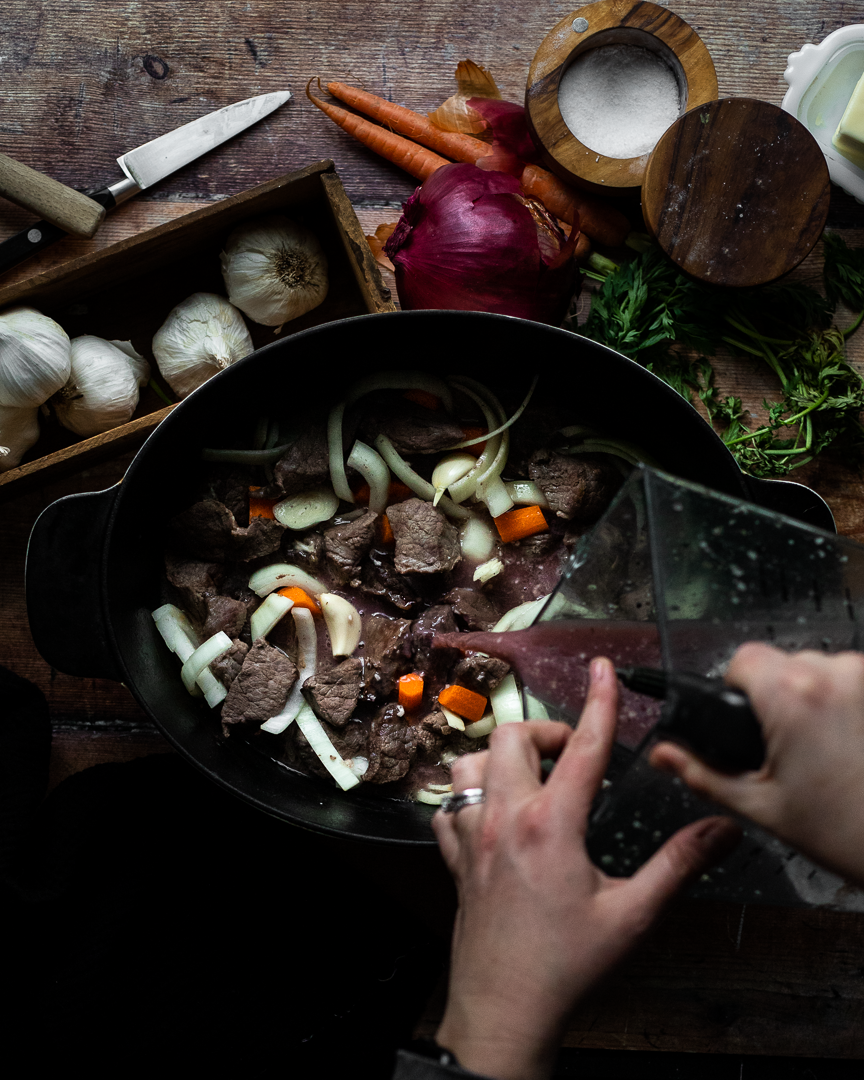
Then, I stirred in some flour right after that initial roast and along with the onions and carrots. I found that adding in the flour at this stage rather than at the end, allowed the flour to cook and thicken the sauce without any added fuss.

A deeply flavored, rich, and cozy beef stew is usually an all-day, multiple-pan affair. But this recipe simplifies the steps so that you can have this stew, which is mostly hands-off cooking, on the table in a maximum of 2 hours. #meandthemoose #beefstew #dinnerrecipes #beefrecipes

My next major shortcut was to whizz a majority of the ingredients in a blender and pour it all over the meat and veggies before a long, slow braise. Less chopping! No garlic fingers! Win win! But, if you don’t want to dirty your blender or food processor (which I completely understand) a traditional chop will do just fine.

A deeply flavored, rich, and cozy beef stew is usually an all-day, multiple-pan affair. But this recipe simplifies the steps so that you can have this stew, which is mostly hands-off cooking, on the table in a maximum of 2 hours. #meandthemoose #beefstew #dinnerrecipes #beefrecipes

Weeknight beef stew

Time: 1 3/4- 2 hours
Yield: 4-6 servings

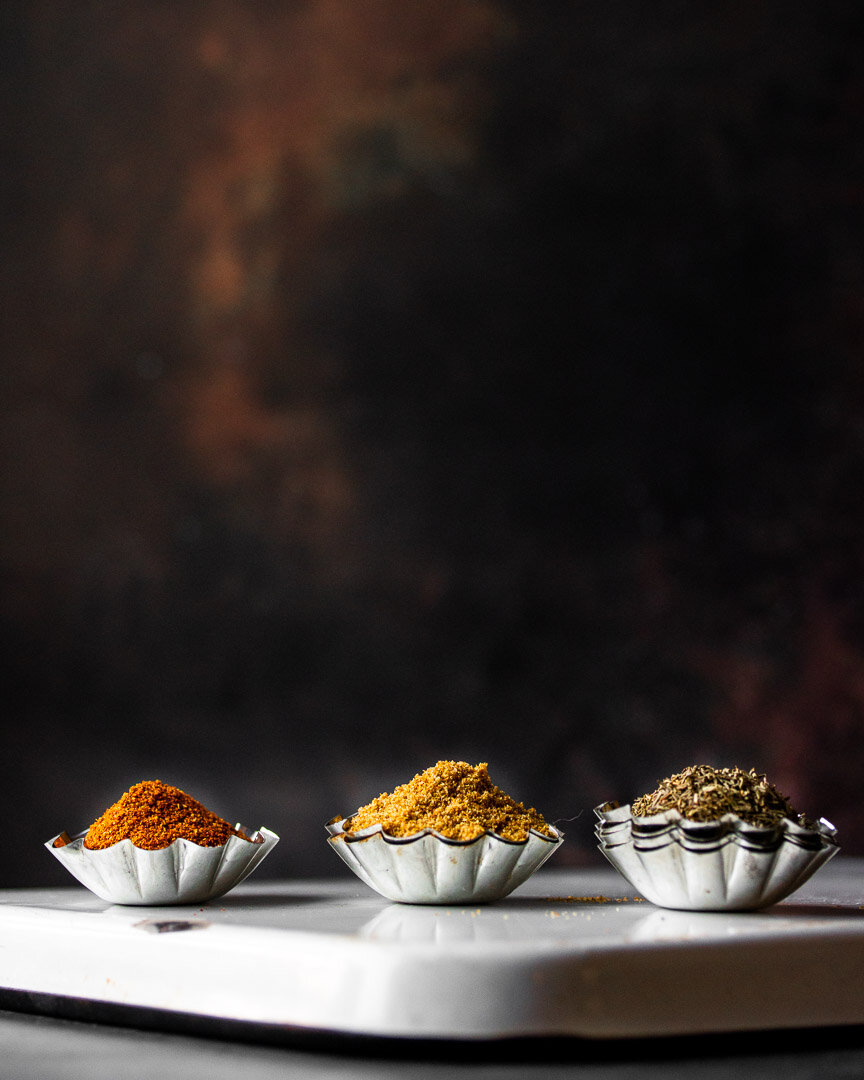
2 lbs stew beef cubes
1 Tbsp kosher salt, divided (see note above)
3 Tbsp butter 
2 Tbsp flour 
2 cups beef stock 
1 cup red wine 
2 anchovies 
6 large garlic cloves, divided 
1/2 tsp dried thyme 
1/2 tsp black pepper 
1 large onion 
2 large carrots 

Optional topping:
1/2 lb mushrooms (optional) 
1 Tbsp olive oil or butter, or a combination
1 tsp balsamic vinegar


Preheat oven to 500. Pat the beef cubes dry. Add in a single layer to a large Dutch oven. Top with 3 Tbsp of butter cut into 6-9 small cubes. Sprinkle very lightly with salt. Roast, uncovered, for 15 minutes. Remove from the oven.

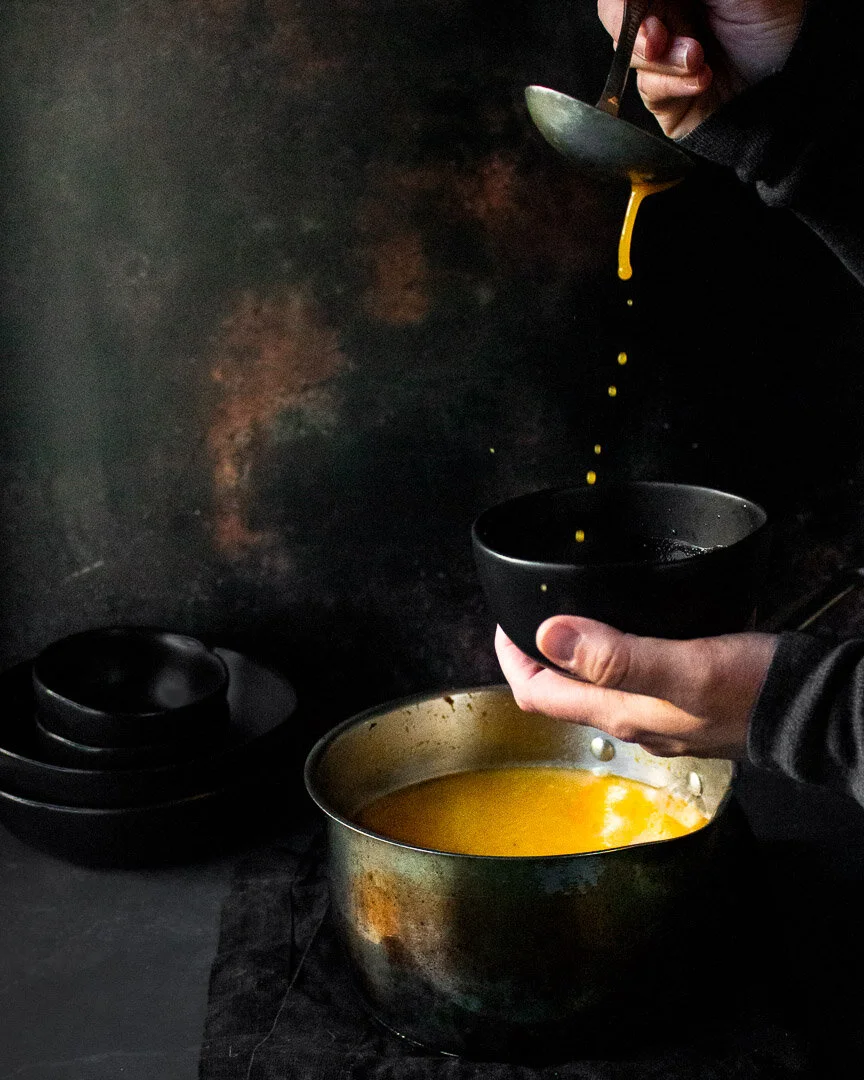
While the beef is roasting, add the beef stock, wine, anchovies, 3 cloves garlic, thyme, 1-2 very large pinches of salt, and pepper to a blender or food processor and whizz for 30 seconds.

Once the beef is quickly caramelized, turn the oven down to 375. Sprinkle 2 Tbsp of flour over the meat and mix. Add the onions and carrots and remaining 3 large garlic cloves to the pot. Sprinkle with another judicious pinch of salt. Stir.

Top with the liquid and bake in the oven, uncovered, for 1¼-1½  hours, stirring once halfway through the cooking time. The dish is done once the liquid has cooked down and thickened into a gravy-like consistency.

Optional topping:
While the beef is cooking, chop or slice the mushrooms and sauté in butter and olive oil. Once they have released their water and that water has evaporated, add the vinegar and cook for 1-2 more minutes until the vinegar has also evaporated.

March 24, 2022 /Rebecca Davis
recipes, cooking, beef, beef stew, beef recipes, stews, weeknight, easy cooking, easy roasting, advanced eaters, winter, cozy dishes, cozy cooking, gluten-free option, dairy free option, carrots, onion, mushrooms, beef cubes, hands off, hands off cooking, family meals, toddler eats, kid eats
Cooking, Fall, Food, Kid eats, No refined sugar, Nut-free, Recipes, Toddler eats, Winter
1 Comment
No-churn vanilla ice cream with Easter candy and pretzel mix-ins is the easy, fun cooking project that you can do with your kids to use up that holiday haul! #Easter #icecream #icecreamrecipe #nochurn #dessert #sweetandsavory

No-churn vanilla ice cream with Easter candy and pretzel mix-ins is the easy, fun cooking project that you can do with your kids to use up that holiday haul! #Easter #icecream #icecreamrecipe #nochurn #dessert #sweetandsavory

Candy pretzel no-churn ice cream

April 05, 2021 by Rebecca Davis in Cooking, Food, Holidays, Kid eats, Recipes, Spring, Sweets, Vegetarian

If the Easter Bunny left you a LOT of candy this year (or you stocked up on post-holiday sales), this Candy Pretzel No-Churn Ice Cream is a fun way to use it up. AND, it’s so easy that my (newly) 6-year-old can make it mostly by himself!

Take me to the ice cream!

No-churn vanilla ice cream with Easter candy and pretzel mix-ins is the easy, fun cooking project that you can do with your kids to use up that holiday haul! #Easter #icecream #icecreamrecipe #nochurn #dessert #sweetandsavory

No-churn vanilla ice cream with Easter candy and pretzel mix-ins is the easy, fun cooking project that you can do with your kids to use up that holiday haul! #Easter #icecream #icecreamrecipe #nochurn #dessert #sweetandsavory

I’m obsessed with no-churn ice cream. Most recipes you’ll find are basically the same— a carton of heavy cream, a can of sweetened condensed milk, a pinch of salt (but not in this recipe because we’re using pretzels), some vanilla extract, and whatever mix-ins you like. Some recipes use a bit of cream cheese, but I prefer it without.

*There are two ways to make the ice cream base: You can whip the cream first and then fold in the condensed milk, OR you can combine them and whip the whole mess together. Obviously, it’s faster to do the milks together, but you risk over-mixing. Whipping the base too much can lead to a buttery texture in the final product, which is a little gross.

Whipping the cream on its own lets you see how thick it’s gotten, so you’re less likely to overdo it. If you’re a newbie or just worried, use this method.

I usually dump them both together and whip until I see tracks in the mixture that stay put for a few seconds before melting back into the gloop. Just note: When you mix the two liquids together, you WON’T achieve a stiff peak like you would with cream alone.

No-churn vanilla ice cream with Easter candy and pretzel mix-ins is the easy, fun cooking project that you can do with your kids to use up that holiday haul! #Easter #icecream #icecreamrecipe #nochurn #dessert #sweetandsavory

No-churn vanilla ice cream with Easter candy and pretzel mix-ins is the easy, fun cooking project that you can do with your kids to use up that holiday haul! #Easter #icecream #icecreamrecipe #nochurn #dessert #sweetandsavory

No-churn vanilla ice cream with Easter candy and pretzel mix-ins is the easy, fun cooking project that you can do with your kids to use up that holiday haul! #Easter #icecream #icecreamrecipe #nochurn #dessert #sweetandsavory

No-churn vanilla ice cream with Easter candy and pretzel mix-ins is the easy, fun cooking project that you can do with your kids to use up that holiday haul! #Easter #icecream #icecreamrecipe #nochurn #dessert #sweetandsavory

No-churn vanilla ice cream with Easter candy and pretzel mix-ins is the easy, fun cooking project that you can do with your kids to use up that holiday haul! #Easter #icecream #icecreamrecipe #nochurn #dessert #sweetandsavory

No-churn vanilla ice cream with Easter candy and pretzel mix-ins is the easy, fun cooking project that you can do with your kids to use up that holiday haul! #Easter #icecream #icecreamrecipe #nochurn #dessert #sweetandsavory

My favorite part of this particular recipe is the pretzel-Rolo concoction. You basically melt a Rolo (or any other chocolate and caramel candy) in the oven for 3 minutes and then smoosh another pretzel and some sprinkles on top. They’re like a chocolate-covered pretzel with a caramel sprinkle bonus! And much less messy to make!

Also, if you’re like us, you always have some stale pretzels in the back of the cabinet that no one really wants to eat. This is a great way to resurrect them.

No-churn vanilla ice cream with Easter candy and pretzel mix-ins is the easy, fun cooking project that you can do with your kids to use up that holiday haul! #Easter #icecream #icecreamrecipe #nochurn #dessert #sweetandsavory

No-churn vanilla ice cream with Easter candy and pretzel mix-ins is the easy, fun cooking project that you can do with your kids to use up that holiday haul! #Easter #icecream #icecreamrecipe #nochurn #dessert #sweetandsavory

Candy pretzel No-Churn Ice Cream

Time: 20 minutes + 8 hours of freezing
Yield: About 5 cups of ice cream

10-15 Rolo candies (or other chocolate and caramel candy)
20-30 mini pretzels
2-3 Tbsp sprinkles
2 cups heavy cream (1 pint)
14 oz sweetened condensed milk (1 small can)
1 tsp vanilla extract
1-2 cups chocolate candy, roughly chopped (I used milk chocolate bunnies and Cadbury eggs, but use whatever you like!)

Heat the oven to 350.

Spread half of the pretzels on a parchment-covered sheet pan. Top with one Rolo or other chocolate and caramel candy. Melt in the oven for 2-3 minutes.

Remove from the oven and top each melted chocolate piece with another pretzel and glitz them up with some sprinkles. Put in the fridge to chill while you make the ice cream base.

*Combine the heavy cream, condensed milk, and vanilla extract in a large bowl or in the bowl of a stand mixer. (See notes above for different methods for making the base.) Mix with the whisk attachment until you see visible tracks in the cream that stick around for a few seconds before melting back into the gloop.

Roughly chop whatever candy you’re using. Remove the pretzels from the fridge and roughly chop those too. Gently fold the chopped candies into the ice cream base. Pour the mixture into a metal or other freezer-safe container and freeze for at least 8 hours.

April 05, 2021 /Rebecca Davis
ice cream, no churn, no churn ice cream, candy, chocolate, pretzels, sweet and salty, sweet and savory, kid food, kid cooking, easy, fast, dessert, desserts, Easter, holiday, advanced eater, recipes, vegetarian
Cooking, Food, Holidays, Kid eats, Recipes, Spring, Sweets, Vegetarian
Comment
Koginut squash, a cross between butternut and kabocha, makes a creamy, herby, warm, and comforting soup. #meandthemoose #squashsoup #koginut #koginutsquash #squashrecipes #squashsouprecipes

Koginut squash soup

November 22, 2020 by Rebecca Davis in Cooking, Food, Gluten-free, Kid eats, Toddler eats, Winter

This soup is so creamy, herby, warm, and comforting—everything a bowl of soup should be. I use Koginut, which is a cross between the butternut and kabocha varieties of squash, but use anything you have on hand!

Yes, soup for you!

Koginut squash, a cross between butternut and kabocha, makes a creamy, herby, warm, and comforting soup. #meandthemoose #squashsoup #koginut #koginutsquash #squashrecipes #squashsouprecipes

The koginut is my new favorite squash. It has the thick, creamy flesh of a kabocha squash but the mellow, sweet flavor of a butternut. If you can’t find one, have no fear. Basically any winter squash variety would be perfect here and all roast in roughly the same way. I’ve also used 2 extra large sweet potatoes in a pinch and the soup turned out equally delicious.

A note about roasting: One important element of this roasting method is to NOT trim the tops and bottom of the squash. Leaving them whole means that the steam gets trapped in the cavity of the squash so that it roasts and steams at the same time.

Also! In the recipe, you’ll note that I put the milk high up on the ingredients list even though we don’t add it until the end. That’s because, bringing it to room temperature and even microwaving it a bit makes it less likely that the milk solids will separate, which can happen if the cold milk is shocked by the hot soup. You can warm it in a pan on the stove while the soup simmers, but who wants to make another dish or worry about something scalding?

Koginut squash, a cross between butternut and kabocha, makes a creamy, herby, warm, and comforting soup. #meandthemoose #squashsoup #koginut #koginutsquash #squashrecipes #squashsouprecipes

Koginut squash soup 


Time: About 90 minutes, less than half of it active
Yield: 10 cups of soup 

3 cups roasted squash, about 1 medium winter squash or 2 very large sweet potatoes 
½ cup heavy cream or half and half 
1 Tbsp olive oil
½ large onion or 2 large shallots, roughly chopped 
5 large garlic cloves, roughly chopped 
1 Tbsp butter 
3 stems fresh thyme or ¼ tsp dried 
Heaping ¼ tsp cumin
Heaping ¼ tsp paprika 
1 tsp sea salt 
4-6 cups low sodium chicken stock 
2 Tbsp brown sugar (optional)

Heat oven to 425. Halve the squash and scoop out the seeds and stringy flesh inside. Place the squash cut side down on a parchment-lined baking sheet and roast for 30-45 minutes, until the squash is fork tender. 

Using a kitchen towel or oven mitt to protect your hands, scoop out the cooked flesh from the inside of the squash and set aside.

Measure out the cream or half-and-half. Let sit at room temperature while you prepare the rest of the soup.

In a large stock pot, heat the olive oil over a medium-low flame and then cook the onion until beginning to brown, about 5-6 minutes. Add the garlic and cook for 1 minute until fragrant. 

Add the butter and let melt and bubble slightly. 

Add the spices, stir well, and cook for 1 minute until fragrant. 

Add the squash and stir well to combine. Add the stock, stir well again, increase the flame to high, and let the liquid come to a boil.

Turn down the flame to low and let simmer for 15 minutes.

Puree the soup. 

Add the puree back to the original pot. Test the milk to see if any chill remains. If it feels cool to cold, microwave it for 30 seconds at a time until it feels room temperature or warmer. Add to the soup and stir.  

Test for seasoning and adjust as necessary. If desired, add 2 Tbsp of sugar (brown or white) and stir to combine.

November 22, 2020 /Rebecca Davis
soup, soup season, toddler eats, kid eats, kid food, squash, koginut, winter, winter squash, comfort food, squash soup, recipes, gluten free, gluten-free, lunch, dinner, lunchbox
Cooking, Food, Gluten-free, Kid eats, Toddler eats, Winter
5 Comments
  • Newer
  • Older