Pumpkin and persimmon butter

Cooking down some canned pumpkin and a few persimmons with maple syrup and spices will make your house instantly smell like the holidays and spice up even the most basic meals. #meandthemoose #pumpkinrecipes #persimmonrecipes #dessert #fruitbutter

Cooking down some canned pumpkin and a few persimmons with maple syrup and spices will make your house instantly smell like the holidays and spice up even the most basic meals.

Take me to the recipe!

Cooking down some canned pumpkin and a few persimmons with maple syrup and spices will make your house instantly smell like the holidays and spice up even the most basic meals. #meandthemoose #pumpkinrecipes #persimmonrecipes #dessert #fruitbutter

I’m a sucker for persimmons. I can’t help myself when they arrive in the grocery stores. But I never know what to do with them. I love baking with them, but I’m trying to have fewer baked goodies hanging around in preparation for baked-goodies-hanging-around season. And if I’m going to eat them on their own or in a salad, they need to ripen, which, in my frozen kitchen, takes forever and a day.

This is my grand compromise: A cooked down “butter” that’s thick and slightly sweet that pairs with toast, graham crackers, apple slices, pretzels, Dutch babies, regular babies, cornbread, muffins, oatmeal. etc. One could also use this “butter” as a fruity addition to an autumnal cheesecake or mix it with an ice cream or other custard. My favorite way to use it is mixed with mascarpone and a couple of eggs and then baked with a pie shell for a spin on pumpkin pie.

The best part about this concoction is that you don’t need to ripen the persimmons. You heard me. As long as you use fuyu and NOT HACHIYA*, you’re fine with unripened persimmons. Of course, the more you let them ripen, the better they taste, so it does behoove you to wait at least a little while before making this butter.

*Why not Hachiya, you ask? Well, those are the larger, more ovular persimmons and if you don’t wait until they’re almost completely mushy to eat them, the tannins in the fruit make your mouth feel gluey and dry. It’s awful, trust me.

Anyway, whatever you choose to do with it, you’re only 20-30 minutes away from the endless possibilities, so get to it!

Cooking down some canned pumpkin and a few persimmons with maple syrup and spices will make your house instantly smell like the holidays and spice up even the most basic meals. #meandthemoose #pumpkinrecipes #persimmonrecipes #dessert #fruitbutter

Pumpkin persimmon butter

Time: 25 minutes, mostly active
Yield: 2 cups, depending on how much you cook down the mixture 

1 can pumpkin puree
4 fuyu persimmons 
1 Tbsp dark brown sugar (light is also fine)
¼ cup maple syrup
½ tsp cinnamon
¼ tsp ground ginger
1/8th tsp ground cloves
1 tsp vanilla extract or vanilla bean paste
1 large pinch of kosher salt
½ cup water

Peel the persimmons and cut into quarters. 

Add all ingredients to a blender or food processor and blend until smooth. Transfer to a large pot. 

Heat over a medium-low flame until just beginning to bubble. Turn the heat down to low and cook, stirring frequently to prevent burning, until the persimmons totally break down and the mixture has thickened slightly, about 20 minutes.

Almond and coconut energy balls

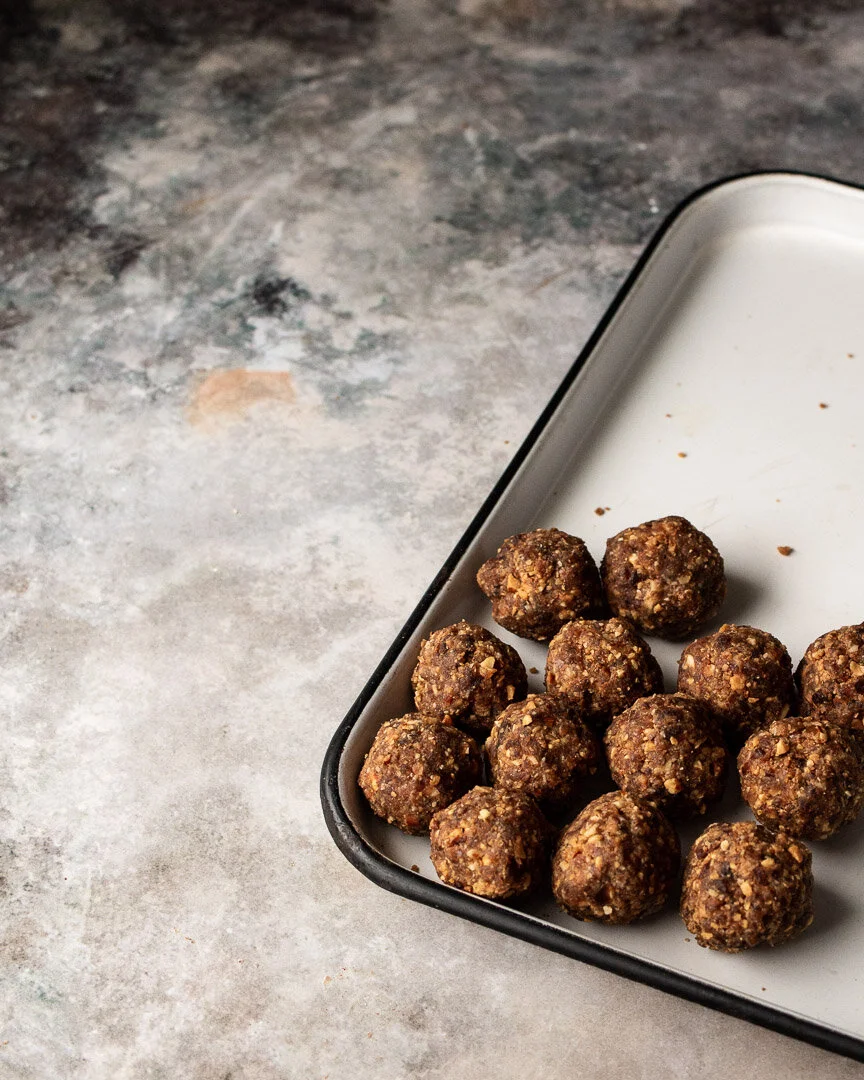
These coconut and almond energy bites are a quick snack to throw together, easy to eat, and last for weeks in the fridge. #meandthemoose #energyballs #energybites #snacks #almonds #dates #easysnacks

These throw-together snacks are easy to make and store for a filling, quick bite on the go.

Take me to the recipe!

These coconut and almond energy bites are a quick snack to throw together, easy to eat, and last for weeks in the fridge. #meandthemoose #energyballs #energybites #snacks #almonds #dates #easysnacks

Let’s talk energy balls, shall we? Sometimes called “energy bites,” these sticky, two-bite goodies are naturally sweetened with dates and come together in a food processor in minutes. They require minimal ingredients, can be modified to suit your tastes, and are surprisingly filling for such a tiny treat. Best of all, when stored in the fridge, they last for weeks.

These coconut and almond energy bites are a quick snack to throw together, easy to eat, and last for weeks in the fridge. #meandthemoose #energyballs #energybites #snacks #almonds #dates #easysnacks

This is the thing I grab when I absentmindedly open the fridge, looking for something (in both food and existential senses).

These coconut and almond energy bites are a quick snack to throw together, easy to eat, and last for weeks in the fridge. #meandthemoose #energyballs #energybites #snacks #almonds #dates #easysnacks

A couple of notes:

  • Make the balls small! The mixture is pretty caloric, so I make them no more than about 1 Tbsp each.

  • Do toast the almonds and coconut. That little bit of browning really enhances the flavor and makes the balls less sweet.

  • Test your dates before using. If they don’t squish almost effortlessly, they may be a bit too tough or dry. If that’s the case, cover them with boiling (or just really really hot) water and let sit for 5 minutes.

These coconut and almond energy bites are a quick snack to throw together, easy to eat, and last for weeks in the fridge. #meandthemoose #energyballs #energybites #snacks #almonds #dates #easysnacks

Almond and coconut energy balls


Time: 15 minutes
Yield: 16 balls

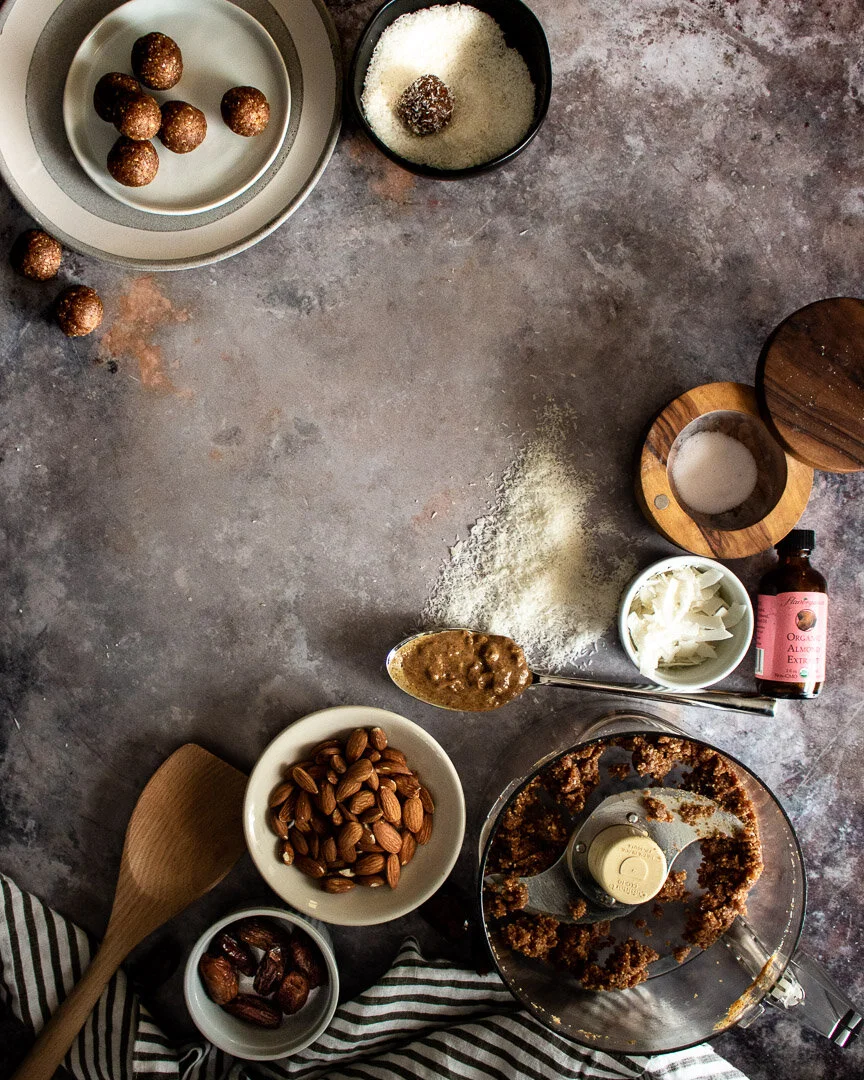
1/2 cup raw almonds
1/2 cup unsweetened shredded or flaked coconut
16 pitted dates, rehydrated if too tough or dry
2-3 Tbsp almond butter
1/8 tsp almond extract
Pinch of salt
Water, as needed

Preheat the oven or toaster oven to 350. Spread the almonds and coconut out onto a baking sheet and toast until the coconut is just beginning to brown on the edges and the mixture smells nutty, about 3 minutes. Keep a close eye on the mixture to ensure that it doesn’t burn.

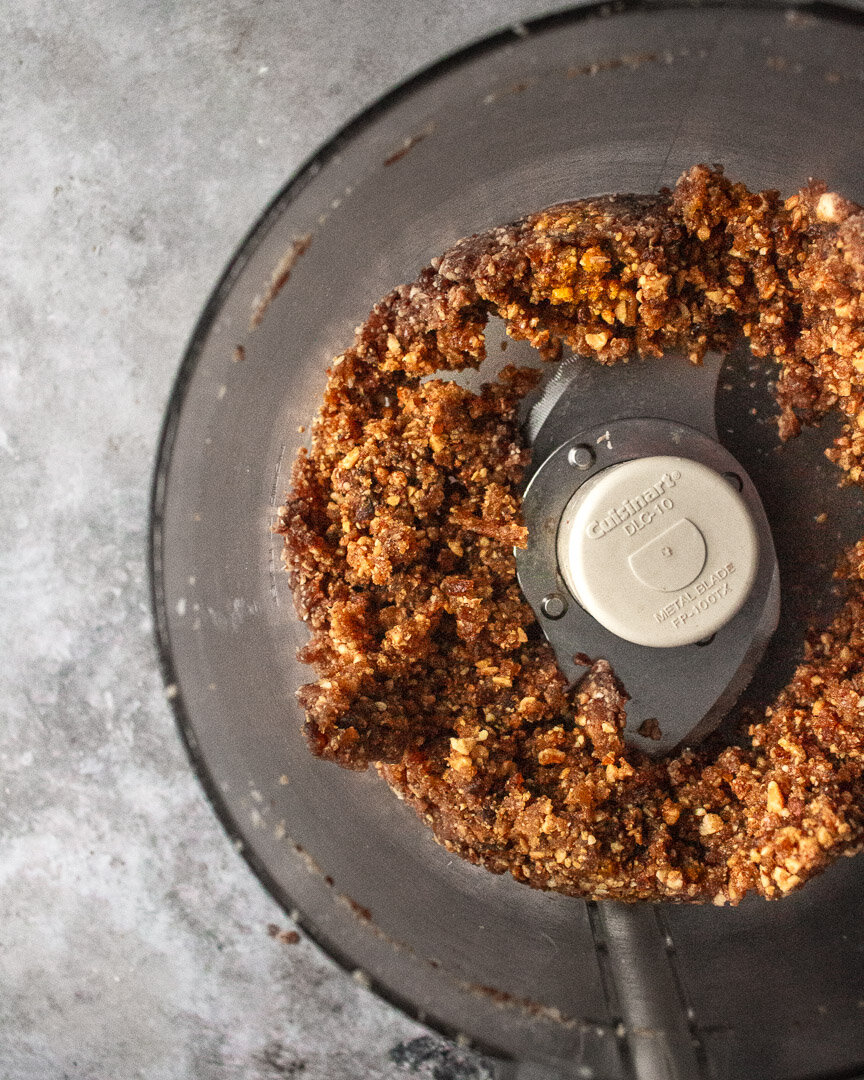
Put the toasted almonds and coconut in a food processor along with the dates, almond butter, almond extract, and salt. Whizz in the processor until the mixture comes together in one large mass, about 4-5 minutes. If the mixture doesn’t come together, sprinkle in about 1/2 tsp of water and try again, repeating about every 30 seconds until you have a large mass.

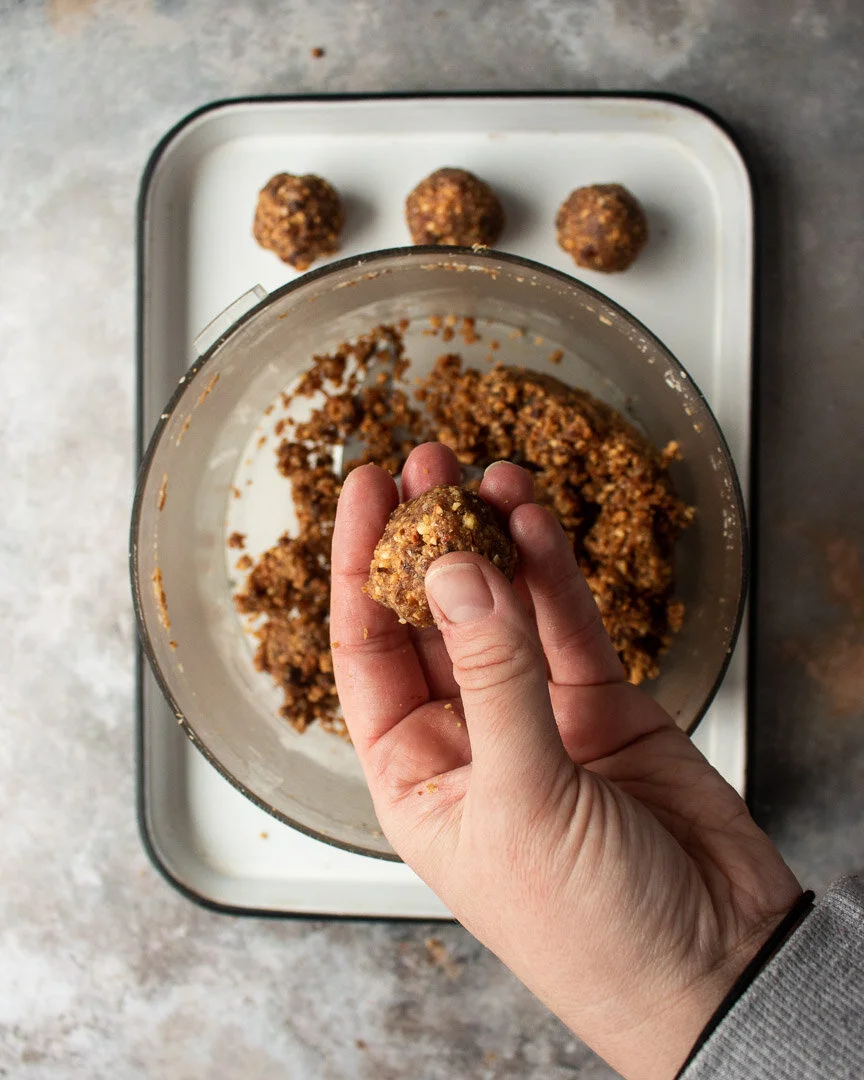
Scoop about 1 Tbsp of the mixture into wet hands and roll into a ball.

Chill the balls in the refrigerator to help them set.

Chicken burgers with pub cheese

The easiest, fastest chicken burgers you can make that are packed with flavor and a real crowd pleaser. #meandthemoose #burgers #chickenburgers #dinner #easydinnerrecipes #fastdinnerrecipes

These easy, fast chicken burgers are packed with flavor and ready in under 30 minutes. They’re what I cook on nights when it’s suddenly dinnertime, everyone’s hangry, and I need a quick, crowd-pleasing meal.

Take me to the burgers!

The easiest, fastest chicken burgers you can make that are packed with flavor and a real crowd pleaser. #meandthemoose #burgers #chickenburgers #dinner #easydinnerrecipes #fastdinnerrecipes

Guess what?! Change is hard! I sent my little off to Kindergarten on Monday (we’re on a hybrid schedule so he’s in school one week and at home the next) and then wandered around my house for 5 hours like I’d never been here before. (And he went back to Pre-K for almost two months this summer, so I don’t know why it felt so weird!)

That happens to me any time I go through a big transition. The edges suddenly feel a little fuzzy and I temporarily forget how to negotiate my day. It’s no wonder my kid struggles with change too.

How do you deal with change? Is there something that anchors you when the seas get rough? For me, it’s cooking. When I feel off kilter, I need to cook something. It focuses my mind, forces me to think about the present, and following a recipe is really helpful when I just want someone to tell me what to do.

So, here is a fab recipe for chicken burgers. If you’re feeling strange as this new school year starts, I’ll be the grown up telling you, “Make these for dinner. Here’s how.” Problem solved.

The easiest, fastest chicken burgers you can make that are packed with flavor and a real crowd pleaser. #meandthemoose #burgers #chickenburgers #dinner #easydinnerrecipes #fastdinnerrecipes

A couple of notes:

  • The heat of the skillet is important. A good sear on both sides and then covering the pan and letting the meat steam as it cooks seals in the juices as well as cooking the meat pretty fast.

  • I try not to handle the raw meat mixture too much; the more you mix the meat, cheese, and spices, the tougher and more rubbery it can get.

  • DO NOT, I REPEAT: DO NOT use another bowl to mix these ingredients. Use the container that the ground chicken came in. Save a dish.


Chicken burgers

Time: 25 minutes, mostly active
Yield: 4 burgers 

1 lb ground dark meat chicken (I like to use leg meat) 
1 tsp garlic powder 
1 tsp onion powder 
1 tsp fine sea salt 
½ tsp cumin 
½ tsp coriander 
pepper to taste
¼ cup pub cheese 
2 Tbsp olive oil

Sprinkle the seasonings and plop the cheese onto the ground chicken in the package. Using your hands, mix thoroughly, but try not to over mix. I like to make sure that there aren’t any pockets of dry spices, but if there are still blobs of cheese, that’s fine.

Heat a skillet over a medium high flame. Add the olive oil and heat until the oil slips easily around the pan. Add patties with ¼ of the mixture in each one, trying to shape them into rough circles. 

Get a good sear on one side. If the pan is hot enough, this should take about 3 minutes. Flip and sear on the other side, 3 more minutes.

Turn the flame to low and cover the skillet. Cook until the burgers are firm and have reached an internal temperature of 165, about 10-12 minutes. 

Chicken and apple breakfast sausages

Chicken and apple breakfast sausages | Me & The Moose. These easy chicken and apple sausage patties are an easy batch bake that can deliciously simplify your mornings. #meandthemoose #breakfast #sausages #chickensausage #sage #healthybreakfastre…

These chicken and apple breakfast sausage patties are super quick, packed with flavor, and a great way to add some lean protein to your breakfasts.

Take me to the recipe!

Chicken and apple breakfast sausages | Me & The Moose. These easy chicken and apple sausage patties are an easy batch bake that can deliciously simplify your mornings. #meandthemoose #breakfast #sausages #chickensausage #sage #healthybreakfastre…

So! It’s been forever since I last posted because, like half of the food bloggers I follow, I’ve been busy cooking something else: A BABY. Normally I have a strong sense of smell, but pregnancy turns me into a bloodhound. Combine that with constant nausea, and you can imagine how I’ve felt about cooking or looking at food photos or being in the kitchen or even opening the refrigerator door.

Luckily, I started working on a homemade version of chicken and apple sausages (a family favorite) WAY before they started making me nauseous, so I know they’re good. Plus, they’re easy to whip up over the weekend and then store or freeze for future breakfasts. OR, if you’re feeling ambitious, you can even make them on a weekday morning if you’re one of those people with your shit together on school days.

I fiddled around a lot with the spice mix so that it would be strong enough to compensate for how little fat is in the recipe. I use a combination of fresh and dried sage but you could certainly opt for a single type. If you like less garlic or just milder flavors generally, cut back on the garlic powder and the patties will still taste great.

A note about the fat we add: It’s only a Tbsp, which may feel like too little or too much depending on where you stand and you may be tempted to add more or leave it out. But I’ve found that 1 Tbsp is enough to keep the meat from drying out without making it taste oily or making the texture crumbly.

And the apple adds a little sweetness and a little moisture.

Chicken and apple breakfast sausages | Me & The Moose. These easy chicken and apple sausage patties are an easy batch bake that can deliciously simplify your mornings. #meandthemoose #breakfast #sausages #chickensausage #sage #healthybreakfastre…

Chicken and apple breakfast sausages

Time: 15 total (5 prep, 10 cooking)
Yield: 16 patties

1 lb ground chicken, (7-8% fat)  
1 small apple, shredded (about ½ cup of apple)
2 Tbsp olive oil, divided
1 Tbsp Dijon mustard
1 tsp dried sage
1 tsp fennel seeds
½ tsp garlic powder
¼ tsp onion powder
1 tsp kosher salt
¼ tsp pepper

Combine the chicken, shredded apple, 1 Tbsp olive oil, and the rest of the ingredients in a large bowl. Mix just until all of the ingredients are combined.

In a large skillet, heat ½-1 Tbsp of oil over a medium flame until hot. (If you’re cooking the sausages in batches, use half of the oil; otherwise, use it all.)

Scoop 2 Tbsp of chicken mixture into balls and place in the hot skillet. Push them down slightly to form round patties. Reduce the flame to medium low and cook until well browned on the bottoms, about 5 minutes.

Flip the patties and cook on the other side until the meat is cooked through, the patties feel firm to the touch, and/or the patties reach 165 on a meat thermometer, about 4 more minutes.

Rainbow Chard Galette

Rainbow Chard Galette | Me & The Moose. This galette is a super-easy show stopper for Easter and beyond! we ate it for dinner last night and the preschooler didn’t bat an eye at the heaps of greens. #meandthemoose #rainbowchard #sidedishes #vege…

This Rainbow Chard Galette is so good (I mean, there’s cheese and puff pastry, what’s not to love) and a serious show stopper for your Easter feast (or any day, really).

Take me to the recipe!

OVENS, amiright? It recently occurred to me that the real secret to successful baking is knowing your oven well. I mean, measuring and experience and bringing things to room temperature and patience are also important, but seriously, if you know that your oven runs hot or cool or that it has uneven spots, you can really up your baking game.

As you can tell, I’m still adjusting to our oven even though we’ve lived in our current house for almost two years.

Luckily, I’ve found that store-bought puff pastry is fairly forgiving. As long as your filling isn’t too wet and the oven is at least 400 degrees, you’re pretty safe.

Which makes this easy galette a reliable option for your holiday table.

Rainbow Chard Galette | Me & The Moose. This galette is a super-easy show stopper for Easter and beyond! we ate it for dinner last night and the preschooler didn’t bat an eye at the heaps of greens. #meandthemoose #rainbowchard #sidedishes #vege…

A couple of notes:

  • I like to rip the greens off of the stems and then arrange the stems in a way that flexes my OCD muscles. HOWEVER, you can opt to chop everything together to save time and that’s perfectly acceptable.

  • Roasting garlic makes the flavor mellow and mild, which I like here because it lets the chard sing. But if you like a stronger garlic flavor, chop the cloves and saute them with the spring onions and greens instead of roasting. Or you can do half and half.

  • This galette really needs salt. I salt at the beginning and end of wilting the greens and then finish with some more salt. I like salt. If you don’t, I urge you to salt at the beginning and end of wilting (and taste test to make sure it’s not too much) and then skip the final salting rather than waiting to add salt at the end.

Rainbow Chard Galette | Me & The Moose. This galette is a super-easy show stopper for Easter and beyond! we ate it for dinner last night and the preschooler didn’t bat an eye at the heaps of greens. #meandthemoose #rainbowchard #sidedishes #vege…

Rainbow chard galette


Time: 50-60 minutes (about 30 minutes active time, depending on how intense you get about arranging the chard stems)
Yield: 9 medium pieces


4 large garlic cloves
2 Tbsp olive oil + more for roasting the garlic (about ½ cup)
2 large spring onions (white/purple and green parts), chopped (about 1 heaping cup) sub scallions if necessary
10 cups chard leaves, measured after chopping, lightly packed (about 2 medium bundles)
2 tsp balsamic vinegar
1/4 tsp kosher salt (a few big pinches)
A few cracks of black pepper
1 cup ricotta
3/4 cup nutty cheese like gruyere or aged Gouda, shredded
1 puff pastry sheet
1 Tbsp roasted garlic oil (from earlier roasted garlic)
1 egg, whisked

Preheat oven to 425.

Smash four garlic cloves (no need to remove the skin) and place in an oven-safe ramekin. Add enough olive oil to cover the garlic. Cook in the oven for 6-8 minutes, or until you start to smell garlic and the cloves are fork tender.

Meanwhile, heat 2 Tbsp olive oil in a very large skillet. Add the spring onions and sauté until translucent and fragrant, about 2 minutes.

Add the greens and a large pinch of salt. Cook until wilted, about 8-10 minutes.

Add the balsamic vinegar, another large pinch of salt, and a few cracks of fresh black pepper and stir a few times.

Once wilted, place the onions and greens into a large bowl. Add the cheeses and roasted garlic. Mix well.

On a floured surface, roll out the puff pastry dough to a thickness of 1/8th to 1/16th of an inch (about 1/3 bigger than original packaging). Move the dough to your sheet pan.

Spread the greens and cheese on the puff pastry, leaving a 1-inch frame. Fold the bare edges over onto the greens and cheese mixture.  

Arrange the chard stems in your desired pattern.

Brush the chard stems with 1 Tbsp roasted garlic oil.

Brush the lightly beaten egg over the visible parts of the pastry crust.

Bake for 18-20 minutes or until the bottom and the edges are golden brown.

Rainbow Chard Galette | Me & The Moose. This galette is a super-easy show stopper for Easter and beyond! we ate it for dinner last night and the preschooler didn’t bat an eye at the heaps of greens. #meandthemoose #rainbowchard #sidedishes #vege…