Sloppy Joe baked potatoes

Sloppy Joe baked potatoes | Me & The Moose. This lightened up version of sloppy Joes uses turkey meat and the bare minimum of sweetener in the filling and forgoes a carby bun for a crispy, salt, malt-vinegary baked potato. #meandthemoose #dinner…

These baked potatoes are dressed up with healthier turkey sloppy Joe filling for a tasty, healthy, and easy version of this kid-friendly sandwich.

Take me to the recipe!

Sloppy Joe baked potatoes | Me & The Moose. This lightened up version of sloppy Joes uses turkey meat and the bare minimum of sweetener in the filling and forgoes a carby bun for a crispy, salt, malt-vinegary baked potato. #meandthemoose #dinner…

M used to love sloppy Joes. LOVE THEM. However, when offered these, he declined saying, “I didn’t order that.” SOMEONE GAVE HIM THE GIFT OF SASS FOR HIS FOURTH BIRTHDAY AND I AM NOT HERE FOR IT.

After calmly explaining that I am, in fact, not his waitress, he proceeded to eat a dinner of pickles, cheese, and guacamole, all of which were the toppings and “safe” options I’d put out with the sloppy Joes. You win some, you lose some.

I’ve explained before how we started serving one family meal and adding lots of “safe” options as alternatives for M so that he can self-direct at dinner. Sometimes that means an apple and almond butter on the table or lots of condiments like pickles, olives, and cheese. Guacamole is usually reliable. But sometimes that means he doesn’t eat a ton for dinner and I’m slowly learning to be okay with that.

So, sloppy Joes, while traditionally a very kid-friendly option, were for the grownups in our house. But I have hope for the future.

Sloppy Joe baked potatoes | Me & The Moose. This lightened up version of sloppy Joes uses turkey meat and the bare minimum of sweetener in the filling and forgoes a carby bun for a crispy, salt, malt-vinegary baked potato. #meandthemoose #dinner…

What tends to appeal about Sloppy Joes is their sweetness, but I find that when the filling gets too sweet (like, when a recipe calls for a cup of ketchup), it can become cloyingly sweet. Also, who needs to eat all of that sugar for dinner?

However, the signature sloppy Joe flavor gets lost when you omit sweetener entirely, so I’ve included the bare minimum of brown sugar (2 tsp!) in this recipe. You can also wait to add it until the very end to decide for yourself if you really need it!

Sloppy Joe baked potatoes

Yield: 3 cups or 23 oz
Time: between 60-75 minutes (35 minutes active time)

4 large Russet potatoes
2 Tbsp olive oil
Flaky sea salt


1 Tbsp olive oil
1 lb ground turkey
½ medium white onion, minced (about ¾ cup)
1 medium stalk celery, minced (about ¼ cup)
1 small carrot, peeled and minced (a scant ½ cup)
2 large cloves garlic, minced 
½ cup water, divided
6 oz tomato paste (one small can, about 10 Tbsp)
2 Tbsp yellow mustard
1 tsp Worcestershire sauce
1 Tbsp malt vinegar (or whatever vinegar you have on hand), plus more for the potatoes
2 tsp brown sugar (optional)
2 tsp flaky sea salt, divided

Optional garnishes: cheese, pickles, pickles jalapenos, guacamole, sour cream, yogurt, coleslaw


  1. Preheat the oven to 400.

  2. Scrub 4 potatoes thoroughly and prick all over with a fork or small paring knife. I usually do 10-12 stabs per potato.

  3. Brush the outside skin with a very thin coating of olive oil. You should have some of the 2 Tbsp left over. Sprinkle with flaky sea salt.

  4. Place the potatoes on a sheet pan and bake for 45 minutes to an hour, or until the skin is crisp and the potato is fork tender.

  5. While the potatoes cook, heat the olive oil in a large sauté pan over medium heat for 1-2 minutes. Add the ground turkey and chop the meat into small pieces with the end of your spatula or spoon. Stir a few times and reduce the heat to medium low.

  6. Chop the onions and add to the pan, stirring a few times.

  7. Repeat with the celery, carrots, and garlic, letting each vegetable cook while you prep the next one.

  8. Cook and stir until the turkey is fully cooked and no pink remains. The whole process of cooking the turkey and veggies should take about 13-15 minutes.

  9. Turn the flame back up to medium and let the turkey and veggies brown slightly. When they begin sticking to the pan a bit (about 3-4 minutes), pour in ¼ cup of water and scrape the browned bits from the bottom of the pan.

  10. Add the tomato paste, mustard, vinegar, Worcestershire sauce, 1 tsp salt, and brown sugar (if using), and mix well. If the mixture seems too dry, add the other ¼ cup of water. If you’ve added all of the water and it seems too wet, let the mixture bubble for a few minutes until your sauce has thickened.

  11. When the potatoes are done, carefully remove the pan from the oven and, using an oven mitt on one hand to steady the potato, cut it open with a sharp knife, being careful of the steam that escapes.

  12. Pour a few drops of malt vinegar and a large pinch of sea salt into each opened potato. Top with 1/2 -3/4 cup of the turkey mixture.

Sloppy Joe baked potatoes | Me & The Moose. This lightened up version of sloppy Joes uses turkey meat and the bare minimum of sweetener in the filling and forgoes a carby bun for a crispy, salt, malt-vinegary baked potato. #meandthemoose #dinner…

Sunflower seed butter with flax and chia

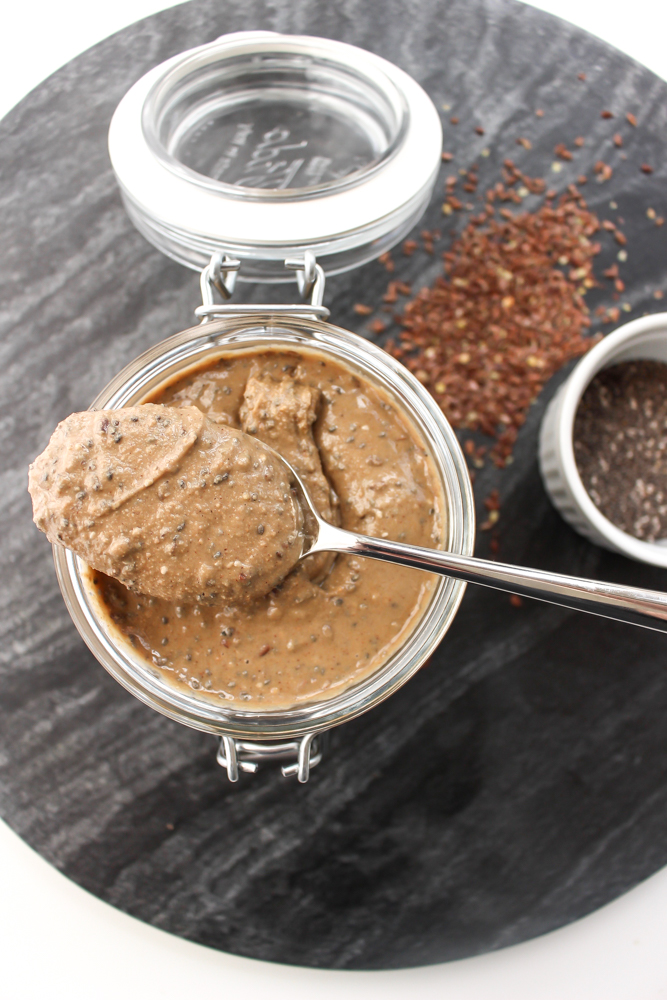
Sunflower seed butter | Me & The Moose. This homemade sunflower seed butter tastes so much better than store-bought and is fortified with flax and chia seeds. #meandthemoose #sunflowerseedbutter #lunchboxideas #lunch #lunchbox #sunflowerseedreci…

Once again, I’m copying Trader Joe’s. They have a peanut butter with flax and chia and it’s a fantastic way to get some extra nutrition into a picky eater. Here’s my school-safe version!

Jump to the recipe!

I have a confession to make: I go back and forth between caring A WHOLE LOT about M’s nutrition and then feeling like there are a million little struggles every day and I don’t want to add food to that list.

And he’s always been a contrarian with FOMO, which means he doesn’t love limits. The “perfect parent” voice in my head constantly beats me up about not being stricter. Don’t get me wrong, I say “no” to things 100 times a day and we obviously set lots of boundaries. But we’ve figured out that M does better when he has choice within those limits and that we have to say “yes” to some things or there will be a meltdown.

Anyway, part of M’s way of gaining control these days is that he has VERY strong opinions about food. What he loves one day, he hates the next. Peanut butter mixed into applesauce has been a constant and lately he’s been really into PB&J’s after watching this silly video.

BUT we can’t send any nuts to school, so sunflower seed butter it is. Unfortunately, a lot of the store-bought ones don’t taste great. I’ve made my own sunflower seed butter before and I do love this recipe. But if M’s eating this for at least one meal per day, I wanted to beef up the nutrition. And it tastes so good, he doesn’t complain!

Sunflower seed butter | Me & The Moose. This homemade sunflower seed butter tastes so much better than store-bought and is fortified with flax and chia seeds. #meandthemoose #sunflowerseedbutter #lunchboxideas #lunch #lunchbox #sunflowerseedreci…

A couple of notes about this nut butter:

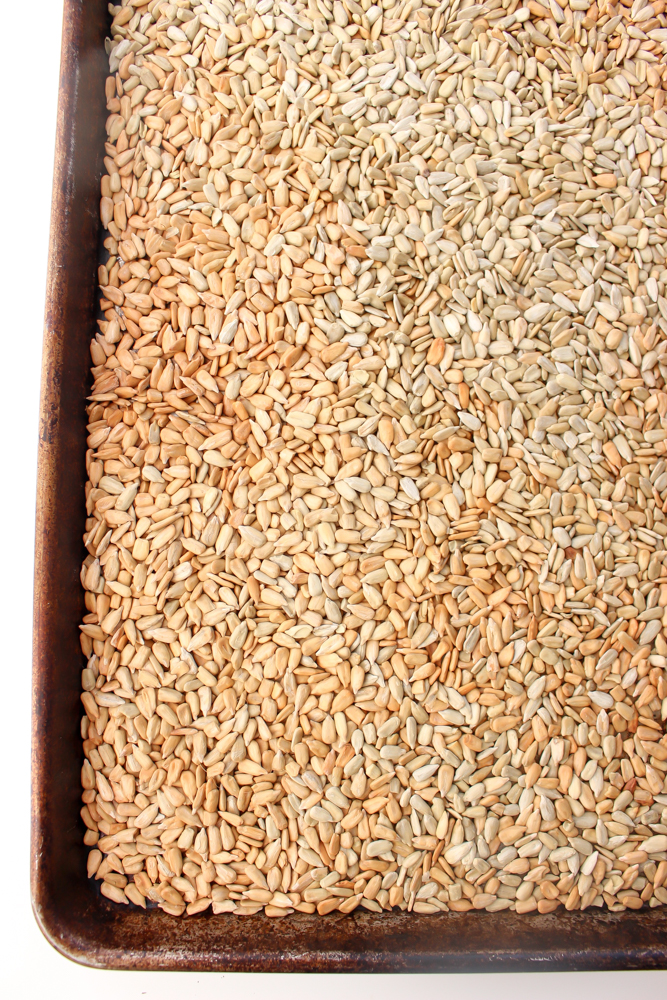
  • When roasting the nuts, you want them to be mostly brown and golden rather than gray. But watch to make sure that they don’t burn! (See the photos above for a before and after.) Well-roasted seeds are much easier to process than ones that are still partly raw.

  • The grinding process takes a bit of patience. If you let the machine run, the seeds will come together into a paste. There are more detailed instructions for the individual grinding steps in the recipe below. Be sure to read the recipe before starting this butter.

  • Storage: I store this seed butter in the fridge because I’ve read that flax and chia (and seeds in general) tend to get rancid quickly when left vulnerable to moisture and heat in the cabinet). The cold tightens the butter considerably, but 20 seconds in the microwave makes the butter easily spreadable again.

Sunflower seed butter | Me & The Moose. This homemade sunflower seed butter tastes so much better than store-bought and is fortified with flax and chia seeds. #meandthemoose #sunflowerseedbutter #lunchboxideas #lunch #lunchbox #sunflowerseedreci…

Sunflower seed butter with flax and chia

Yield: 2-2¼ cups 
Time: 30-35 minutes

3 cups raw sunflower seeds
4-6 Tbsp coconut oil, melted
2 Tbsp maple syrup
2 tsp vanilla extract
1 tsp cinnamon
1 tsp flaky sea salt
3 Tbsp each chia seeds
3 Tbsp whole flax seeds

  1. Preheat the oven to 350. Spread the raw sunflower seeds out on a large sheet pan. Roast for 5 minutes and shake the tray. Roast for 2-3 minutes more, checking to make sure that the seeds don’t burn. When the seeds are uniformly more golden brown than gray, they’re ready for processing.

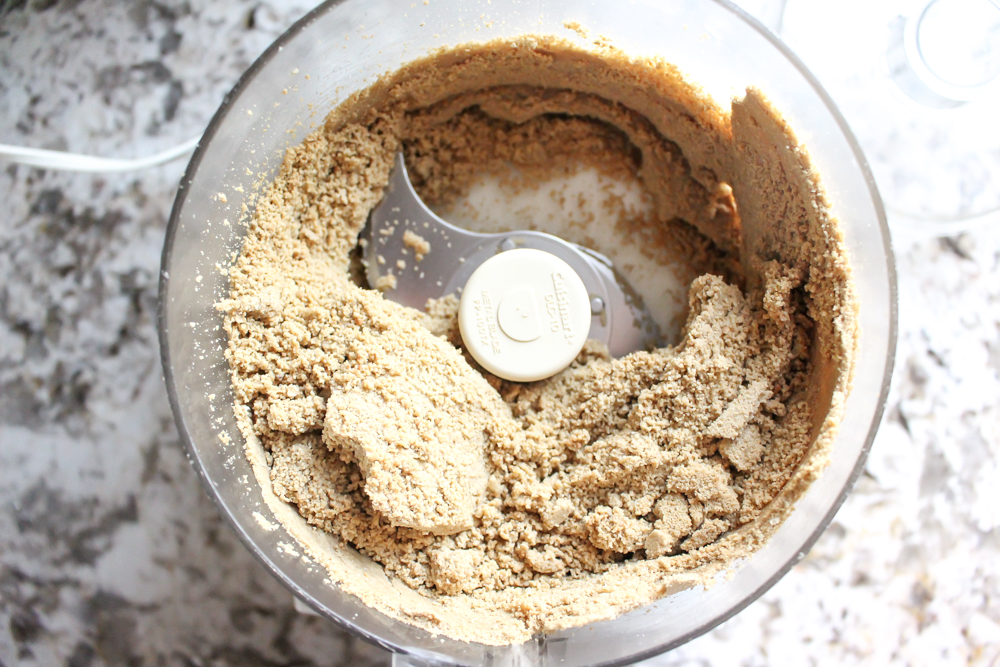
  2. Add the roasted seeds to a large food processor and grind for 2 minutes. The seeds will break up and look very dry and like breadcrumbs.

  3. Add 2 Tbsp of coconut oil and the maple syrup and process for 2 more minutes. At this stage, the seeds start coming together in a large slow-moving glacier of seed butter. Scrape down the sides and break up the glacier as necessary. It will still feel dry and crumbly when you break up the glacier.

  4. Add the vanilla and cinnamon and process again, this time letting the machine run. Let it go for at least 3-4 minutes before adding more coconut oil as the heat of the processor and the continued grinding will start to make the butter smoother and wetter. The glacier of seed butter will still be forming, but will be spinning around the food processor much faster.

  5. After that 3-4 minutes, and while the food processor is running, add the other 2-4 Tbsp of coconut oil to achieve a silky consistency. Don’t add more maple syrup or water because it will make the seed butter stick together and clump more instead of smoothing it out.

  6. The whole process of grinding the seeds into a smooth butter usually takes between 15 and 20 minutes (including stopping add ingredients), so patience is key.

  7. Transfer to a large bowl and stir in the sea salt, chia seeds and flax seeds and stir well.

Sunflower seed butter | Me & The Moose. This homemade sunflower seed butter tastes so much better than store-bought and is fortified with flax and chia seeds. #meandthemoose #sunflowerseedbutter #lunchboxideas #lunch #lunchbox #sunflowerseedreci…

White bean chicken chili

Who needs a quick, easy, healthy, and cheap dinner that everyone will eat, is totally customizable, and is gluten and dairy free? EVERYONE, that’s who. And we ESPECIALLY need it this week.

White bean chicken chili | Me & The Moose. This easy, fast, cheap, and healthy meal also happens to be gluten and dairy free and a crowd pleaser for game day or a weekday. #meandthemoose #quickdinner #dinner #dinnerrecipes #glutenfreerecipes #da…

Our family just flew back from 6 days in Key West, FL and boy are my arms, legs, eyes, lungs, feet, teeth, hair, elbows, knees, and brains tired. See what I did there?

Can we talk about traveling with kids? I love it and hate it. On the one hand, it’s really nice to get out of the regular grind and say “yes” to things like daily ice cream and night swimming. That’s how memories are made, people!

But some of parenting’s stressors are portable. And some of those stressors are actually worse when saying “yes” comes with a side of fatigue and crashing blood sugar.

This particular vacation was amazing fun sandwiched between two slices of crazy-travel bread thanks to oversleeping for our 6:30 am flight on the way there, and then changing our flights twice and driving four hours at 10 pm to beat an ice and snow storm on our way home.

We also paid an arm and a leg for a 3-hour nap in an airport hotel that was the grossest place I’ve ever stayed. It was less like a hotel room and more like a bunch of pink-eye germs and bed bugs holding hands. Shudder. M commented, “It smells like a lot of people were sweating in here.”

But I fully acknowledge that we’re so lucky to be able to travel and are so grateful to the TSA and FAA employees who are currently working really hard without pay. We tried to make meaningful eye contact while saying “Thank you” over and over in securlty.

That said, I’m exhausted.

White bean chicken chili | Me & The Moose. This easy, fast, cheap, and healthy meal also happens to be gluten and dairy free and a crowd pleaser for game day or a weekday. #meandthemoose #quickdinner #dinner #dinnerrecipes #glutenfreerecipes #da…

So, let’s get to this easy, all-purpose chili.

It is deceptively complex considering how quickly it comes together. You can certainly let it simmer for an hour to deepen the flavor if you like, but sauteing the spices and using a rich homemade stock if possible, will achieve the same depth of flavor in less time.

And if you put out every possible topping, I’ve found that this dish makes just about everyone happy.

White bean chicken chili | Me & The Moose. This easy, fast, cheap, and healthy meal also happens to be gluten and dairy free and a crowd pleaser for game day or a weekday. #meandthemoose #quickdinner #dinner #dinnerrecipes #glutenfreerecipes #da…

White bean chicken chili  

1 Tbsp olive oil
1 small white onion, chopped
2-3 large cloves garlic
1 tsp chili powder
½ tsp coriander
1 tsp cumin
1 tsp kosher salt
2 lbs ground chicken breast
1½ cups chicken stock (more, if you like a saucier chili)
1 cup chopped tomatoes
8 oz chopped roasted green chilis (2 small cans)
15 oz can white beans
Toppings: Cheese, scallions, avocado, sour cream, and pickled jalapenos

Heat oil over a medium flame in a large pot. Add the onion and sauté until fragrant, about 3-4 minutes.

Add the garlic and sauté again until fragrant, about 1 minute.

Add the spices and salt and cook, stirring frequently, for 1 more minute.

Add the chicken and sauté until no pink remains.

Add the stock and tomatoes and stir. Bring to a boil, reduce heat to low, and simmer for about 15-20 minutes until the sauce has thickened slightly.   

If the sauce isn’t thickening to your liking after 20 minutes, combine 1 Tbsp flour and 1-2 Tbsp of water and stir vigorously to combine. (I usually use a lidded jar and shake the water and flour together.) Add to the sauce and simmer for another 5 minutes.

Add the chilis and the white beans and bring back to a boil to head through.  

Garnish with cheese, scallions, avocado, sour cream, yogurt, pickled jalapenos, cilantro, etc. Whatever your chili loving heart desires.

Serve immediately.

Yield: 7-8 cups (about 5 grown-up servings)

White bean chicken chili | Me & The Moose. This easy, fast, cheap, and healthy meal also happens to be gluten and dairy free and a crowd pleaser for game day or a weekday. #meandthemoose #quickdinner #dinner #dinnerrecipes #glutenfreerecipes #da…

Romesco hummus

Romesco hummus | Me & The Moose. This easy, healthy snack makes plain, boring hummus more interesting by adding vegetables. Who doesn’t want that? #meandthemoose #hiddenveggies #hummusrecipes #hummus #romescohummus #glutenfree #nutfree #dairyfree #snacks #snackrecipes

Romesco hummus is like roasted red pepper hummus, but make it glamour. There’s smoky paprika for some mystery and cayenne for a little kick and tomato for a little sweetness. It’s an all-around treat and game-changing snack.

Take me to the hummus!

Romesco hummus | Me & The Moose. This easy, healthy snack makes plain, boring hummus more interesting by adding vegetables. Who doesn’t want that? #meandthemoose #hiddenveggies #hummusrecipes #hummus #romescohummus #glutenfree #nutfree #dairyfree #snacks #snackrecipes

It’s happening, people. The “new year, new anxiety” phase of January has begun.

Can we talk about having a second child? I have mixed thoughts about it. Sometimes it feels like a member of our family is missing. And both my husband and I have siblings and love it (both the idea of having a sibling and the actual people that our siblings are). AND being an aunt is one of my very favorite things. I don’t want M to miss out on any of that.

But it took so long for us to get pregnant with M, that I’ve been mentally preparing to have one child since he was born.

And the fact is, it took me a long time to feel like myself again both mentally and physically after having M and I’m scared to give that up. I wouldn’t necessarily claim that we’ve “hit our stride” as a family, but we’ve achieved a sort of equilibrium, so the idea of purposely throwing a HUGE wrench into the works with another baby is very scary.

I’m also scared about the change to M’s life. He’s actually cried a few times because he doesn’t have a sibling, but I know that his sadness is purely theoretical. When another little person actually takes up our time, he’ll be PISSED. I don’t want to ruin his life, you know?

But what about the joy a kid brings? And the funny family stories we’ll have in the future? And M will need someone to complain to about all of the mistakes we’ll inevitably make.

And here’s where the anxiety comes in: We are entering my 39th year of life, so my time to perseverate about having another child is swiftly coming to an end. UUUUUUUUGGGGGHHHHH.

What is your advice? Have any of you felt this way? How did you make the final decision? I NEED TO KNOW.

Anyhoo, I can’t think of a good segue, so HUMMUS.

Romesco hummus | Me & The Moose. This easy, healthy snack makes plain, boring hummus more interesting by adding vegetables. Who doesn’t want that? #meandthemoose #hiddenveggies #hummusrecipes #hummus #romescohummus #glutenfree #nutfree #dairyfree #snacks #snackrecipes

Hummus was one of M’s favorite snacks until…it wasn’t. He actually told me one day that he was “done” with hummus and carrots. Rude.

So I combined plain hummus with the veggies and spices from Romesco sauce, had him measure the ingredients and press the food processor buttons, and HUZZAH he likes hummus again.

To anyone wondering why they should make hummus rather than buying it in the store, I say, it’s truly so easy that a small child can do it (and did). Unlike regular Romesco sauce, this hummus is nut-free, so you don’t have to toast or roast anything. You don’t even need to chop because, food processor.

A couple of notes:

  • There is a lot of smoked paprika in this recipe, so start with 1/2 tsp and add more to taste if you prefer milder flavors.

  • I use a brand of roasted red pepper that comes in a tall, thin jar, so the peppers are really big. If your peppers are smaller, use two.

Romesco hummus | Me & The Moose. This easy, healthy snack makes plain, boring hummus more interesting by adding vegetables. Who doesn’t want that? #meandthemoose #hiddenveggies #hummusrecipes #hummus #romescohummus #glutenfree #nutfree #dairyfree #snacks #snackrecipes

Romesco hummus

Time: 10 minutes
Yield: 16 oz or about 2 cups

1 can chickpeas, drained
1 large roasted red pepper (or 2 smaller peppers)
2 Tbsp tomato paste
1 large garlic cloves
1/2-1 tsp smoked paprika
1 tsp sea salt
1/8 tsp cayenne (or more if you want more of a kick)
3 Tbsp tahini
1-2 Tbsp sherry or red wine vinegar

 Add all ingredients to a food processor and blend until smooth.

Sheet pan dinner: Mustard salmon with crispy lentils and green beans

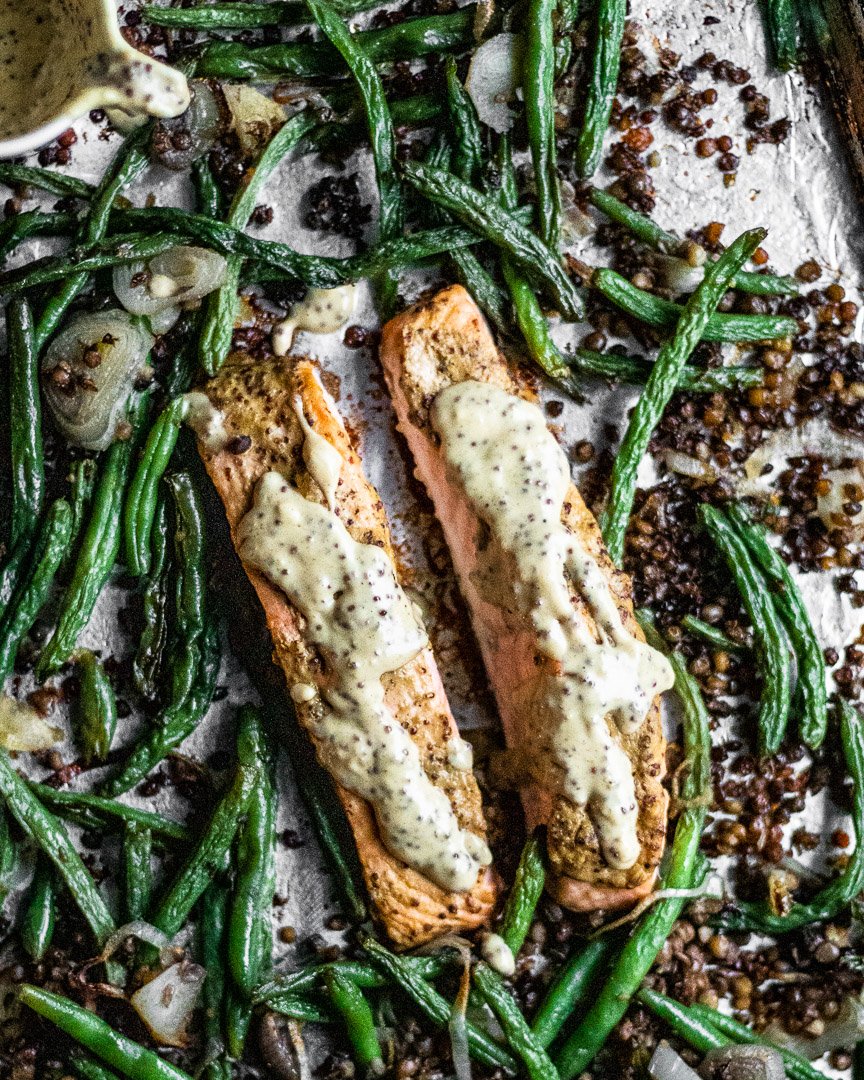
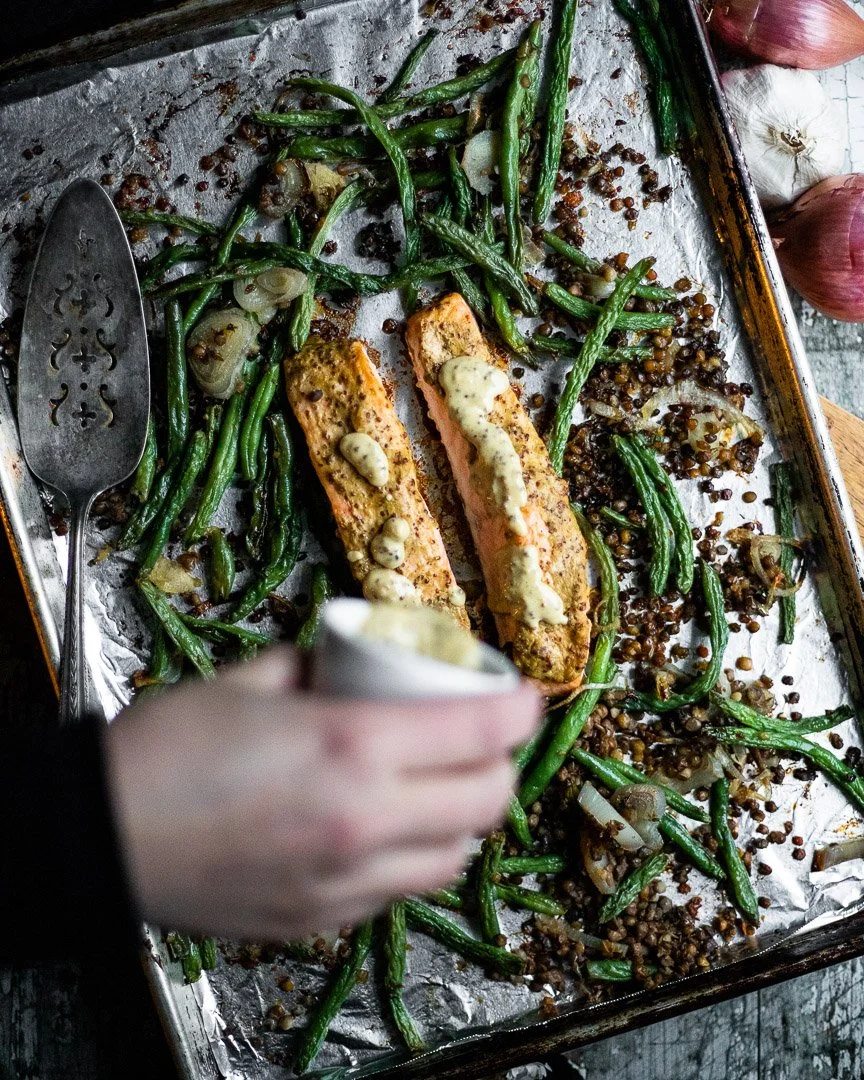
Sheet pan dinner: Mustard salmon with crispy lentils and green beans | Me & The Moose. This quick dinner is healthy, satisfying, and full of flavor. Supermarket shortcuts make it even easier. #meandthemoose #sheetpandinner #quickdinner #healthydinner #healthyrecipes #easyrecipes #salmon

This sheet pan dinner is as delicious as it is easy and the clean up is a snap. If any of your resolutions involve more cooking, this is one you should add to the list!

Take me to the recipe!

Sheet pan dinner: Mustard salmon with crispy lentils and green beans | Me & The Moose. This quick dinner is healthy, satisfying, and full of flavor. Supermarket shortcuts make it even easier. #meandthemoose #sheetpandinner #quickdinner #healthydinner #healthyrecipes #easyrecipes #salmon

Happy new year, all! Thanks for reading and cooking along with me this year. I hope you’ll stick around for 2019 too!

Are you all making resolutions this year?

There’s much talk about whether or not resolutions are a good move. I’ve historically used my resolutions as a way to punish myself for everything I think is wrong with me. And that feels like a negative way to start the year, no?

So, instead of resolving to eat “healthier,” I’m going to just make delicious food that emphasizes both deliciousness and nourishment. Staaarting….now!

Sheet pan dinner: Mustard salmon with crispy lentils and green beans | Me & The Moose. This quick dinner is healthy, satisfying, and full of flavor. Supermarket shortcuts make it even easier. #meandthemoose #sheetpandinner #quickdinner #healthyd…

Sheet pan dinner: Mustard salmon with crispy lentils and green beans | Me & The Moose. This quick dinner is healthy, satisfying, and full of flavor. Supermarket shortcuts make it even easier. #meandthemoose #sheetpandinner #quickdinner #healthydinner #healthyrecipes #easyrecipes #salmon

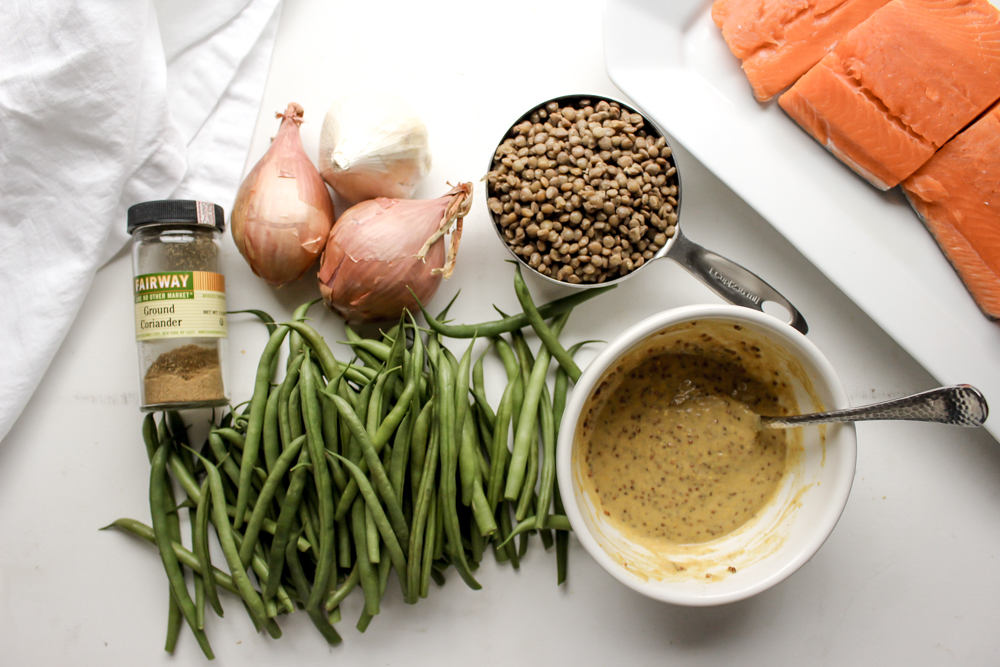
This sheet pan dinner is fast, easy, and requires minimal prep. You can also make it even simpler by using some store-prepped ingredients. I use pre-cooked lentils that are available at Trader Joe’s, Whole Foods, and other grocery stores in the refrigerated aisle.

I also opt for haricots vert over of straight green beans because you don’t have to trim the ends. Haricot vert are just a thinner and smaller variety of green beans. They can be more expensive, but if time is the priority, it may be worth the extra $1 or $2.

A couple of notes:

  • If using frozen salmon, thaw it before cooking. If cooking from frozen, the fish releases a lot of water, which affects the final texture of the vegetables and lentils.

  • Make sure you separate the sauce into two different bowls to reserve some for after the fish has cooked. You don’t want to dip your spoon or brush into the whole batch of sauce once you’ve touched the raw fish.

Sheet pan dinner: Mustard salmon with crispy lentils and green beans | Me & The Moose. This quick dinner is healthy, satisfying, and full of flavor. Supermarket shortcuts make it even easier. #meandthemoose #sheetpandinner #quickdinner #healthyd…

Sheet pan dinner: Mustard salmon with crispy lentils and green beans | Me & The Moose. This quick dinner is healthy, satisfying, and full of flavor. Supermarket shortcuts make it even easier. #meandthemoose #sheetpandinner #quickdinner #healthydinner #healthyrecipes #easyrecipes #salmon

Mustard salmon with crispy lentils and green beans

Time: About 25- 30 minutes
Yield:
4 servings

1.5-2 lbs salmon (about 4 medium fillets)
1 lb haricot vert or green beans (if using green beans, trim the edges)
1 cup cooked lentils
2 very large shallots (or 3-4 smaller ones), cut into 1/4 inch slices
2-3 Tbsp olive oil, plus more for the sheet pan underneath the salmon
2 large pinches kosher salt
Mustard sauce (recipe below)

Mustard sauce
3 Tbsp Dijon mustard
3 Tbsp grainy mustard
Zest of 1 medium lemon
1 Tbsp lemon juice (from ½ a lemon, reserve the leftover juice)
1 tsp coriander
1 Tbsp olive oil
1 large clove garlic, minced
2 Tbsp plain Greek yogurt
salt and pepper to taste

Preheat the oven to 425.

On a large rimmed sheet pan (about 13x18), mix together the green beans, sliced shallots, and cooked lentils. Toss with olive oil and salt and push to the sides of the pan.

Roast for about 7 minutes and remove from the oven.

While the veggies cook, make the mustard sauce. In a small bowl, mix together the sauce ingredient. I use a garlic press to really mince the garlic, but if cutting by hand, mince finely. Put half of the sauce into a separate bowl for later.

Once you remove the veggies from the oven, add some more olive oil to the center of the pan.

Place the salmon fillets skin-side down in the middle of the pan so that the skin is directly on the pan or foil.

Cover the flesh side of the fish fillets with about half of the mustard mixture and spread evenly. Reserve the rest of the mixture for later.

Roast the fish and veggies for 12-15 minutes, or until the salmon flakes easily with a fork and reads 145 on a thermometer.

Serve immediately.