Lemon and rosemary turkey and couscous en cocotte

Don’t be intimidated by the “en cocotte” portion of the title. It’s just French for “cooked in a covered pot that you can also use for serving.” An alternative translation is: How to cook a really good turkey breast the lazy way; no overnight brine, no basting, nothing.

Take me to the recipe!

Lemon and rosemary turkey and couscous en cocotte | Me & The Moose. This one-pot (ish) meal has a low and slow cooking time, but is mostly hands-off and a much faster way to make delicious turkey breast without brining or drying out the meat. #t…

A quick note before we talk about the ins and out of this recipe: Anyone who knows me, understands how very much I hate the word “moist.” (I refer to is as “the ‘M’ word.”) Even saying it in my head feels wrong. I’m not alone here, I know, but I do feel that I have a particularly strong reaction, which made my search for the easiest turkey cooking method particularly grueling. Because it’s damn near impossible to read a blog post, watch a video, or see a cooking show about poultry without people shouting it from the rooftops.

But figuring out this recipe made it all worth it! And I promise you, this is the easiest route to not-dry turkey.

Lemon and rosemary turkey and couscous en cocotte | Me & The Moose. This one-pot (ish) meal has a low and slow cooking time, but is mostly hands-off and a much faster way to make delicious turkey breast without brining or drying out the meat. #t…

I first learned about cooking “en cocotte” from an episode of Cook’s Country. They made “French Chicken in a Pot” and I wanted to try it with turkey. I’ve also wanted to make a version of the famous Greek Avgolemono Soup, which is broth thickened with a cooked grains and egg yolks, but soup isn’t always psychologically satisfying as a meal, you know?

Instead, I used the broth and egg yolks to thicken the grains instead of the other way around.

Lemon and rosemary turkey and couscous en cocotte | Me & The Moose. This one-pot (ish) meal has a low and slow cooking time, but is mostly hands-off and a much faster way to make delicious turkey breast without brining or drying out the meat. #t…

A couple of cooking notes:

  • After roasting the turkey, there should be about 1/4 of an inch of liquid at the bottom of the Dutch oven. If there isn’t, add another 1/4 cup of stock before cooking the couscous.

  • The only extra step in this recipe is to blend together some broth, egg yolks, and lemon juice to add to the cooked couscous. I really recommend using a blender EVEN THOUGH it’ll dirty another appliance. If you don’t get a really good emulsion of the liquids, you can end up with scrambled eggs rather than a rich, thick sauce over your couscous.

  • The oven temperature (275!) will seem very low and it is. But the Dutch Oven with a lid and an extra layer of foil really seals in the heat and moisture and cooks the turkey despite the low oven temperature. Our oven runs very hot, so I actually set it 10 degree lower.

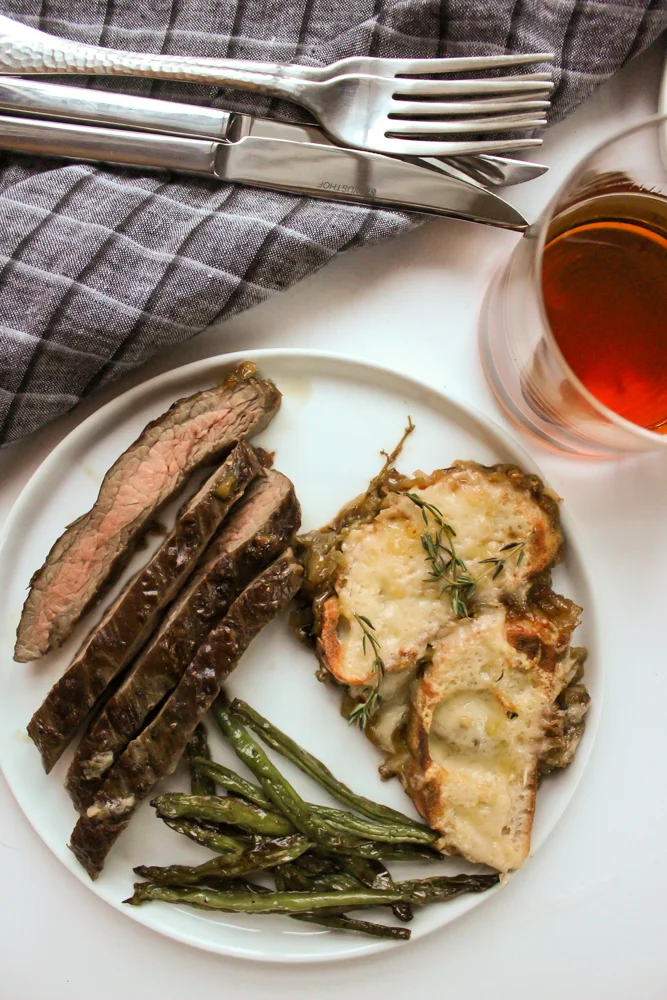
  • The only downside to this cooking method is that the steam softens the turkey skin. If you like crispy skin, just strip it off and seer it on a really hot skillet to crisp it back up.

  • I love serving this with a quick tzatziki sauce.

Lemon and rosemary turkey and couscous en cocotte | Me & The Moose. This one-pot (ish) meal has a low and slow cooking time, but is mostly hands-off and a much faster way to make delicious turkey breast without brining or drying out the meat. #t…

Lemon and rosemary turkey and couscous en cocotte

1 bone-in turkey breast, about 2 ½ lbs
2 Tbsp olive oil, divided
1 small onion (or ½ of a large onion), chopped
4-5 extra large garlic cloves, smashed and roughly chopped 
1 Tbsp fresh rosemary, minced (or 1 tsp dried)
1½ tsp smoked paprika
1 tsp kosher salt
4 cups low sodium chicken stock or water, divided
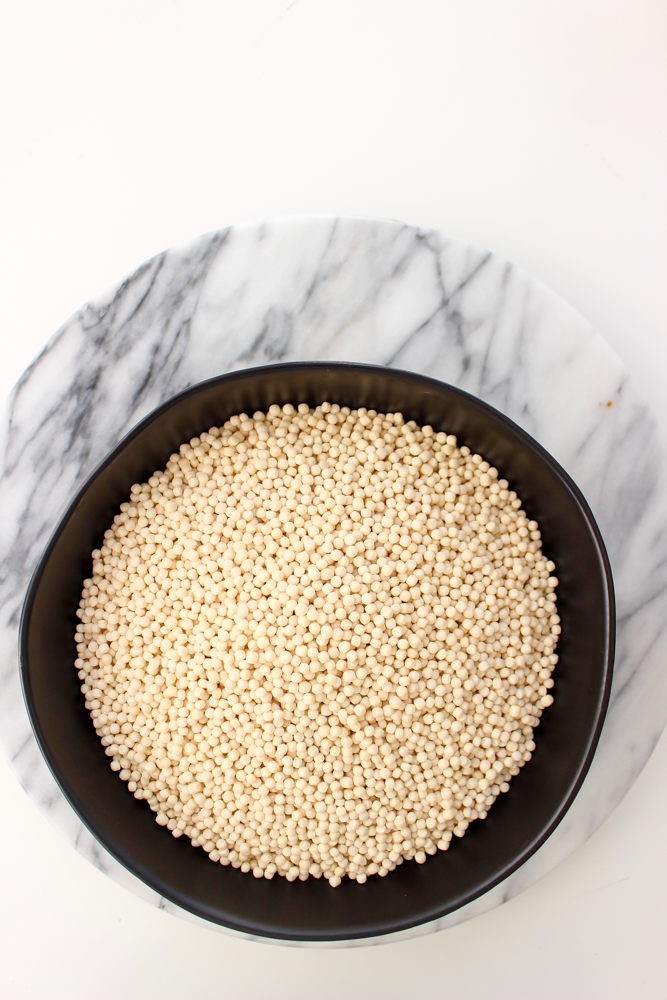
3 cups Israeli couscous  
2 egg yolks
1/3 cup lemon juice (juice of 2 large lemons)

Preheat the oven to 275.

In a large Dutch oven or oven safe pot with a lid, heat 1 Tbsp olive oil over medium high heat. Seer the turkey breast on the top, bottom, and both sides, adjusting the heat if the turkey browns too quickly or if the oil starts to spit uncomfortably. When browned all over (this should take about 10 minutes), remove to a plate.

Add 1 Tbsp of olive oil to the same Dutch oven and heat over a medium low flame for a few seconds. Saute the onion until translucent, about 3 minutes. Add the garlic and cook for 1 minute more. Add the rosemary, smoked paprika, and salt. Cook for 1 minute more until fragrant.

Turn off the heat.

Add the turkey back to the pan. Cover the top of the Dutch oven tightly with a large piece of tin foil and then top with the lid.

Bake for 1 hour. Check the internal temperature of the turkey with a thermometer in the thickest part. When the thermometer reads 165, the turkey is done. If the turkey isn’t up to temperature yet, return it to the oven and check it every 5-10 minutes to avoid overcooking.

While the turkey is cooking, blend together 1 cup of chicken stock, 2 egg yolks, and 1/3 cup of lemon juice. Set aside.

When the turkey is done, remove the Dutch oven and carefully take off the tin foil from its top (watch the steam!). Remove the turkey to a plate or cutting board and cover tightly with the tin foil. Let rest.

Add 3 cups of stock to the turkey cooking juices in the Dutch oven and bring to a boil. Add the couscous, reduce the heat to low, and simmer for 8-10 minutes, until the couscous has absorbed all of the stock. (Check after 4 minutes to make sure the couscous isn’t cooking too fast or sticking too much. If it is, turn down the heat.)

When the liquid is absorbed, add the broth/ egg yolk/ lemon juice combination. Stir it into the couscous and bring the mixture back to a boil. Once it boils, turn off the heat and stir a few more times.

Slice the turkey and serve with the couscous.

Yield: 5-6 large servings

Lemon and rosemary turkey and couscous en cocotte | Me & The Moose. This one-pot (ish) meal has a low and slow cooking time, but is mostly hands-off and a much faster way to make delicious turkey breast without brining or drying out the meat. #t…

French onion steak skillet

French Onion Steak Skillet | Me & The Moose. This one-pan meal is decadent enough for a special occasion, but quick and easy enough for a weeknight. #frenchonion #steak #valentinesdayrecipes #dinner #onepanmeal #quickrecipes #datenightrecipes

Valentine’s Day is on the horizon, folks. This is a holiday that I don’t particularly enjoy. If you’re not in a relationship or in one that’s complicated, it can feel like a giant middle finger. If you are in a relationship, it can be stressful and/or tedious to have a mandated celebration of your love. AND EXPENSIVE, AMIRIGHT? There’s definitely surge pricing for restaurants and babysitters. Bleh. I hate it.

So instead, we’ll put the kiddo to bed early, open a bottle of wine, and make this easy French Onion Steak Skillet that requires VERY little work and even less cleanup.

But even on non-holiday nights, if your kids like French Onion Soup or steak, they’ll dig in. No need to save this for a special, adults-only meal.

Also, I think I’ve finally cracked the code for getting GENUINELY caramelized onions (not fried, frizzled, or straight-up burned) in about 20 minutes. I know, I know. Most recipes claim that it takes 20 minutes when it actually takes an hour or more to get that deep uniform jammy brownness. Behold this before and after:

French Onion Steak Skillet | Me & The Moose. This one-pan meal is decadent enough for a special occasion, but quick and easy enough for a weeknight. #frenchonion #steak #valentinesdayrecipes #dinner #onepanmeal #quickrecipes #datenightrecipes

After a deep dive through Youtube videos and Cook’s Illustrated articles, I’ve achieved great results much faster than usual. Here are a few secrets to speeding up this otherwise slow process:

  1. Use a large pan with a tight fitting lid. You’ll melt butter and olive oil together and then cook the onions for 3 minutes at a time with the pan covered.

  2. Use medium high heat the whole time. You want the onions to brown and stick to the bottom of the pan just a little bit. If they stick too much and/or blacken rather than brown, turn the heat down slightly. If the onions aren’t sticking to the bottom, turn the heat up.

  3. Add water or stock every 3 minutes and scrape the browned bits off of the bottom and mix them into the onions while they’re cooking.

  4. Repeat the process: Cook 3 minutes over high heat/ add liquid/ scrape the browned bits/ cover and cook for 3 more minutes. After about 15-20 minutes, the onions will be done!

  5. Add 1/8 tsp baking powder at the very end to make the onions sweeter. You can’t add it at the beginning or the onions will break down too much, but adding it at the end lends just the right amount of jamminess.

French Onion Steak Skillet | Me & The Moose. This one-pan meal is decadent enough for a special occasion, but quick and easy enough for a weeknight. #frenchonion #steak #valentinesdayrecipes #dinner #onepanmeal #quickrecipes #datenightrecipes

French onion steak skillet

4 large onions, sliced in ¼ inch slices  
1 Tbsp olive oil
3 Tbsp butter, divided
5 large sprigs of thyme
2½ cups beef stock
¼ tsp salt
1/8 tsp baking soda
1 lb skirt steak, strip steak, flank steak, or tri-tip steak (basically any moderately thin steak) Salt and pepper to taste
½ large baguette, sliced
1 clove garlic, halved
3 oz gruyere cheese, thinly sliced or grated
Flaky sea salt

For the onions:
In a large, ovenproof skillet or pot with a tight fitting lid, heat the olive oil and 1 Tbsp of butter over a medium high flame. Add the onions and thyme, cover, and cook for 3 minutes. If the onions start to burn, turn the heat down slightly (but try to maintain a high heat). After 3 minutes, remove the cover, add ¼ cup of stock, and scrape the browned bits from the bottom of the pan and mix the onions around. Re-cover and cook for another 3 minutes, and then repeat the stock/scrape/mix process. Repeat this 3-minute process until the onions are uniformly soft and brown, about 15-20 minutes.

Turn off the heat and mix in ¼ tsp kosher salt and 1/8 tsp of baking soda. Remove the onions to a separate plate and wipe out the pot.

For the skillet:
Whole the onions are cooking, slice the bread and toast lightly in the toaster. Rub the raw garlic over one side of the bread. Shred the gruyere. Set aside.

When the onions are done and removed to another container, heat the broiler to high.

Melt the other 2 Tbsp of butter in your wiped-out skillet over high heat. Sear the steak for about 3-4 minutes per side. While the steak is seering on one side, season with salt and pepper. Repeat when you flip to the other side.

Turn off the heat and add the cooked onions back to the pan.

Pour 3-4 Tbsp of stock over the onions in the pan. Nestle the slices of bread in the onions around the steak and top with cheese.

Place the entire pan under the broiler until the cheese is bubbly and slightly browned.

Slice the steak to test doneness. Sprinkle with more flaky sea salt and fresh thyme sprigs.


Yield: 2 grown up and 2 kid servings

French Onion Steak Skillet | Me & The Moose. This one-pan meal is decadent enough for a special occasion, but quick and easy enough for a weeknight. #frenchonion #steak #valentinesdayrecipes #dinner #onepanmeal #quickrecipes #datenightrecipes

White bean chicken chili

Who needs a quick, easy, healthy, and cheap dinner that everyone will eat, is totally customizable, and is gluten and dairy free? EVERYONE, that’s who. And we ESPECIALLY need it this week.

White bean chicken chili | Me & The Moose. This easy, fast, cheap, and healthy meal also happens to be gluten and dairy free and a crowd pleaser for game day or a weekday. #meandthemoose #quickdinner #dinner #dinnerrecipes #glutenfreerecipes #da…

Our family just flew back from 6 days in Key West, FL and boy are my arms, legs, eyes, lungs, feet, teeth, hair, elbows, knees, and brains tired. See what I did there?

Can we talk about traveling with kids? I love it and hate it. On the one hand, it’s really nice to get out of the regular grind and say “yes” to things like daily ice cream and night swimming. That’s how memories are made, people!

But some of parenting’s stressors are portable. And some of those stressors are actually worse when saying “yes” comes with a side of fatigue and crashing blood sugar.

This particular vacation was amazing fun sandwiched between two slices of crazy-travel bread thanks to oversleeping for our 6:30 am flight on the way there, and then changing our flights twice and driving four hours at 10 pm to beat an ice and snow storm on our way home.

We also paid an arm and a leg for a 3-hour nap in an airport hotel that was the grossest place I’ve ever stayed. It was less like a hotel room and more like a bunch of pink-eye germs and bed bugs holding hands. Shudder. M commented, “It smells like a lot of people were sweating in here.”

But I fully acknowledge that we’re so lucky to be able to travel and are so grateful to the TSA and FAA employees who are currently working really hard without pay. We tried to make meaningful eye contact while saying “Thank you” over and over in securlty.

That said, I’m exhausted.

White bean chicken chili | Me & The Moose. This easy, fast, cheap, and healthy meal also happens to be gluten and dairy free and a crowd pleaser for game day or a weekday. #meandthemoose #quickdinner #dinner #dinnerrecipes #glutenfreerecipes #da…

So, let’s get to this easy, all-purpose chili.

It is deceptively complex considering how quickly it comes together. You can certainly let it simmer for an hour to deepen the flavor if you like, but sauteing the spices and using a rich homemade stock if possible, will achieve the same depth of flavor in less time.

And if you put out every possible topping, I’ve found that this dish makes just about everyone happy.

White bean chicken chili | Me & The Moose. This easy, fast, cheap, and healthy meal also happens to be gluten and dairy free and a crowd pleaser for game day or a weekday. #meandthemoose #quickdinner #dinner #dinnerrecipes #glutenfreerecipes #da…

White bean chicken chili  

1 Tbsp olive oil
1 small white onion, chopped
2-3 large cloves garlic
1 tsp chili powder
½ tsp coriander
1 tsp cumin
1 tsp kosher salt
2 lbs ground chicken breast
1½ cups chicken stock (more, if you like a saucier chili)
1 cup chopped tomatoes
8 oz chopped roasted green chilis (2 small cans)
15 oz can white beans
Toppings: Cheese, scallions, avocado, sour cream, and pickled jalapenos

Heat oil over a medium flame in a large pot. Add the onion and sauté until fragrant, about 3-4 minutes.

Add the garlic and sauté again until fragrant, about 1 minute.

Add the spices and salt and cook, stirring frequently, for 1 more minute.

Add the chicken and sauté until no pink remains.

Add the stock and tomatoes and stir. Bring to a boil, reduce heat to low, and simmer for about 15-20 minutes until the sauce has thickened slightly.   

If the sauce isn’t thickening to your liking after 20 minutes, combine 1 Tbsp flour and 1-2 Tbsp of water and stir vigorously to combine. (I usually use a lidded jar and shake the water and flour together.) Add to the sauce and simmer for another 5 minutes.

Add the chilis and the white beans and bring back to a boil to head through.  

Garnish with cheese, scallions, avocado, sour cream, yogurt, pickled jalapenos, cilantro, etc. Whatever your chili loving heart desires.

Serve immediately.

Yield: 7-8 cups (about 5 grown-up servings)

White bean chicken chili | Me & The Moose. This easy, fast, cheap, and healthy meal also happens to be gluten and dairy free and a crowd pleaser for game day or a weekday. #meandthemoose #quickdinner #dinner #dinnerrecipes #glutenfreerecipes #da…

Almond butter quinoa muffins

IMG_8346.jpg

What these muffins have: Good fats, protein, Omega-3s, deliciousness.

What these muffins don't have: Gluten, dairy, refined sugar, wheat, eggs, soy.

Bonus feature: The muffins only require one bowl!

IMG_8312.jpg

The new school year already started for lots of the country, but here in CT, M's preschool starts again on Monday. I've been thinking about quick ways to begin our day with protein that don't require cooking in the morning. These muffins are the answer!

Half of the flour is ground quinoa, which has lots of protein. The other half is oatmeal. I originally made these muffins with almond flour instead of oats for even more protein, but the almond flour was so dense that the muffins stuck to the roof of your mouth. You could just feed your kid a spoonful of almond butter and save yourself the trouble.

IMG_8323.jpg

With the oatmeal, the muffins are still substantial, but they're no longer dense. They're actually a smidge crumbly because I omitted eggs and any other binding agent. I wanted them to stay vegan and I don't always have the patience to make a flax egg. Letting them cool completely before eating them made them sturdier too. 

IMG_8325.jpg

For the first day of school, I thought it might be nice to add some blueberry chia jam and a quick icing to make the muffins more special. (I also called them breakfast cupcakes, which went over VERY WELL.) The jam is simple and free of any added sugar. I used cream cheese and maple syrup for my frosting, but you could also use coconut cream or a pre-made dairy-free topping.

You could also mix the chia jam with some yogurt for a delicious breakfast for the younger set (or the parental set, if I'm honest).

If you're avoiding nuts, substitute coconut or rice milk for the almond milk and use sunflower seed butter in place of the almond butter. Still delicious!

Important note: These muffins are best when fresh, so I recommend freezing 3/4 of the batch and then either defrosting a serving at night for breakfast the next morning, or toasting a frozen one right before eating it.


Almond butter quinoa muffins

2 large mashed banana
1 cup creamy natural almond butter, well mixed (or nut butter or seed butter of your choice)
½ cup maple syrup
¼ cup unsweetened vanilla almond milk (or rice, coconut, or other non-dairy milk of choice)
1 Tbsp vanilla extract
1 cup quinoa flour
1 cup quick oats
½ tsp salt
1½ tsp baking powder
1 tsp baking soda
1 tsp pie spice (or cinnamon)
2 tsp apple cider vinegar

Preheat oven to 350.

In a large bowl, mash the bananas. Add the almond butter, maple syrup, almond milk, and vanilla extract and mix well.

Add the flours, salt, baking powder, baking soda, and spices. Mix well. Add the apple cider vinegar and mix again. Let the mixture sit while you prep the muffin tin and prepare the jam and icing (if using).

When ready, spoon the mixture into your muffin tin until each opening is half full.

Bake for 12-14 mins or until the tops turn golden brown and the muffins are firm to the touch.

Let cool completely in the muffin tin before serving.

Yield: 18 muffins


For the Blueberry chia jam:
1 pint blueberries
1 ½ Tbsp chia seeds

Put the blueberries into a small sauce pan and cook over a medium low flame until the berries have broken down and become syrupy, about 15 minutes.

Let cool for 5 minutes and add the chia seeds. Mix well.

Place the mixture in the refrigerator for 10-15 minutes or until ready to use.

Yield: 1 Tbsp per muffin


For the frosting (optional):
2 ¼ cups whipped cream cheese
6 Tbsp maple syrup

Mix the cream cheese and maple syrup well with a spatula. The mixture will look curdled at first. Continue mixing until the two ingredients have come together. Refrigerate until ready to use.

Yield: 2 Tbsp per muffin

IMG_8335.jpg
IMG_8348.jpg

Kitchen clambake

IMG_7794.jpg

What says summer more than a clambake? NOTHING! Well, maybe BBQ chicken, ice cream, popsicles, hamburgers, hotdogs, corndogs, corn, tomatoes, strawberries, blueberries, s'mores...you get the picture. But, clambakes are pretty darn summery. And did you know how easy they are? Super easy.

We've been using Martha Stewart's method for years and it's a pretty no-fail recipe as long as you cook things in the right order. However, Martha's recipe is HUGE and requires an extra large pot, which we don't have. Also, there are only three of us. So, I've scaled this one back and added some more tips to make sure you aren't overcooking any of the seafood.

IMG_7796.jpg

Also, this meal is so so quick to prepare and easy to clean up, leaving more time for all things summer.

IMG_7788.jpg

A couple of notes:
- Feel free to sub in water or stock instead if you want to avoid alcohol. But rest assured that the booze cooks out with the heat AND, the beer is only there for flavoring in the steam; You aren't actually eating it.
- Use the smallest potatoes you can find. If you have even golf ball sized potatoes, I would halve or quarter them to ensure that they cook enough.
- Clean the clams or mussels well. I like to put them all in a large pot of cool water a few hours before we cook them to let the shells open to release the sand.
- Swap in mussels for the clams or use a combination of both, but only use 1 lb. You can also use scallops, squid, or octopus in place of, or in combination with, the shrimp. I don't always love steaming those three because there's a thin margin of error for overcooking and turning them really tough, but if you like their flavor, go for it! But also use a total of 1 lb with those or a combination. 
- Don't skip the garlic butter for serving. This recipe is great without it, but the garlic butter takes it right over the top.
- For a dairy-free option, use clarified butter instead of regular butter. 

IMG_7782.jpg

Stovetop clambake

1 large onion
3 cloves garlic, smashed
1 cup beer
1 cup water
1 tsp sea salt
1 lb small potatoes (if slightly bigger, like the size of a golf ball, quarter the potatoes before cooking) 
8 oz sausage, cut into chunks (whatever your favorites are: I like chorizo or andouille. Just make sure it’s in a casing)
2 lobster tales (about 8-10 oz total)
1 lb clams or mussels (or a combination)
2-3 ears of corn cut in half or thirds
1 lb shrimp, in or out of the shell

4 Tbsp unsalted butter
1 large garlic clove, minced
Fresh parsley (optional; I left it out because I generally dislike parsley)
1 large lemon
Old bay seasoning

Chop the onions and smash the garlic. Add to a large pot with beer, water, and salt. Bring to a boil. Reduce heat to medium. (You still want some vigorous bubbling, but you don’t want too much of the liquid to evaporate.) Cover with a steamer basket (or, as we did, a small pizza sheet because we couldn't find the steamer basket. Whoops.)

Add the potatoes, sausage, and lobster tails to the steamer. Cook for 5-6 minutes until the shells start to turn orangey red.

Add the clams (or other hard-shelled seafood like mussels) and the corn. Steam for another 6-8 minutes until the shells open. Discard any shells that remain closed.

Add the shrimp (or other soft shelled or de-shelled seafood) and cook for about 4 more minutes until the shrimp is pink all over.  

While making the seafood, melt the butter in a ramekin and add the chopped garlic and parsley (if using). Stir to combine and set aside.

Dump out the seafood, veggies, and sausage onto a large, parchment-covered sheet pan. Sprinkle with old bay seasoning to taste. Serve with lemon wedges, extra old bay, and garlic butter.

Yield: A lot. This recipe comfortably feeds 2 adults and 2 kids, likely with leftovers.

IMG_7790.jpg
IMG_7799.jpg