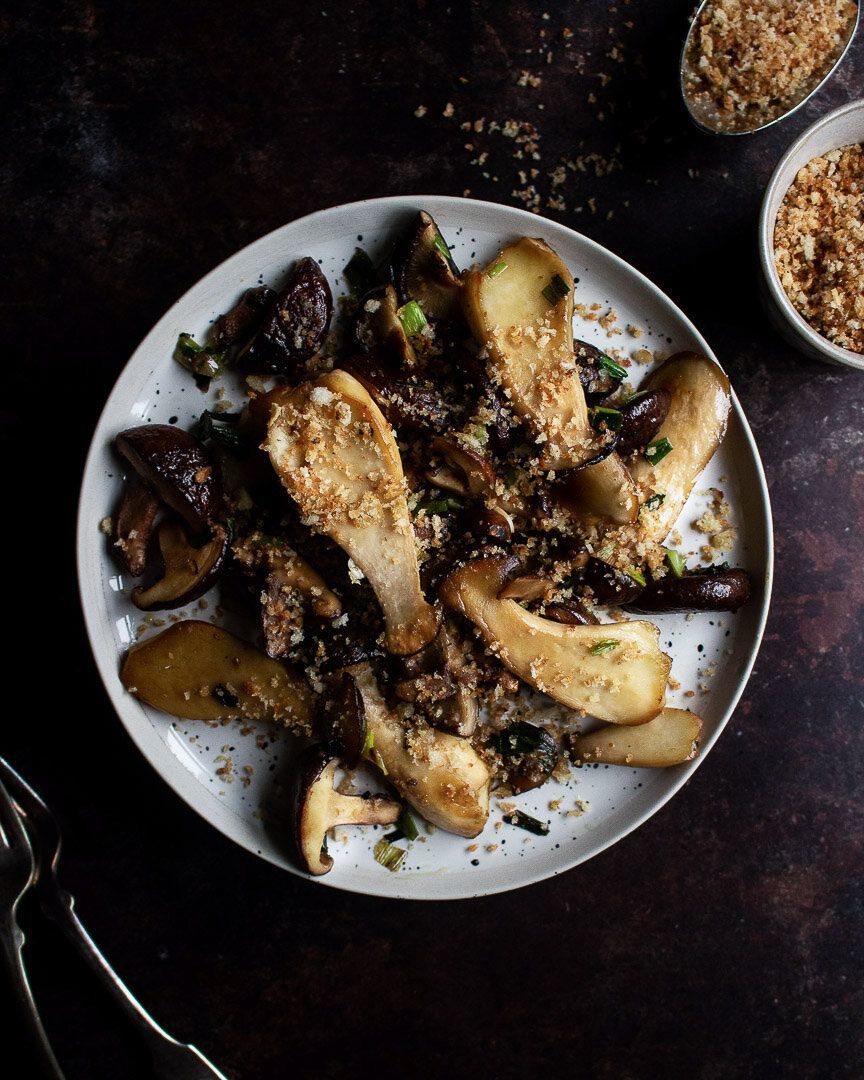
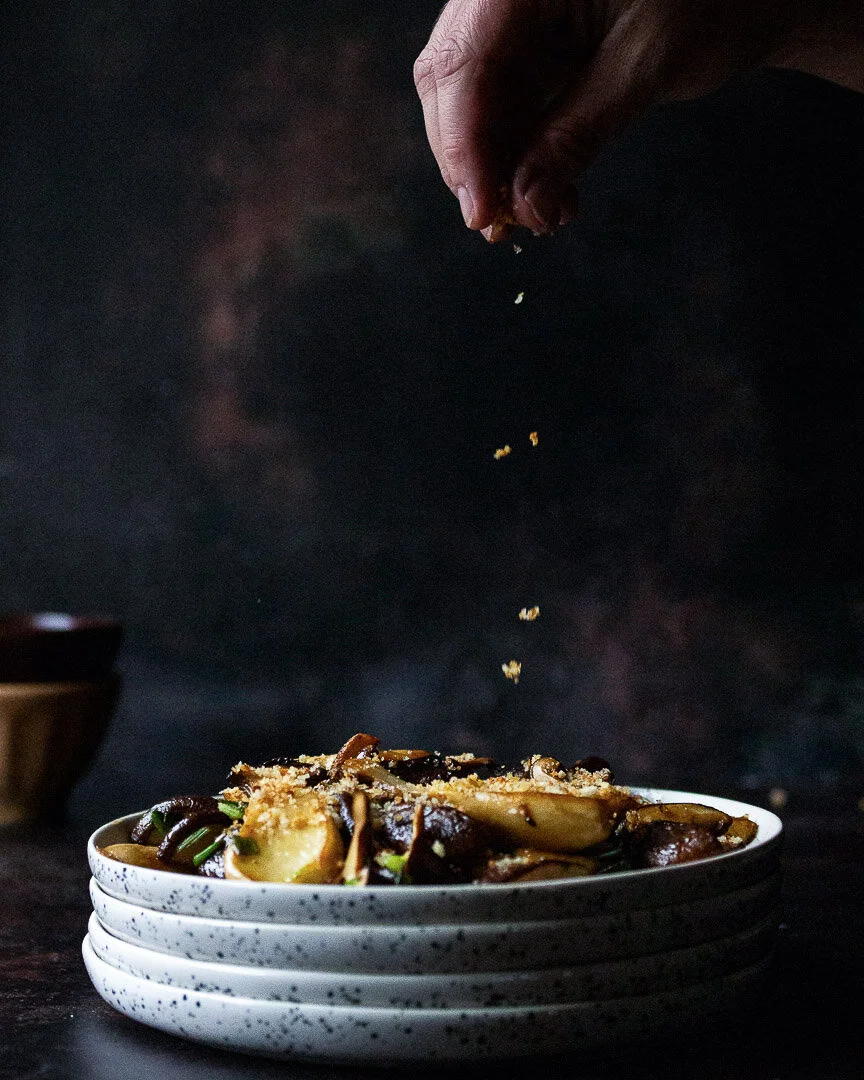
Magical breadcrumbs with mushrooms and scallions
The breadcrumbs are the star of this show, but don’t sleep on the mushrooms and scallions either. A simple, make-ahead side dish that’s fast, easy, and relatively healthy, but seems just the opposite!
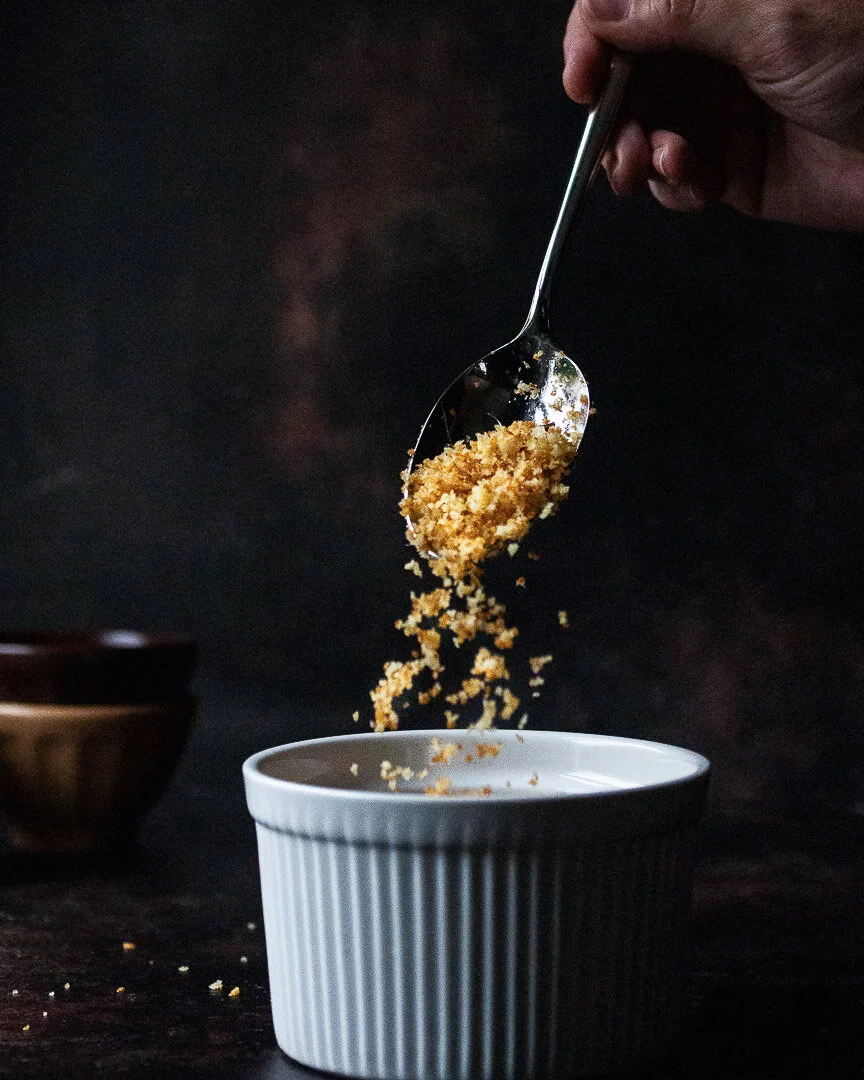
First things first, we have to talk about these magical breadcrumbs. What could be so great about a humble breadcrumb, you might ask? I’ll tell you!
They’re crunchy, salty, briny, and aromatic and elevate anything they top. Using panko maximizes the crispiness while the anchovies add a salty, funky note and the garlic lends a spicy bite. We bathe everything in a little olive oil or butter to mildly tame the funk and the bite while increasing the crunch. The results: magical.
There are other fantastic things about these breadcrumbs too: Sub them in for breading or croutons and they make any dish lighter and easier to prepare. They also stay crispy in the fridge for up to 4 days, so make them in advance and top any side dish just before serving.

For this dish, I’ve used the breadcrumbs to top this umami bomb of mushrooms, scallions, butter, and soy sauce. Each time I’ve made these mushrooms, we’ve INHALED them. This dish is simple, quick, and tastes so much more complex than its humble ingredients would suggest.
A quick note: This is a relatively small recipe because I’m guessing (hoping, encouraging, BEGGING) that we’re all having small Thanksgiving meals this year, but if you’re cooking for a (socially distanced) crowd, definitely increase the mushroom portion of this recipe. You’ll have more than enough breadcrumbs with the measurements given.
Also: Be judicious with the salt in this recipe. We are SALT LOVERS in this house, but the anchovies are so salty that we didn’t really need much more than the big pinch of sea salt that I add while cooking the mushrooms. But you do you.
Magical breadcrumbs with mushrooms and scallions
Time: 10 minutes for the breadcrumbs, 12 minutes for the mushrooms, all active
Yield: About 1 1/2 cups of breadcrumbs (depending upon how “heaping” your cup of panko is), 3 adult side servings of mushrooms (but to be fair, I’ve eaten all of the mushrooms in one sitting topped with a runny egg for lunch)
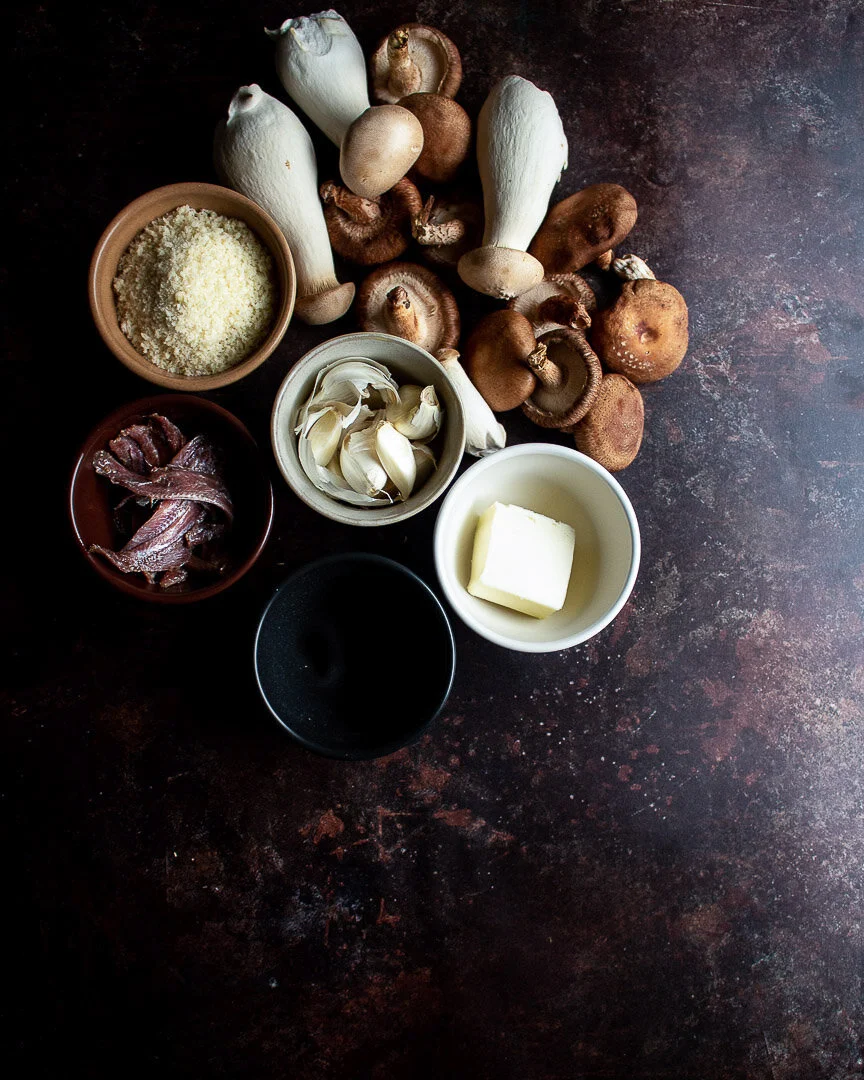
Mushrooms and scallions:
2 Tbsp olive oil
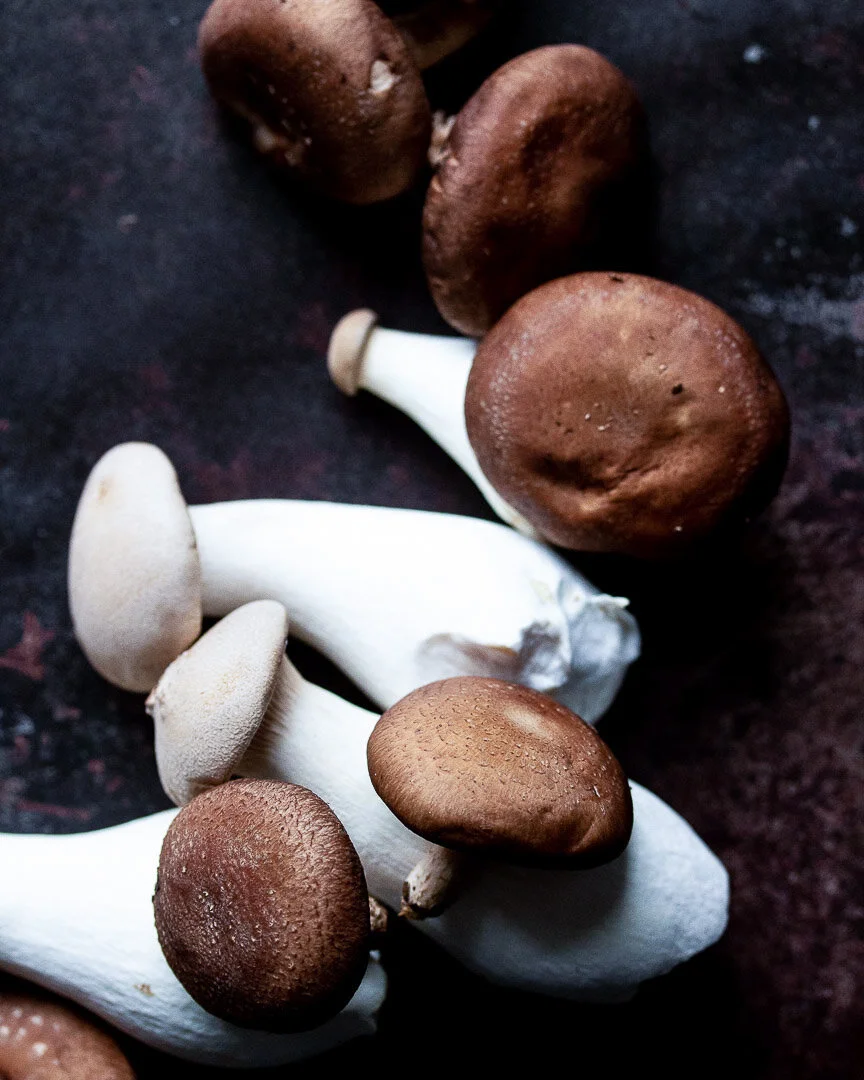
8 oz mushrooms (any variety, about two containers)
Large pinch of salt
4 large scallions, roughly chopped
1 Tbsp butter
1/2-1 tsp soy sauce, to taste
1/4- 1/2 cup Magical breadcrumbs (recipe below), to taste
Flaky sea salt, to taste
Heat the olive oil over a medium flame. When hot, sear the mushrooms on one side and then shake the pan and sear the other side. Cook, shaking the pan occasionally, until the mushrooms turn a darker, golden color, about 5 minutes. If cooking too fast, turn down the heat. Season with a large pinch of salt.
Add the scallions and cook until they begin to wilt and soften, about 4-5 minutes.
If, during the cooking of the mushrooms and scallions, the pan feels too dry or the veggies start to stick, add a little bit more olive oil. But keep in mind that the mushrooms may release their juices as they cook more."**
**Depending on the type of mushrooms you use, they may release a lot of water. If this happens, you can either turn up the flame and cook, stirring frequently to avoid burning, until the liquid has evaporated. Or, if your mushrooms and scallions are nearly cooked and there’s still a lot of water in the pan, drain it before adding the butter.
When the mushrooms and scallions are cooked, turn the flame all the way down. Add the butter. When it’s melted, add the soy sauce and stir to coat. Turn off the flame. Taste and add more soy sauce if necessary.
Top with breadcrumbs (recipe below) and flaky sea salt if necessary, just before serving.
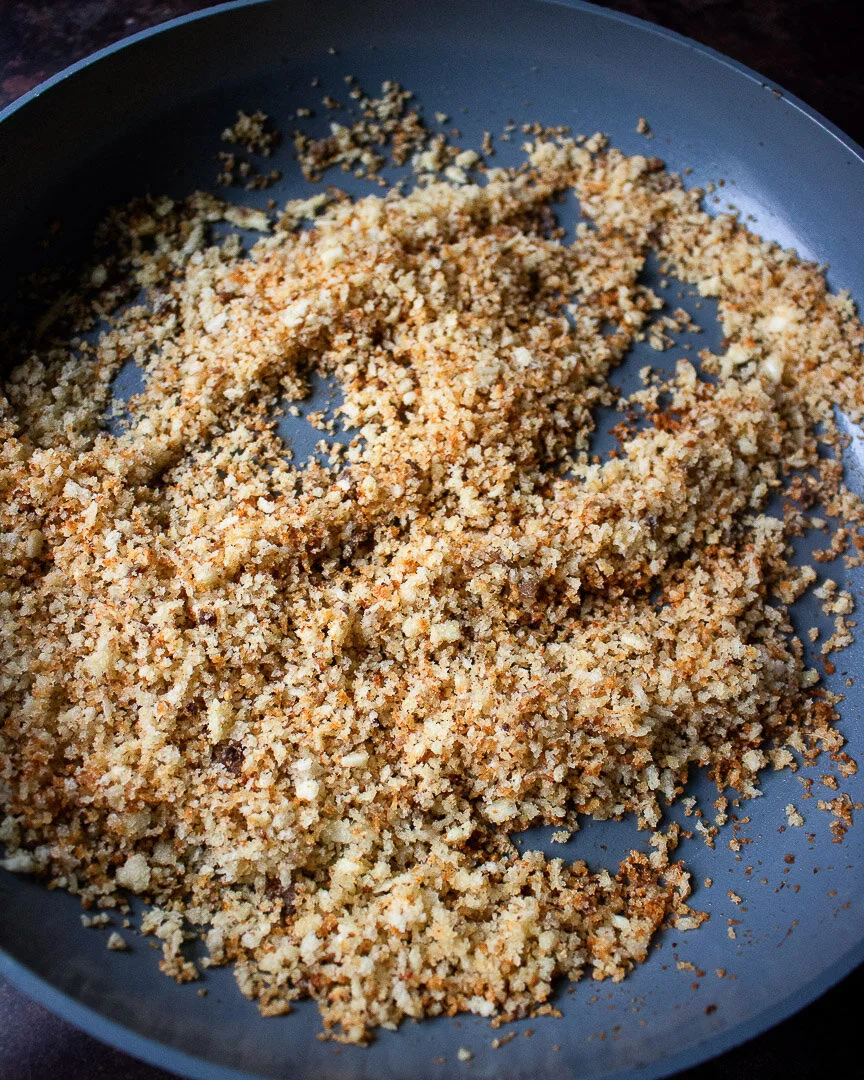
Magical breadcrumbs
2 Tbsp olive oil or butter
2 whole anchovy filets (or 4 1/2 filets depending on how your anchovies are canned)*
1 heaping cup panko
2 large garlic cloves, minced (about 2 Tbsp)
Heat olive oil in a large skillet over a medium-low flame. Add the anchovies and cook, breaking them up with a wooden spoon or spatula until they’re completely dissolved, about 3-4 minutes.
Add the panko and cook, stirring frequently, for 3-4 minutes. If the breadcrumbs start to darken, turn the flame down.
Add the garlic and stir well. Let the mixture cook, untouched for 2-3 minutes or until the bottom of the breadcrumbs start to turn golden. Turn off the flame and mix the breadcrumbs. Let cool for a few minutes in the pan before using.
If saving for later, let the breadcrumbs cool completely and then store, covered loosely, in the fridge for up to 4 days.
*A quick note about anchovies: Sometimes they’re cleaned and the two sides are left connected when they’re canned. I consider that a “whole” anchovy. If they two sides are separated, I consider that 1/2 of a filet)