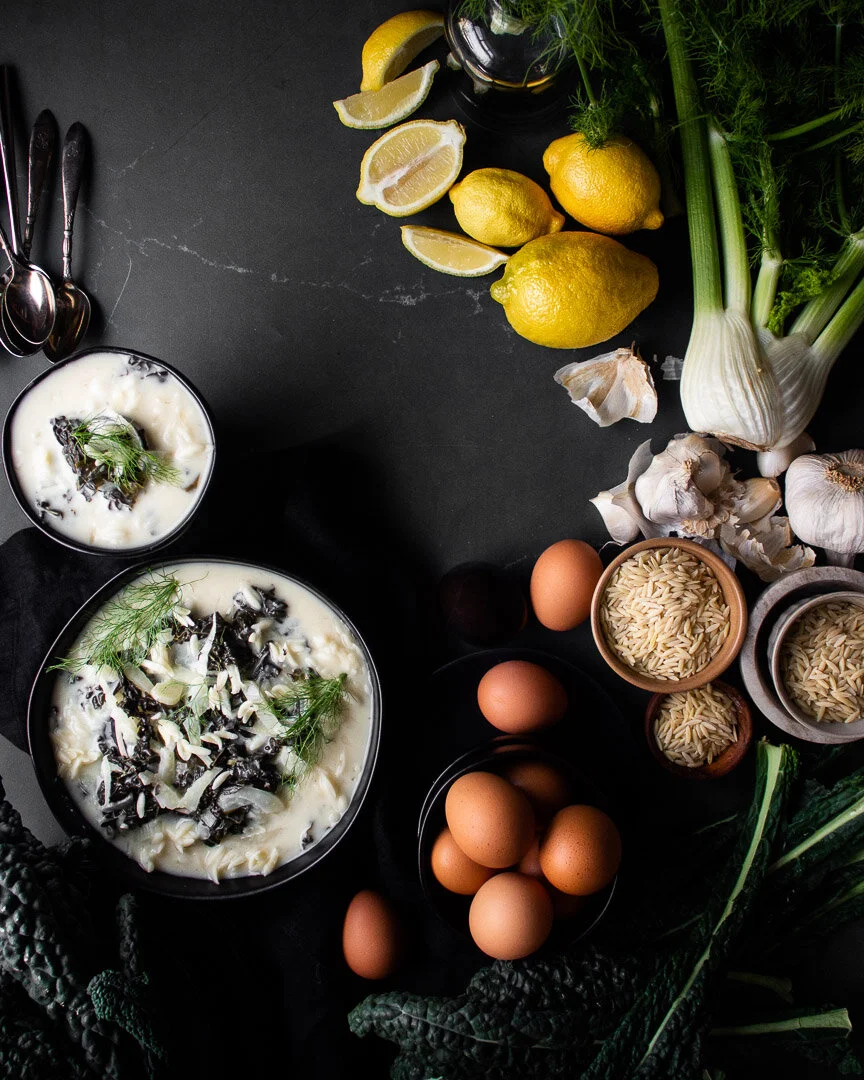
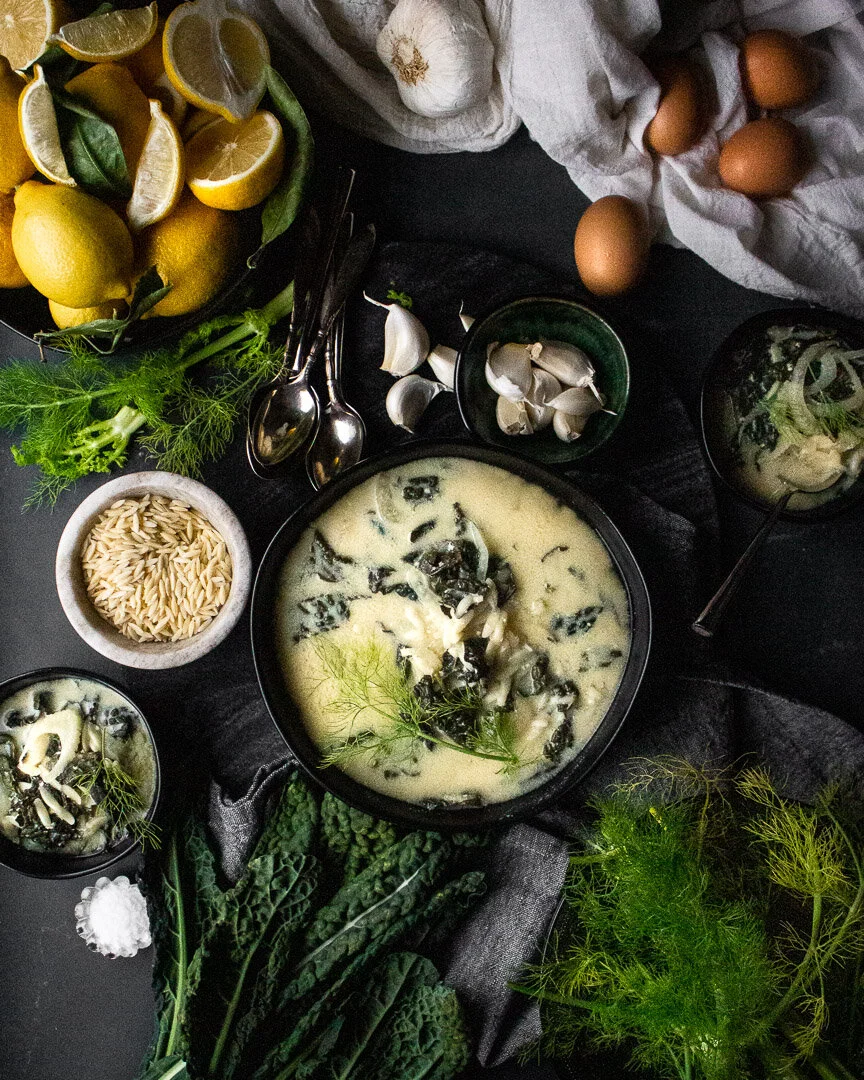
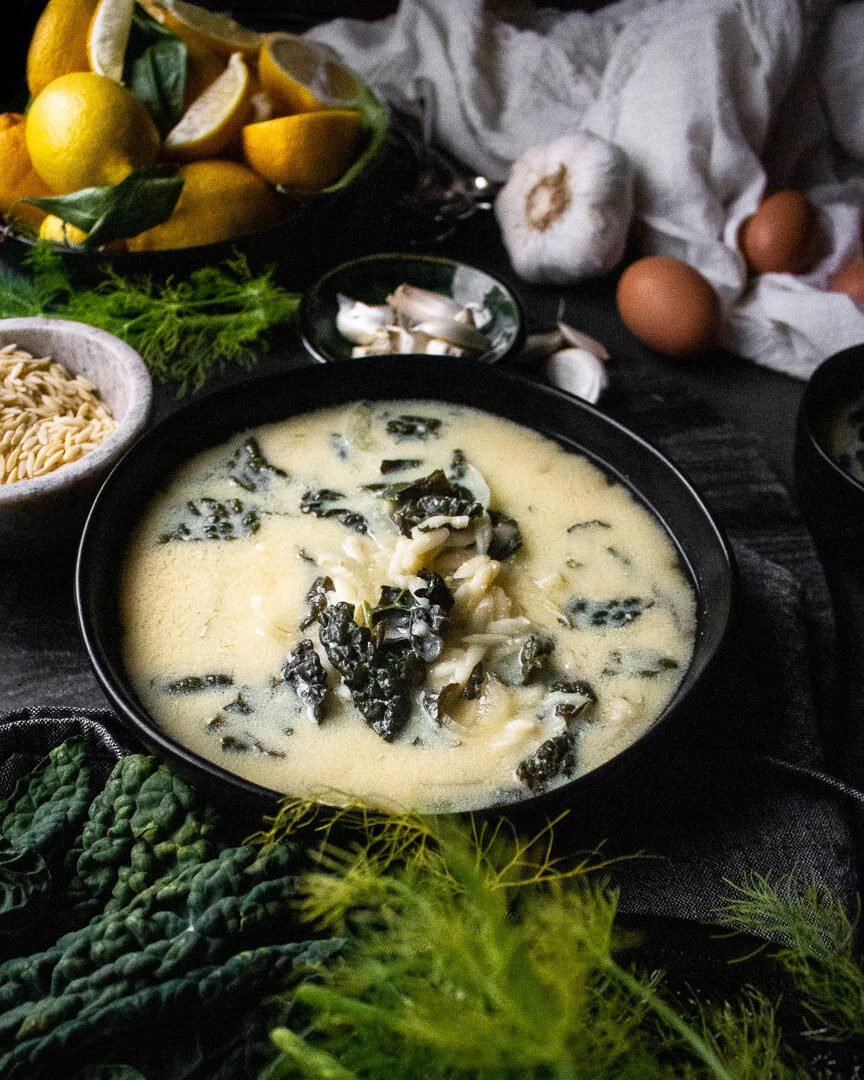
Fennel and kale avgolemono soup

This quick and light version of the classic Greek lemon and egg soup has fennel and kale for some nutrition while maintaining the creamy and bright notes of the original. #meandthemoose #avgolemono #soup #souprecipe #avgolemonorecipe #easyrecipe #lu…

For this classic Greek lemon and egg soup, you slowly heat an emulsion of eggs, lemon juice, and broth for a quick, comforting bowl that packs a sweet and sour punch.

Take me to the recipe!

This quick and light version of the classic Greek lemon and egg soup has fennel and kale for some nutrition while maintaining the creamy and bright notes of the original. #meandthemoose #avgolemono #soup #souprecipe #avgolemonorecipe #easyrecipe #lu…

So guys, I’m trying to lose weight. I hate admitting that because it feels like a betrayal of my hard work to unlearn diet culture over this past year. BUT! Thanks to all of that work, I think I can lose a few pounds while maintaining a healthy relationship with food and my body. Because I love food and it’s not realistic for me to give any of it up. And, while I’m still working at loving my body, I appreciate all that it’s done for me and don’t feel like it has to match an unrealistic thin, white ideal.

But the fact is, I weigh more than I’d like to. Baby weight plus quarantine weight plus holiday weight has added up. I started reigning in my eating a few months ago, which helped my mental health. Somehow feasting on unlimited amounts of Nutella to deal with postpartum and covid anxiety wasn’t working. GO FIGURE. But I focused primarily on what I was eating, rather than on how much I was eating.

Now I need to face the statistics that having had Gestation Diabetes during my second pregnancy makes it more likely that I’ll develop Type II Diabetes if I don’t maintain a healthy weight. And, one of my chief physical complaints is back pain and when I’m holding onto extra weight, there’s more stress on my spine. I want to be able to play with and pick up my kids and I can’t do that if my back is out!

This quick and light version of the classic Greek lemon and egg soup has fennel and kale for some nutrition while maintaining the creamy and bright notes of the original. #meandthemoose #avgolemono #soup #souprecipe #avgolemonorecipe #easyrecipe #lu…

Enter, soup! I love soup in the winter anyway for its coziness, but it’s the perfect vehicle for veggies and healthy fats. It’s also filling and EASY.

This quick and light version of the classic Greek lemon and egg soup has fennel and kale for some nutrition while maintaining the creamy and bright notes of the original. #meandthemoose #avgolemono #soup #souprecipe #avgolemonorecipe #easyrecipe #lu…

This version of Avgolemono in particular is one of my favorites. It’s creamy without any dairy and a well-rounded meal with the orzo and veggies. It’s also infinitely adaptable based on your diet and preferences. Doing Whole 30? Leave out the orzo and add shredded chicken. Gluten free? Swap the orzo for rice. Vegetarian? Use veggie stock instead of chicken stock. Want more protein? Add beans or quinoa. Want it zingier? Add more lemon! Want it creamier? Add another egg! The variations are endless.

The only rule with Avgolemono is this: Don’t let the eggs come to a boil! You’ll end up with scrambled egg bits in your broth and nobody wants that.

This quick and light version of the classic Greek lemon and egg soup has fennel and kale for some nutrition while maintaining the creamy and bright notes of the original. #meandthemoose #avgolemono #soup #souprecipe #avgolemonorecipe #easyrecipe #lu…

Fennel and kale avgolemono soup 

Time: about 30 minutes, mostly active
Yield: about 6 cups

6 cups chicken stock
1 tsp salt + more to taste (I’ve added another 1/2 tsp at the end in some batches)
1/8th tsp of black pepper 
1 bay leaf
1 large garlic clove (or 2 medium/small), peeled and lightly smashed
1/2 cup uncooked orzo
3 eggs
¼ cup lemon juice (the juice of 1 large lemon) + more to taste
2 cups lacinto kale (1 small bunch) 
1 small fennel bulb, sliced paper thin

Combine the stock, salt, black pepper, bay leaf and garlic in a pot and bring to a boil. Scoop out 1 cup of the hot stock and set aside to cool. 

Scoop out the garlic clove and add it to a blender. Set aside. 

Add the orzo and cook according to package directions, minus one minute. 

While the orzo is cooking, chop the kale and slice the fennel as thinly as possible. Set aside. 

Add the eggs and the lemon juice to the blender with the cooled garlic. Set aside.

Once the orzo is done, turn the heat down all the way and let the broth just barely simmer. Add the kale and the fennel and stir.

Check the cooling cup of broth. It should be warm, but not hot. If you can comfortably leave your finger in the broth, it’s ready. If the broth is still too hot to touch, add an ice cube and check again in one minute after the ice has melted.

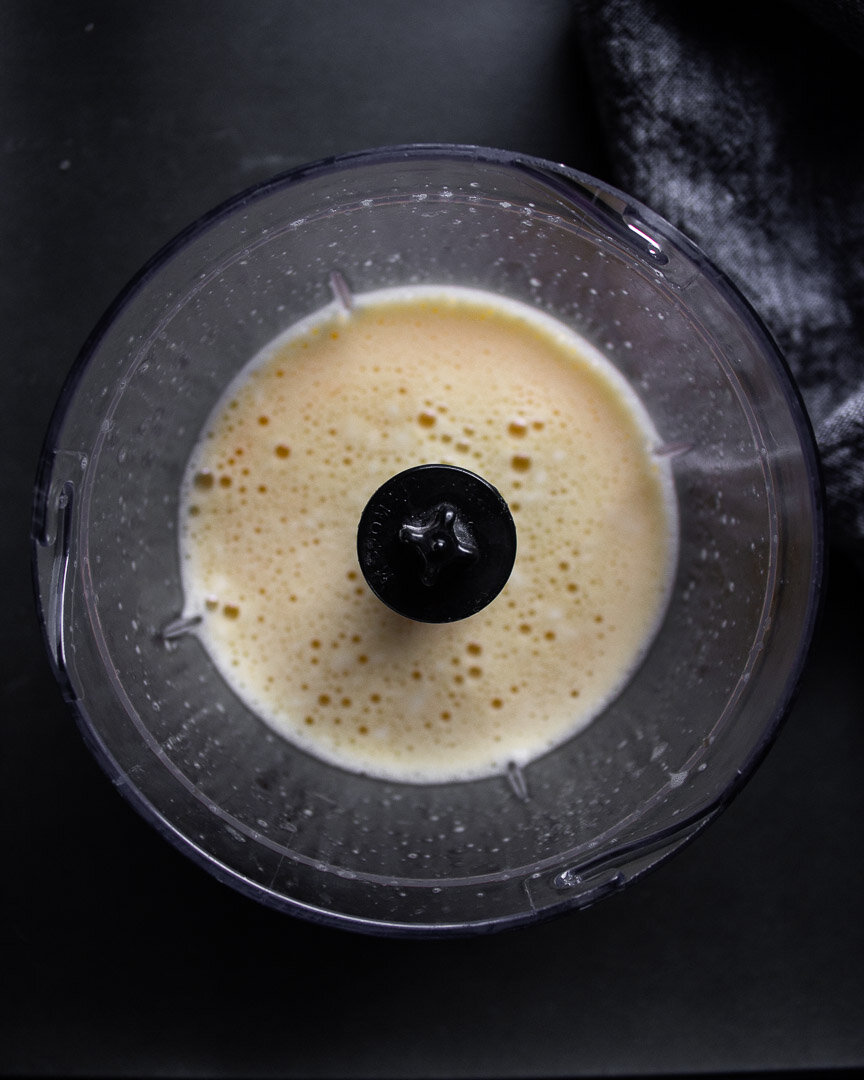
Whizz the garlic, eggs, and lemon juice in the blender until just combined and slightly frothy. Add the warm broth in a stream or in 4 batches if your blender doesn’t open while running. 

Add the egg, lemon, garlic, and stock emulsion to the simmering broth and cook, stirring, for about 5 more minutes. Don’t let the soup boil!

Taste for seasoning and add more salt, pepper, and lemon as needed.
Lemon and rosemary turkey and couscous en cocotte

Don’t be intimidated by the “en cocotte” portion of the title. It’s just French for “cooked in a covered pot that you can also use for serving.” An alternative translation is: How to cook a really good turkey breast the lazy way; no overnight brine, no basting, nothing.

Take me to the recipe!

Lemon and rosemary turkey and couscous en cocotte | Me & The Moose. This one-pot (ish) meal has a low and slow cooking time, but is mostly hands-off and a much faster way to make delicious turkey breast without brining or drying out the meat. #t…

A quick note before we talk about the ins and out of this recipe: Anyone who knows me, understands how very much I hate the word “moist.” (I refer to is as “the ‘M’ word.”) Even saying it in my head feels wrong. I’m not alone here, I know, but I do feel that I have a particularly strong reaction, which made my search for the easiest turkey cooking method particularly grueling. Because it’s damn near impossible to read a blog post, watch a video, or see a cooking show about poultry without people shouting it from the rooftops.

But figuring out this recipe made it all worth it! And I promise you, this is the easiest route to not-dry turkey.

Lemon and rosemary turkey and couscous en cocotte | Me & The Moose. This one-pot (ish) meal has a low and slow cooking time, but is mostly hands-off and a much faster way to make delicious turkey breast without brining or drying out the meat. #t…

I first learned about cooking “en cocotte” from an episode of Cook’s Country. They made “French Chicken in a Pot” and I wanted to try it with turkey. I’ve also wanted to make a version of the famous Greek Avgolemono Soup, which is broth thickened with a cooked grains and egg yolks, but soup isn’t always psychologically satisfying as a meal, you know?

Instead, I used the broth and egg yolks to thicken the grains instead of the other way around.

Lemon and rosemary turkey and couscous en cocotte | Me & The Moose. This one-pot (ish) meal has a low and slow cooking time, but is mostly hands-off and a much faster way to make delicious turkey breast without brining or drying out the meat. #t…

A couple of cooking notes:

  • After roasting the turkey, there should be about 1/4 of an inch of liquid at the bottom of the Dutch oven. If there isn’t, add another 1/4 cup of stock before cooking the couscous.

  • The only extra step in this recipe is to blend together some broth, egg yolks, and lemon juice to add to the cooked couscous. I really recommend using a blender EVEN THOUGH it’ll dirty another appliance. If you don’t get a really good emulsion of the liquids, you can end up with scrambled eggs rather than a rich, thick sauce over your couscous.

  • The oven temperature (275!) will seem very low and it is. But the Dutch Oven with a lid and an extra layer of foil really seals in the heat and moisture and cooks the turkey despite the low oven temperature. Our oven runs very hot, so I actually set it 10 degree lower.

  • The only downside to this cooking method is that the steam softens the turkey skin. If you like crispy skin, just strip it off and seer it on a really hot skillet to crisp it back up.

  • I love serving this with a quick tzatziki sauce.

Lemon and rosemary turkey and couscous en cocotte | Me & The Moose. This one-pot (ish) meal has a low and slow cooking time, but is mostly hands-off and a much faster way to make delicious turkey breast without brining or drying out the meat. #t…

Lemon and rosemary turkey and couscous en cocotte

1 bone-in turkey breast, about 2 ½ lbs
2 Tbsp olive oil, divided
1 small onion (or ½ of a large onion), chopped
4-5 extra large garlic cloves, smashed and roughly chopped 
1 Tbsp fresh rosemary, minced (or 1 tsp dried)
1½ tsp smoked paprika
1 tsp kosher salt
4 cups low sodium chicken stock or water, divided
3 cups Israeli couscous  
2 egg yolks
1/3 cup lemon juice (juice of 2 large lemons)

Preheat the oven to 275.

In a large Dutch oven or oven safe pot with a lid, heat 1 Tbsp olive oil over medium high heat. Seer the turkey breast on the top, bottom, and both sides, adjusting the heat if the turkey browns too quickly or if the oil starts to spit uncomfortably. When browned all over (this should take about 10 minutes), remove to a plate.

Add 1 Tbsp of olive oil to the same Dutch oven and heat over a medium low flame for a few seconds. Saute the onion until translucent, about 3 minutes. Add the garlic and cook for 1 minute more. Add the rosemary, smoked paprika, and salt. Cook for 1 minute more until fragrant.

Turn off the heat.

Add the turkey back to the pan. Cover the top of the Dutch oven tightly with a large piece of tin foil and then top with the lid.

Bake for 1 hour. Check the internal temperature of the turkey with a thermometer in the thickest part. When the thermometer reads 165, the turkey is done. If the turkey isn’t up to temperature yet, return it to the oven and check it every 5-10 minutes to avoid overcooking.

While the turkey is cooking, blend together 1 cup of chicken stock, 2 egg yolks, and 1/3 cup of lemon juice. Set aside.

When the turkey is done, remove the Dutch oven and carefully take off the tin foil from its top (watch the steam!). Remove the turkey to a plate or cutting board and cover tightly with the tin foil. Let rest.

Add 3 cups of stock to the turkey cooking juices in the Dutch oven and bring to a boil. Add the couscous, reduce the heat to low, and simmer for 8-10 minutes, until the couscous has absorbed all of the stock. (Check after 4 minutes to make sure the couscous isn’t cooking too fast or sticking too much. If it is, turn down the heat.)

When the liquid is absorbed, add the broth/ egg yolk/ lemon juice combination. Stir it into the couscous and bring the mixture back to a boil. Once it boils, turn off the heat and stir a few more times.

Slice the turkey and serve with the couscous.

Yield: 5-6 large servings

Lemon and rosemary turkey and couscous en cocotte | Me & The Moose. This one-pot (ish) meal has a low and slow cooking time, but is mostly hands-off and a much faster way to make delicious turkey breast without brining or drying out the meat. #t…

Clam pizza

Clam Pizza | Me & The Moose Whether you use store-bough crust or make your own, cook it on a grill, in the oven, or in a pizza oven, this is my take on the clam pizza full of garlic, cheese, and briny clams. #meandthemoose #pizza #clampizza #homemadepizza

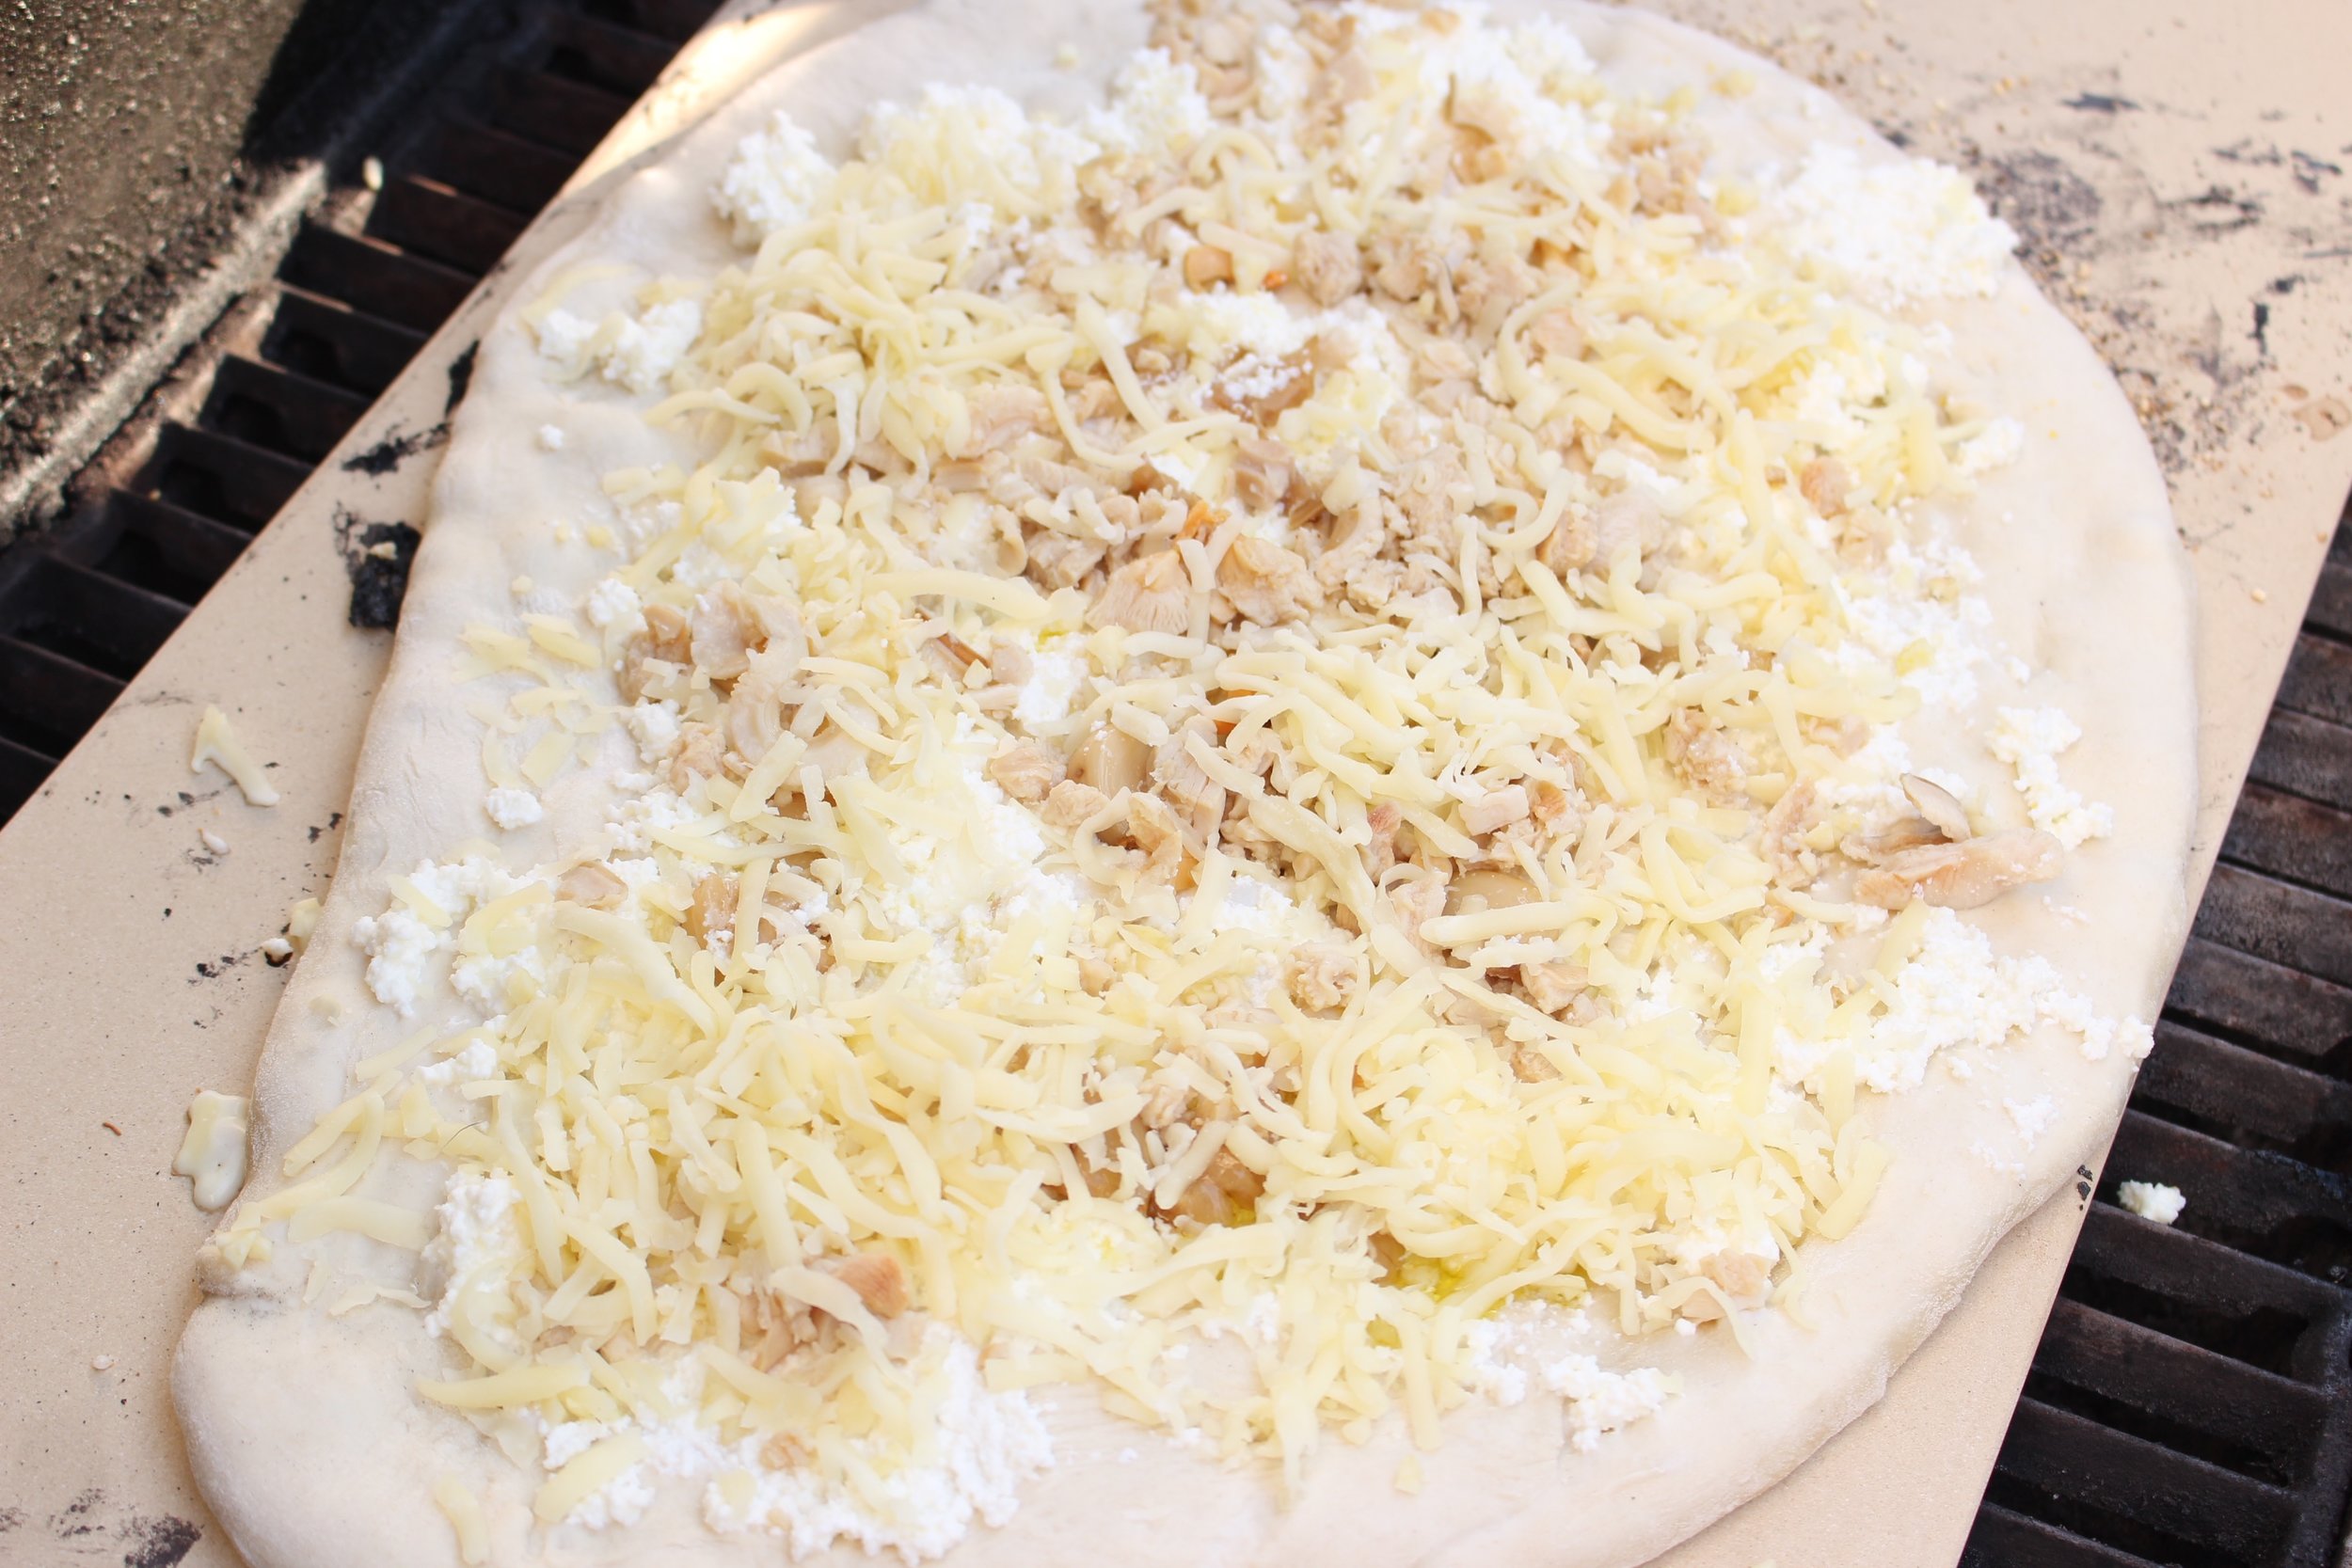
You need a pizza stone, a pizza peel, some ingredients, and the grill or your oven to make the briniest, garlickiest, cheesiest, and most unctuous clam pizza at home.

Take me to the pizza!

Clam Pizza | Me & The Moose Whether you use store-bough crust or make your own, cook it on a grill, in the oven, or in a pizza oven, this is my take on the clam pizza full of garlic, cheese, and briny clams. #meandthemoose #pizza #clampizza #homemadepizza

Clam pizza is such a Connecticut thing. I'm sure some would argue that it's also a New York thing, but I feel like Frank Pepe, the New Haven pizza institution, is best known for it's clam pizza, and thus, clam pizza is a Connecticut thing. That's my story and I'm sticking to it.

I first tried this briny, garlicky pie on a trip to Connecticut long before moving here myself. And I've been on a Goldilocksian journey to find the best one ever since. They have either been too salty, not garlicky enough, or without cheese, which is unacceptable to me when it comes to pizza. (Don't yell at me, people who think seafood and cheese should never mingle.)

Clam Pizza | Me & The Moose Whether you use store-bough crust or make your own, cook it on a grill, in the oven, or in a pizza oven, this is my take on the clam pizza full of garlic, cheese, and briny clams. #meandthemoose #pizza #clampizza #homemadepizza

We have not yet found our favorite (sorry, Pepe's), but instead have been making our favorite. Full of three different kinds of cheese and two different kinds of garlic, this pizza tastes like clams and tastes like a proper pizza, but also SO MUCH MORE. 

I cook this pie using a hot pizza stone on the grill because a) not everyone has a grill, so you can easily recreate this in an oven with the pizza stone (see directions in the recipe); and b) because I've never grilled my pizza directly on the grill grates. If you're braver than I am, here are some instructions for that method.

We’ve also recently started using our Ooni pizza oven (not an ad, we just love it!) to cook this CT classic and the smokiness of the wood-fired oven takes the flavors to another level.

A couple of notes:

  • This is a heavy pizza before it’s cooked. What I mean is, the toppings really weight down the raw pizza dough. So make sure you use LOTS of flour under the crust to ensure that it comes off of your pizza peel and onto the pizza stone intact.

  • If you aren't as into garlic (this recipe calls for 10 cloves), either reduce the number of fresh cloves or just use the roasted ones. Their flavor is much mellower and blends well with the cheese.

  • Please do garnish with the lemon and sea salt. They make a huge difference in the final product.

Clam Pizza | Me & The Moose Whether you use store-bough crust or make your own, cook it on a grill, in the oven, or in a pizza oven, this is my take on the clam pizza full of garlic, cheese, and briny clams. #meandthemoose #pizza #clampizza #homemadepizza

Clam pizza

Time: 45 minutes
Yield: 1 large or 2 medium pizzas, depending on the size of your crusts

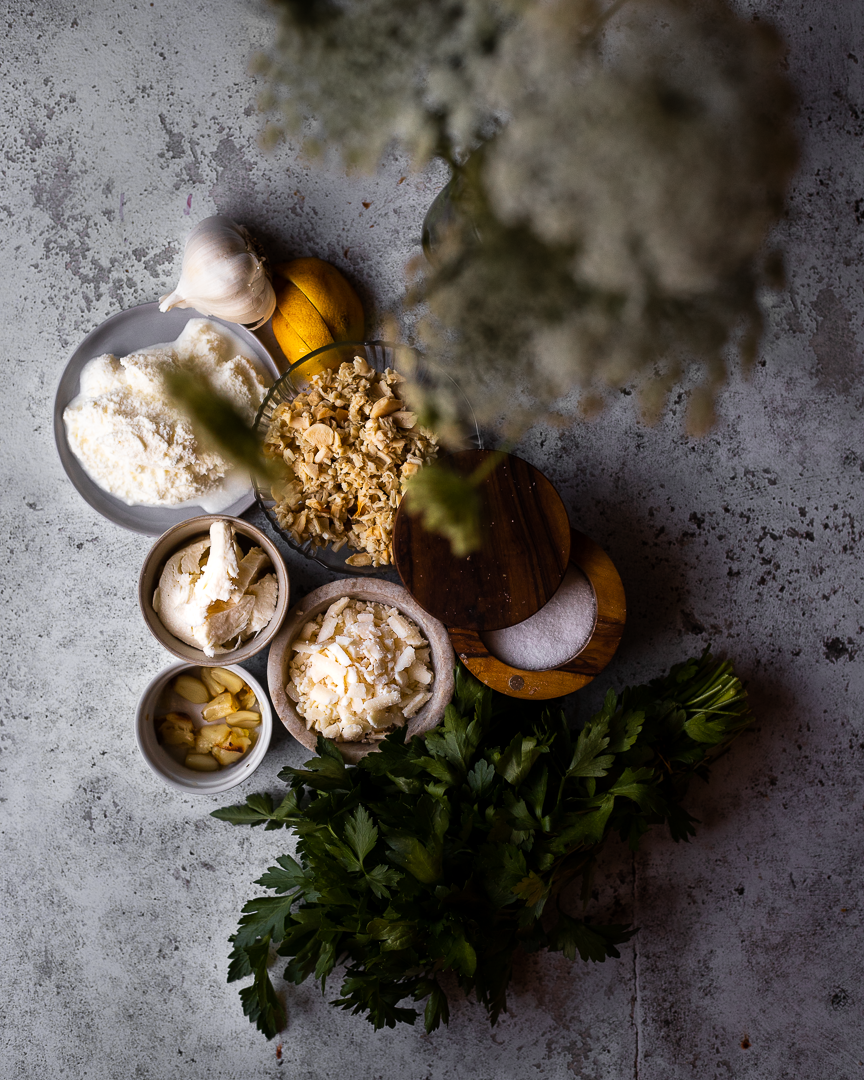
1 pizza dough
Flour to prevent sticking when rolling out dough
1 cup ricotta cheese
7 roasted garlic cloves (see method below)
3 large raw garlic cloves, minced
2 cans clams, drained (about 4 oz of clam meat)
1/2- 3/4 cup nutty cheese such as gruyere, sharp cheddar, gouda (not smoked), or fontina,
shredded
1 cup fresh mozzarella, torn into pieces
Parsley
Lemon wedges
Sea salt
Crushed red pepper flakes

For the roasted garlic:
Preheat the oven or toaster oven to 400. Smash 10 cloves of garlic, but don't remove the peels (if some fall off, great, but no need to do extra work). Add them to a small oven proof container like a ramekin or a coffee mug. Cover with olive oil. Cook until the garlic is bubbling and fragrant and the cloves are very soft when (carefully! hot oil!) squished with a spoon, about 5-8 minutes.

For the pizza:
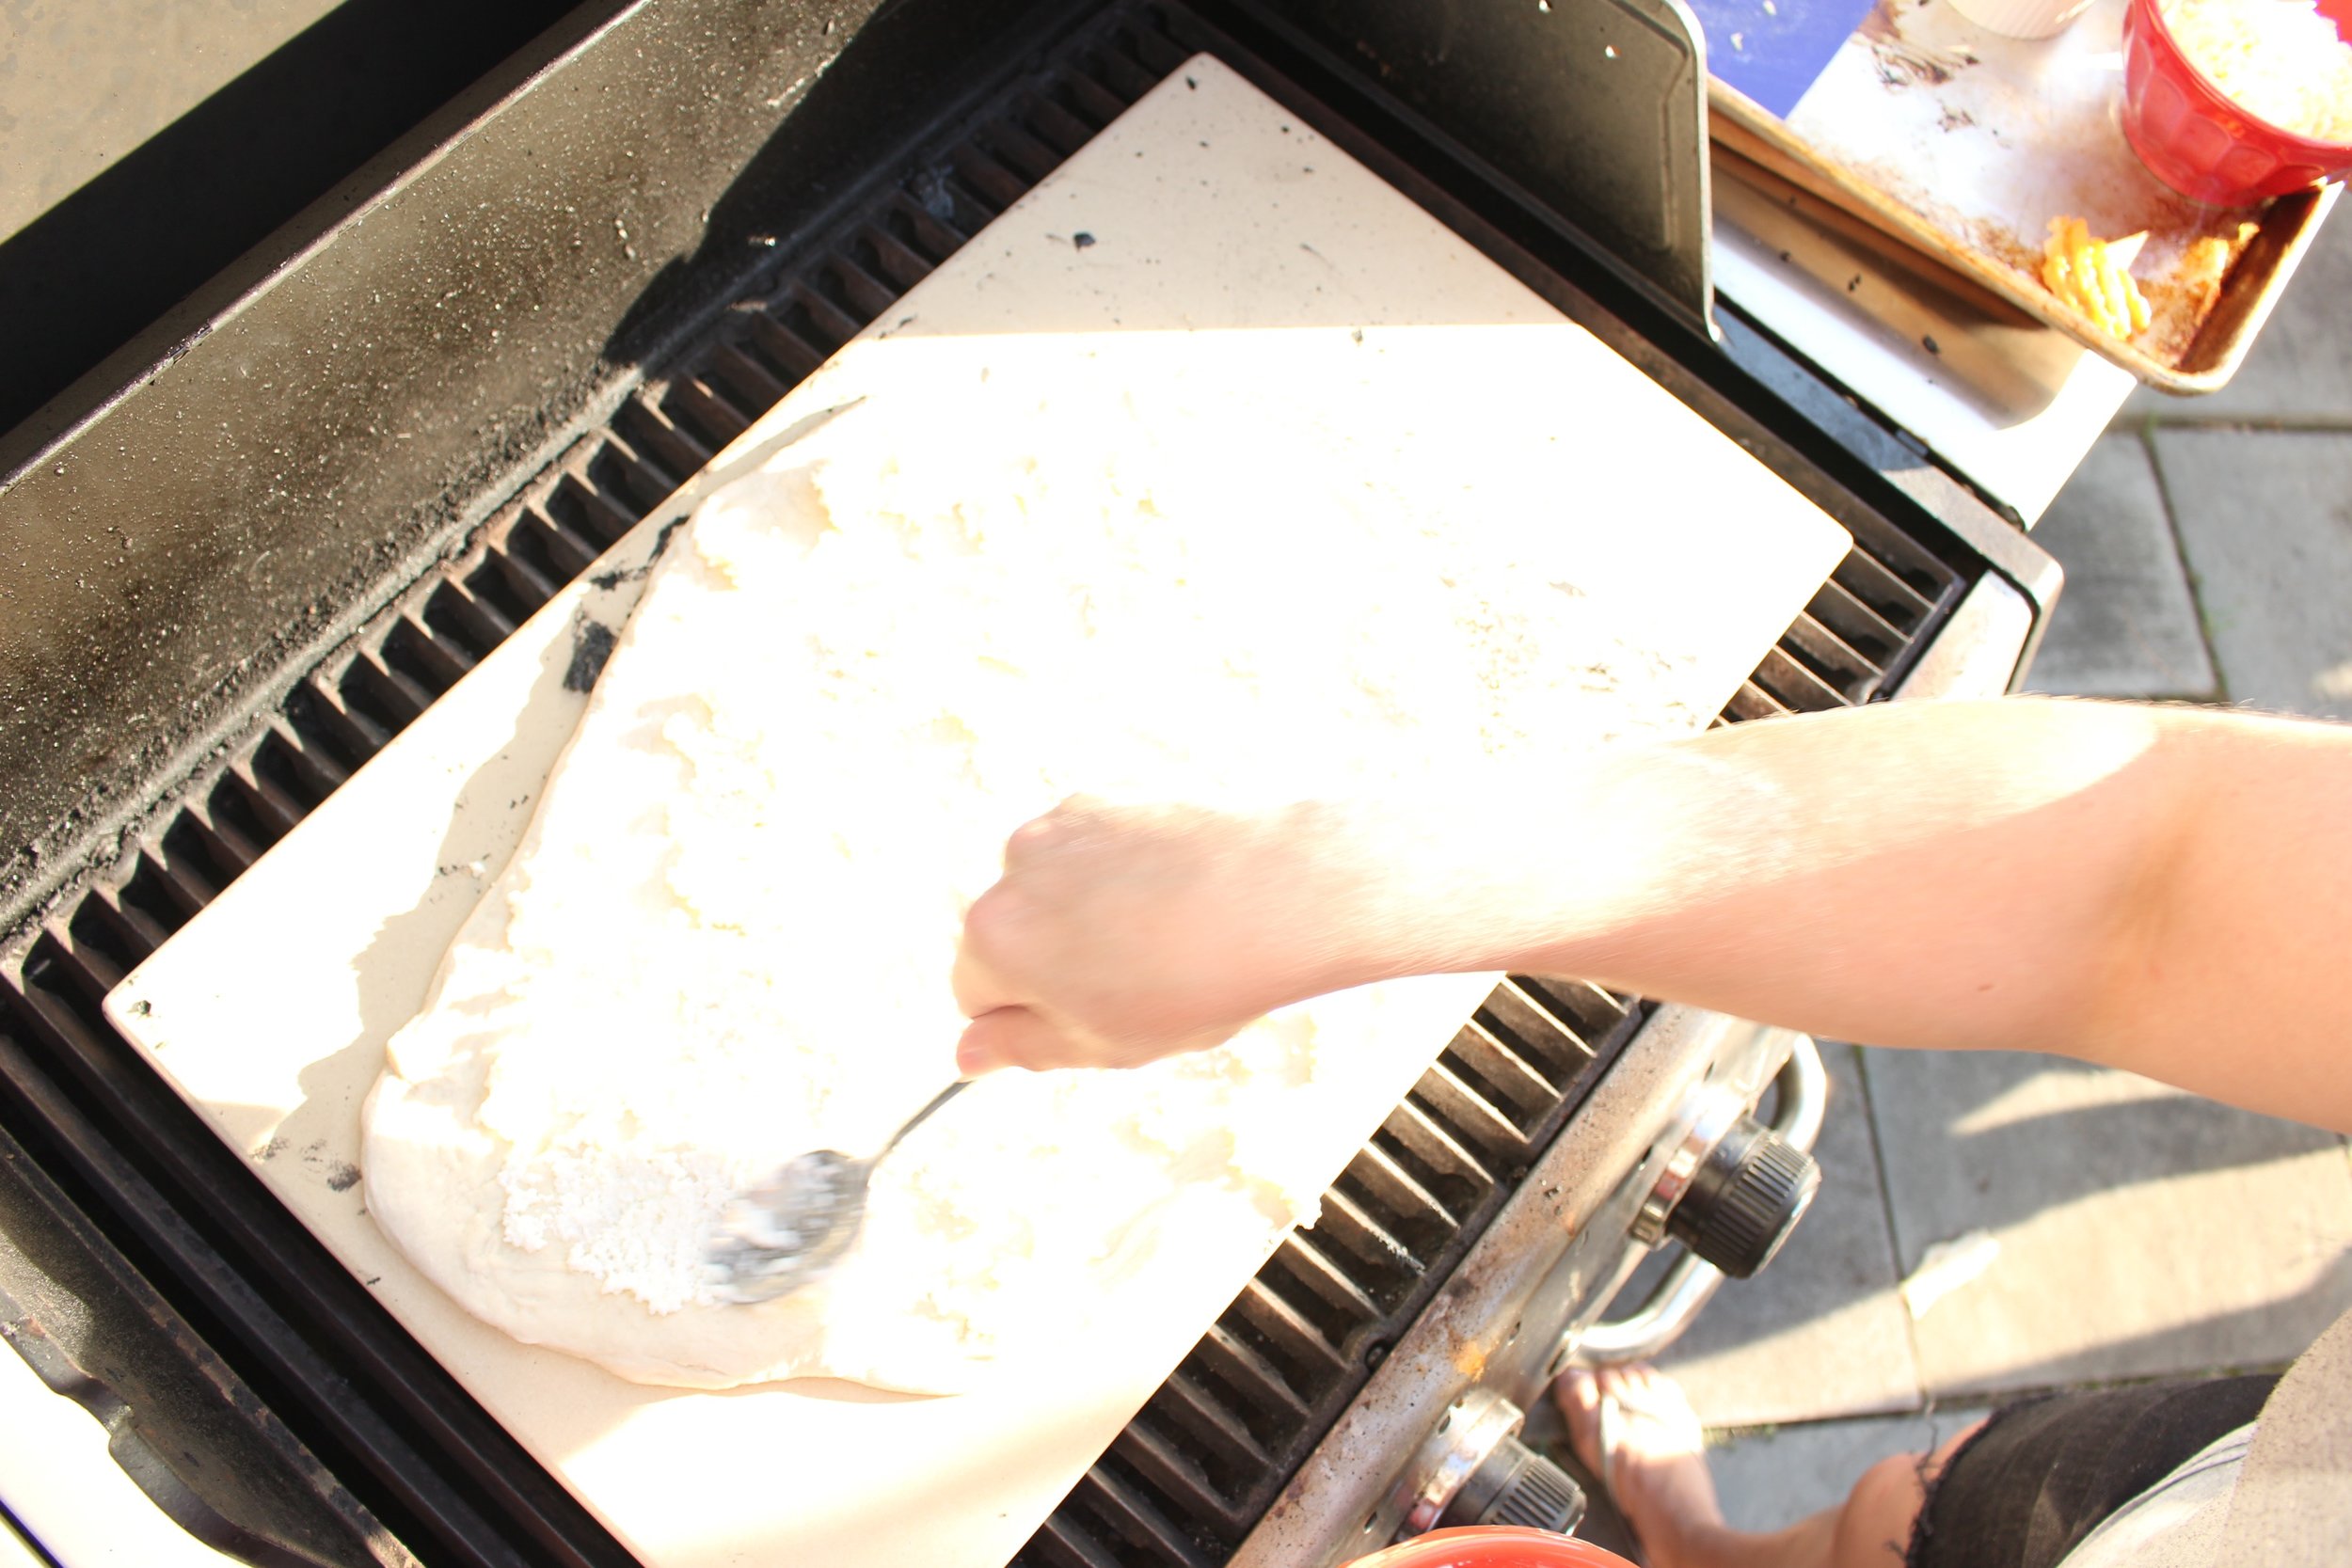
Preheat your grill on high or your oven at 500. Remove the top rack of your grill or the second rack of your oven and move the remaining rack to the lower middle portion of the oven. (You want enough room above the rack to negotiate your dough onto the pizza stone, but be close enough to the top of the oven to easily brown your cheese. Add the pizza stone and let heat for 30 minutes.

Meanwhile, prep all of your toppings. Set aside. 

On a floured counter or pizza board, roll out or press out your dough until very thin. Lift up half of the dough and scatter more flour underneath. Repeat on the other side. Jiggle your dough to make sure that it’ll slide onto a pizza peel or into the oven easily.

If cooking in the oven, add your toppings before placing the raw dough on the hot pizza stone. If the toppings are weighing down the dough too much, carefully add more flour under the crust.

Carefully slide the topped, raw dough onto the pizza stone in the oven. Cook for 6-8 minutes without opening the oven. Check the pizza and cook for another 2-3 minutes, until the cheese and the sides of the crust begin to brown. Check the bottom crust for doneness (it should be golden brown and crispy).

Remove from the heat and top with chopped parsley, sea salt, lemon, and crushed red pepper flakes (optional).

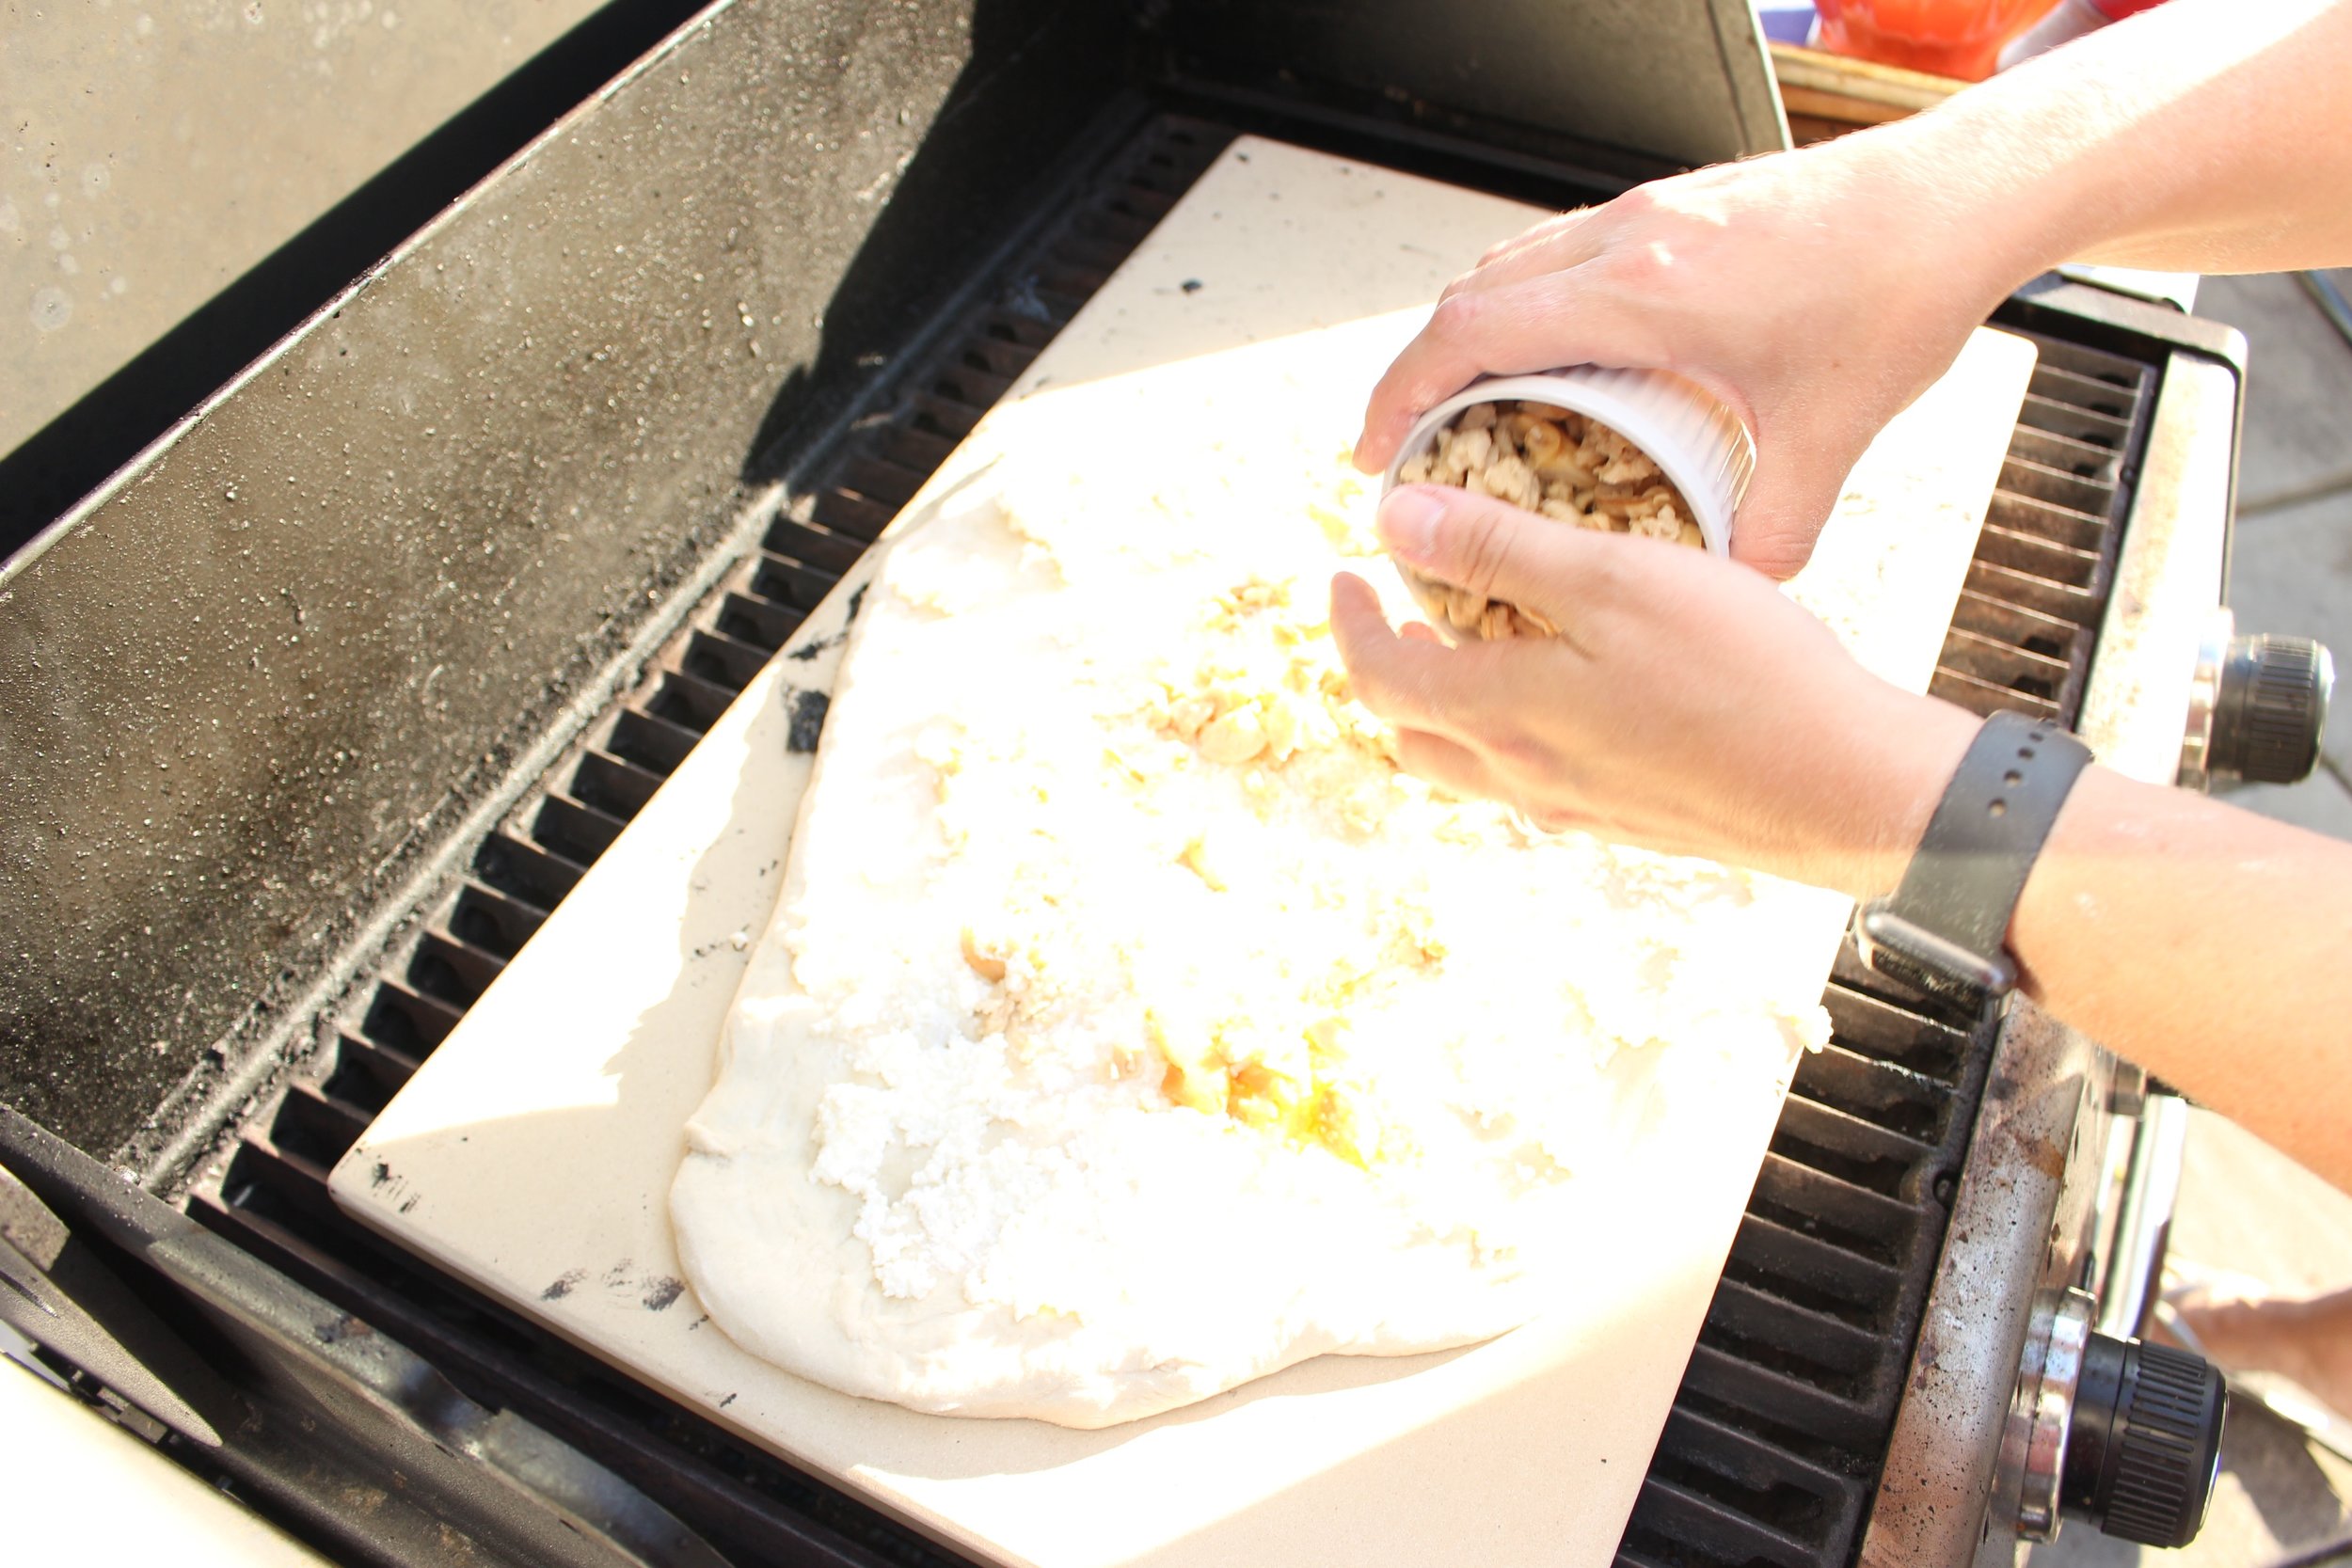
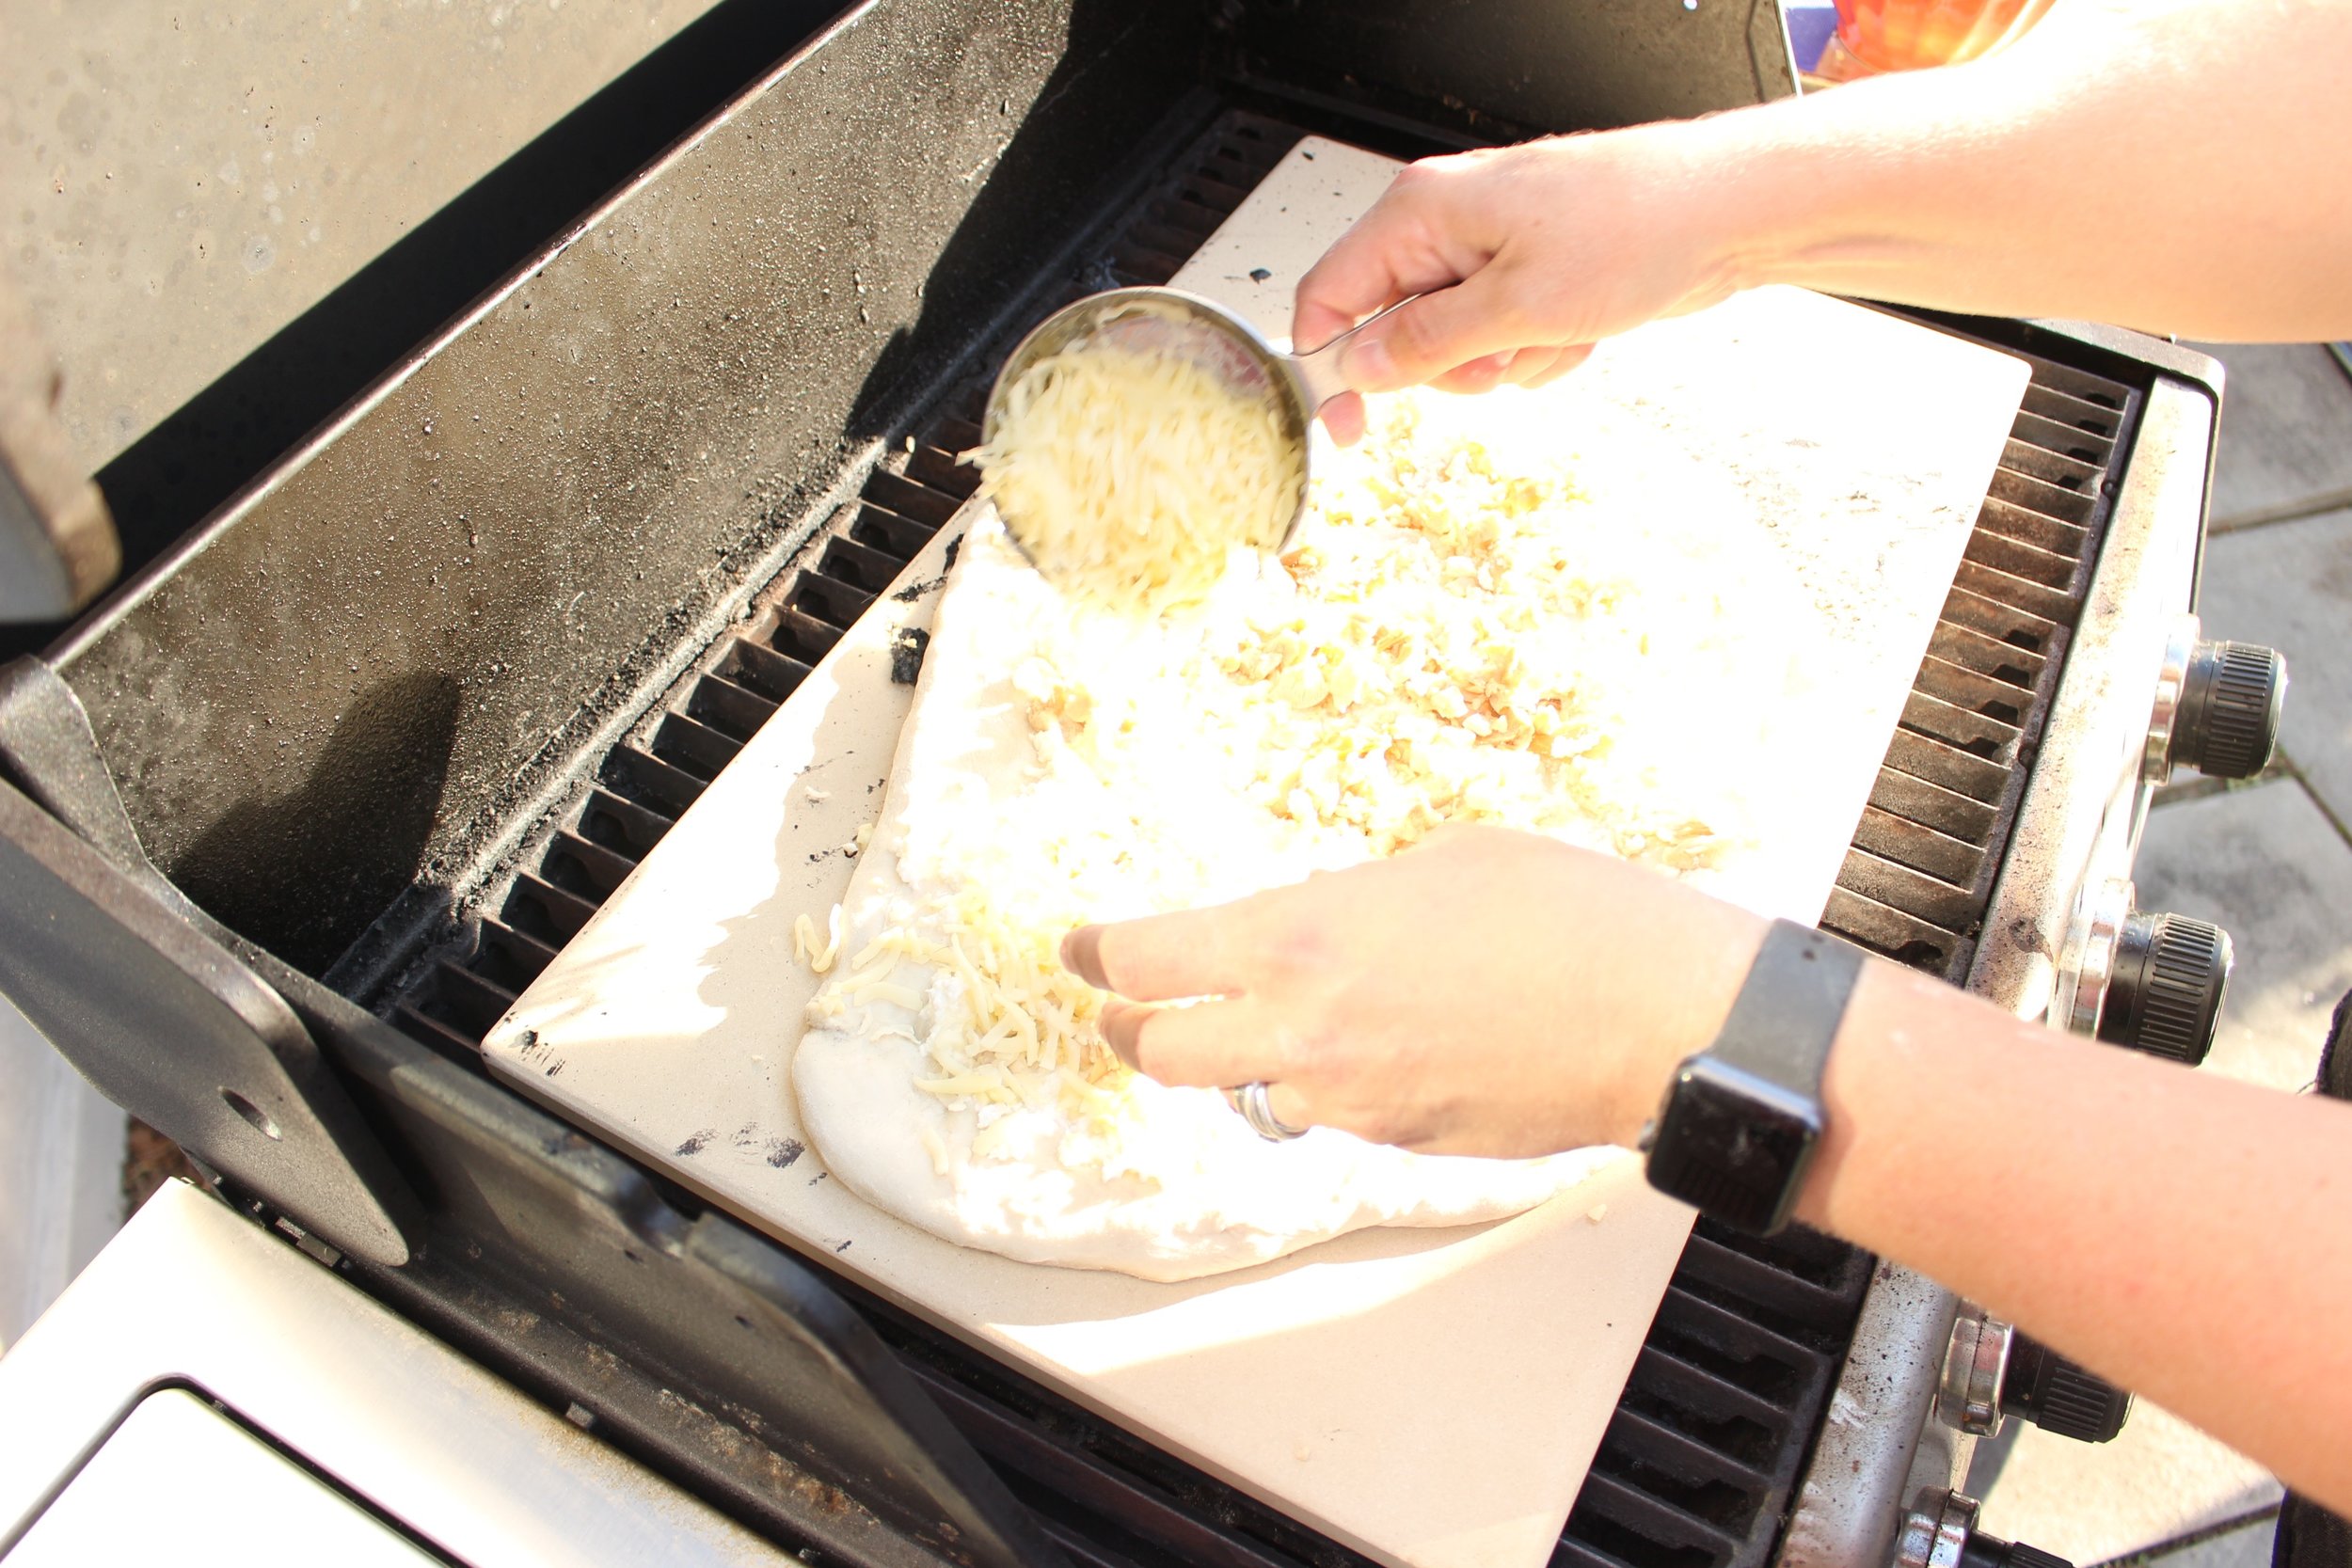
If cooking on the grill, make sure all of your toppings are measured and easily accessible. Slide the plain, raw dough onto your grill and quickly top with the ricotta, roasted and fresh garlic, the clams, and the shredded cheeses. Close the lid to the grill and let cook for 5 minutes. Check for doneness continue cooking for 2-3 minutes until the crust and cheese begin to brown.

Check the bottom crust for doneness (it should be golden brown and crispy).

Remove from the heat and top with chopped parsley, sea salt, lemon, and crushed red pepper flakes (optional).

One note about grilling: the number of burners on your grill will change the speed at which this pizza cooks. A 6-burner grill might take less than 5 minutes, so check it sooner. A 3-burner grill might take a minute more. Use your judgement based on your grill or oven.

Sheet pan dinner: Roasted white fish and cabbage tacos

Roasted white fish, cabbage, and scallion tacos that all cook together on a sheet pan.
Roasting the fish, scallions, and cabbage on a sheet pan make an easy weeknight taco night with almost no clean up.

The dog days of summer are here in the Northeast and it. is. sweaty. I'm hankering for things that are raw or minimally cooked, so a sheet pan dinner may seem counterintuitive. But the cooking here is very quick, requires very few dishes, and the end product leaves us feeling satisfied, but not stupified because being really hot and really full is like entering the third ring of hell.

Taco night, but easier, healthier, and more interesting.

(As always, skip to the next photo to avoid the toddler update.)

Speaking of hell (KIDDING), we're in that annoying place where the things our kid does seem SO AWFUL to us, but when I tell others about his behavior, I'm usually met with, "Yeah, that sounds about right for a 3-year-old." For instance, I just about blacked out with rage (though I think I handled it okay), when M aimed his stream directly at the back of the toilet instead of into the bowl, effectively spraying our entire bathroom with pee. He thought this was HILARIOUS, while I floated out of my body and burst into a million pieces. The first person I told about this replied, "If he ever has a brother, they'll probably do it together."

Don't get me wrong, it's VERY comforting when other people are completely unfazed by M's behavior. But I'm still left wondering if I'm the world's least effective parent. It can be hard to process.

But I also get it. When I tell someone else about M's behavior that's driving me crazy, to them, it's an isolated incident. But when I'm asking him to put on his shoes for the 20th time after struggling to get him to do five other things in the past hour, that shoe battle feels so much more intense and difficult.

Basically what I'm saying is that 3 has been a tough age so far and that on exhausting days, the last thing I want to do is fight with dinner too (what a segue, huh?).

The white fish roasts on a bed of lemons and limes.

This dinner is partly steamed and partly roasted. Roasting the fish with the veggies proved counterproductive because a lot of liquid came out of the fish while it cooked, which led to steamed veggies instead of roasted ones. No thanks. 

Green and red cabbage are perfect for roasting with fish because they cook fast and get both melty and crispy.

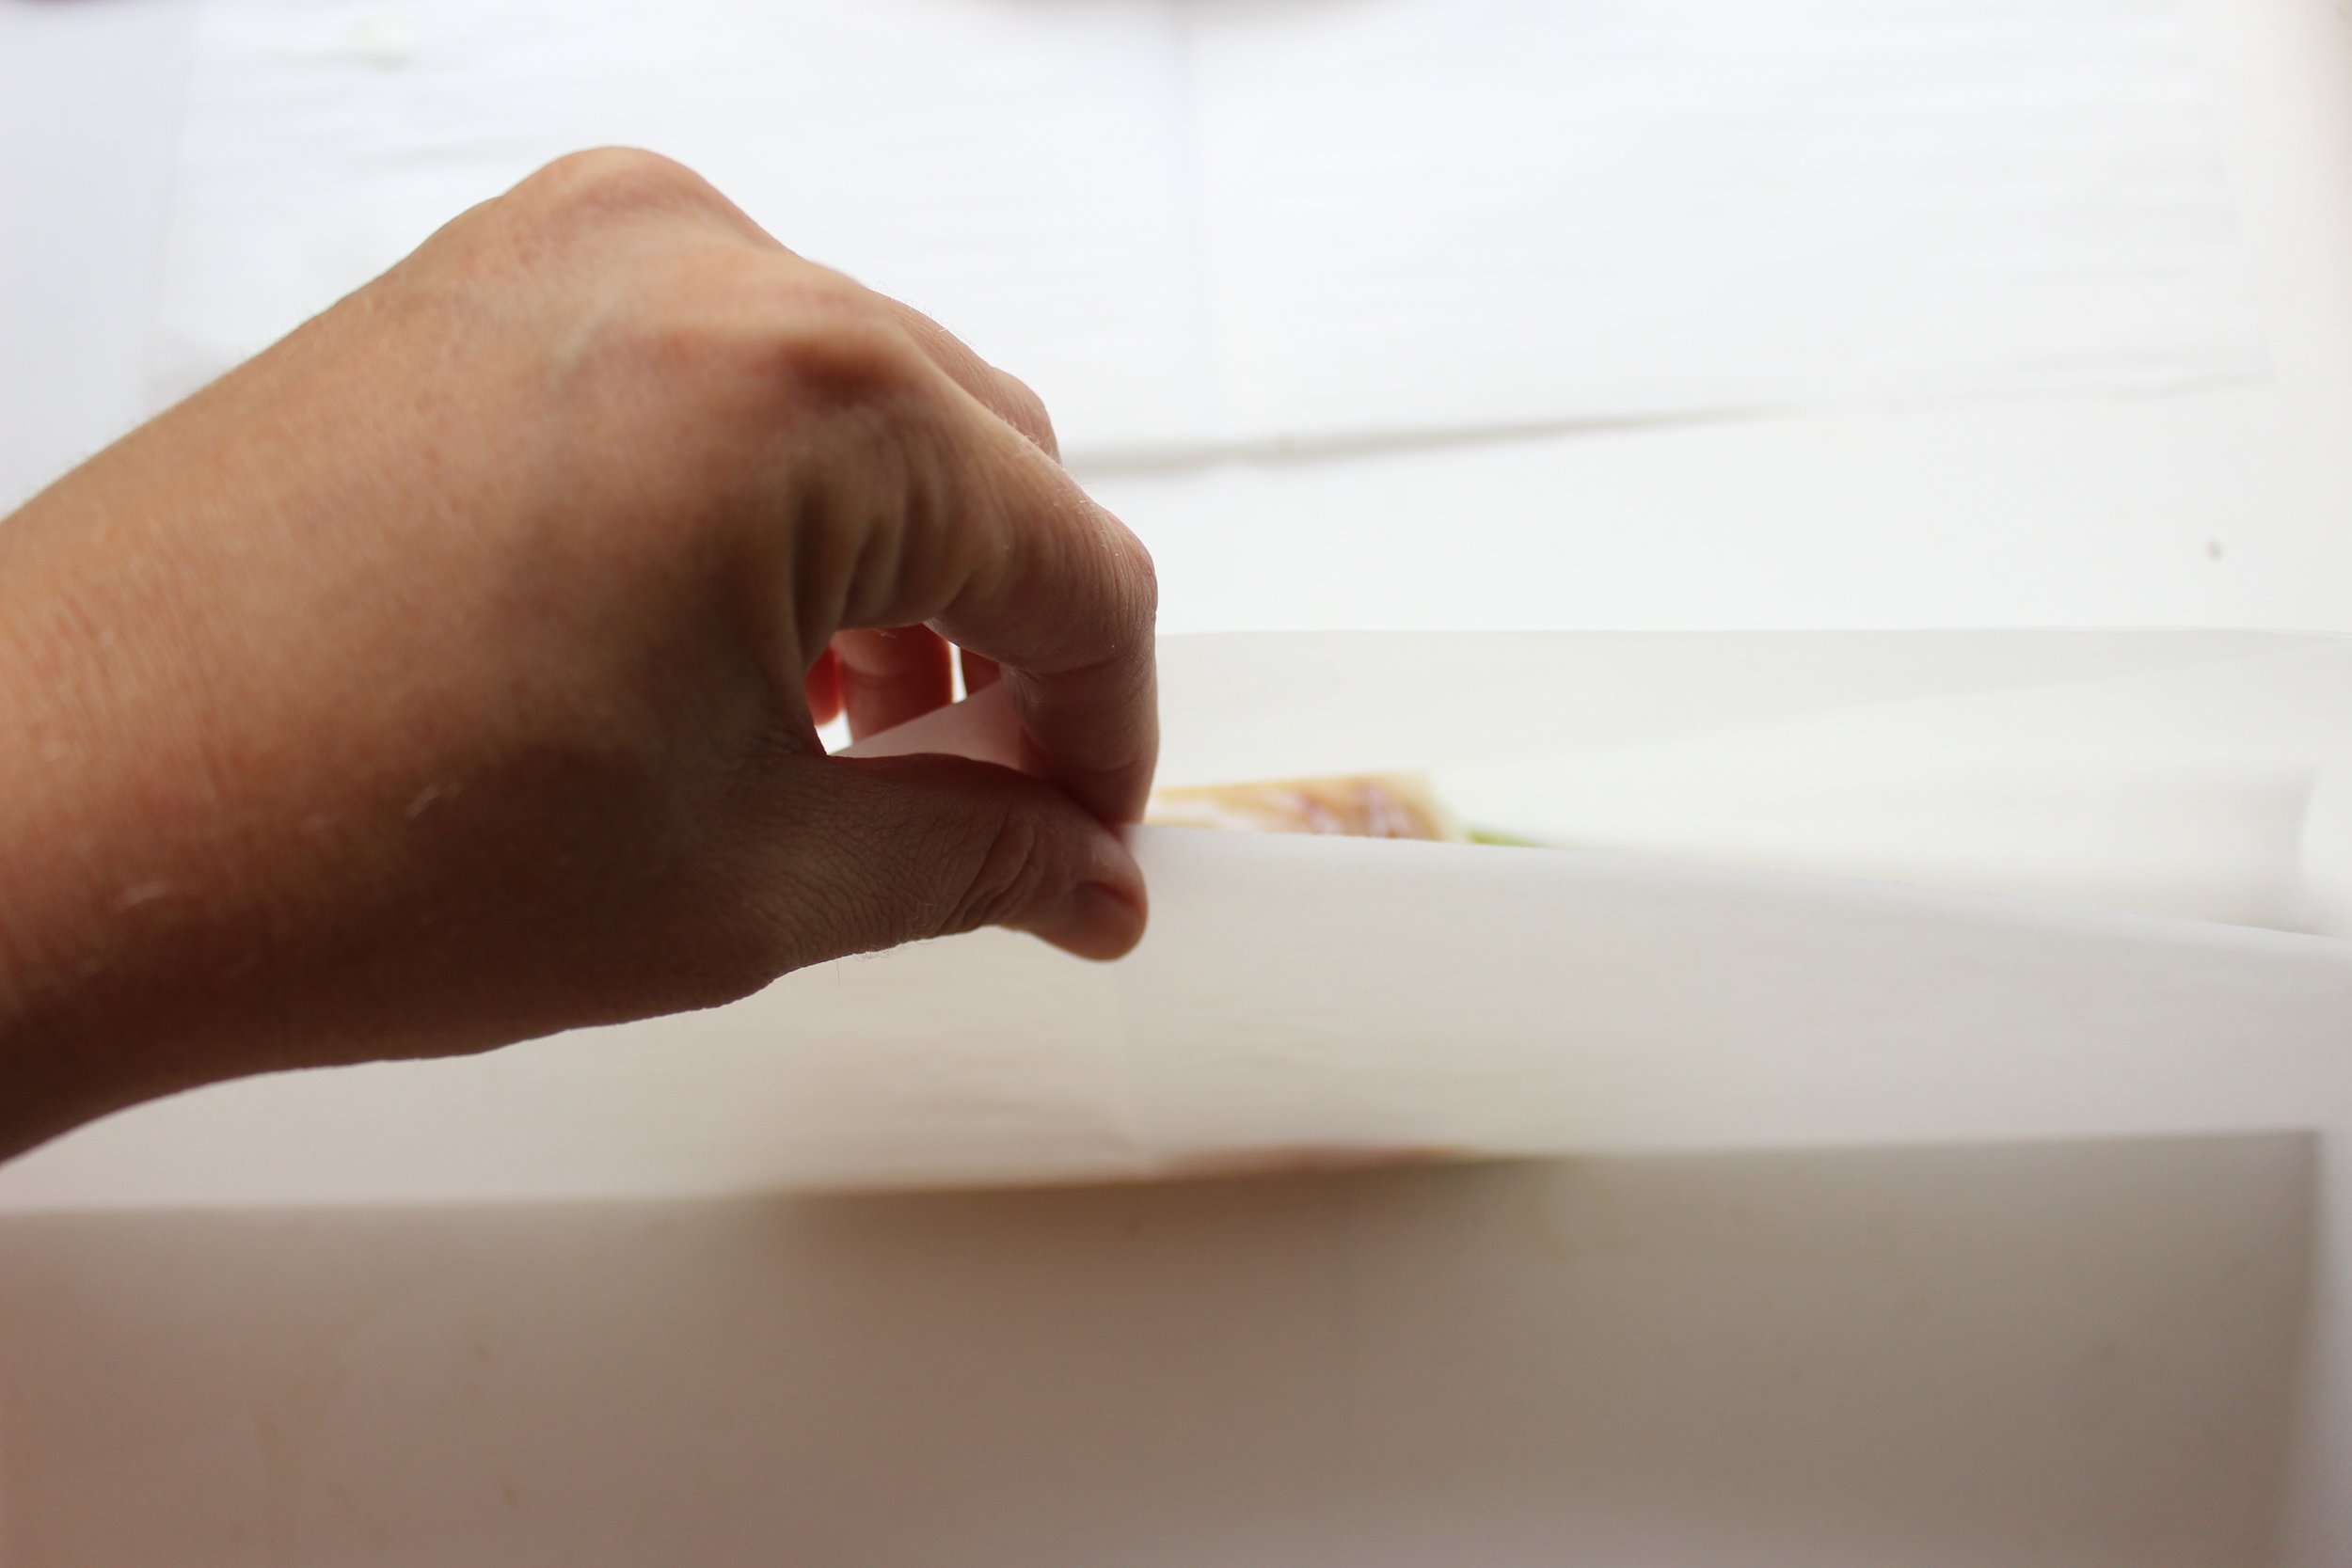
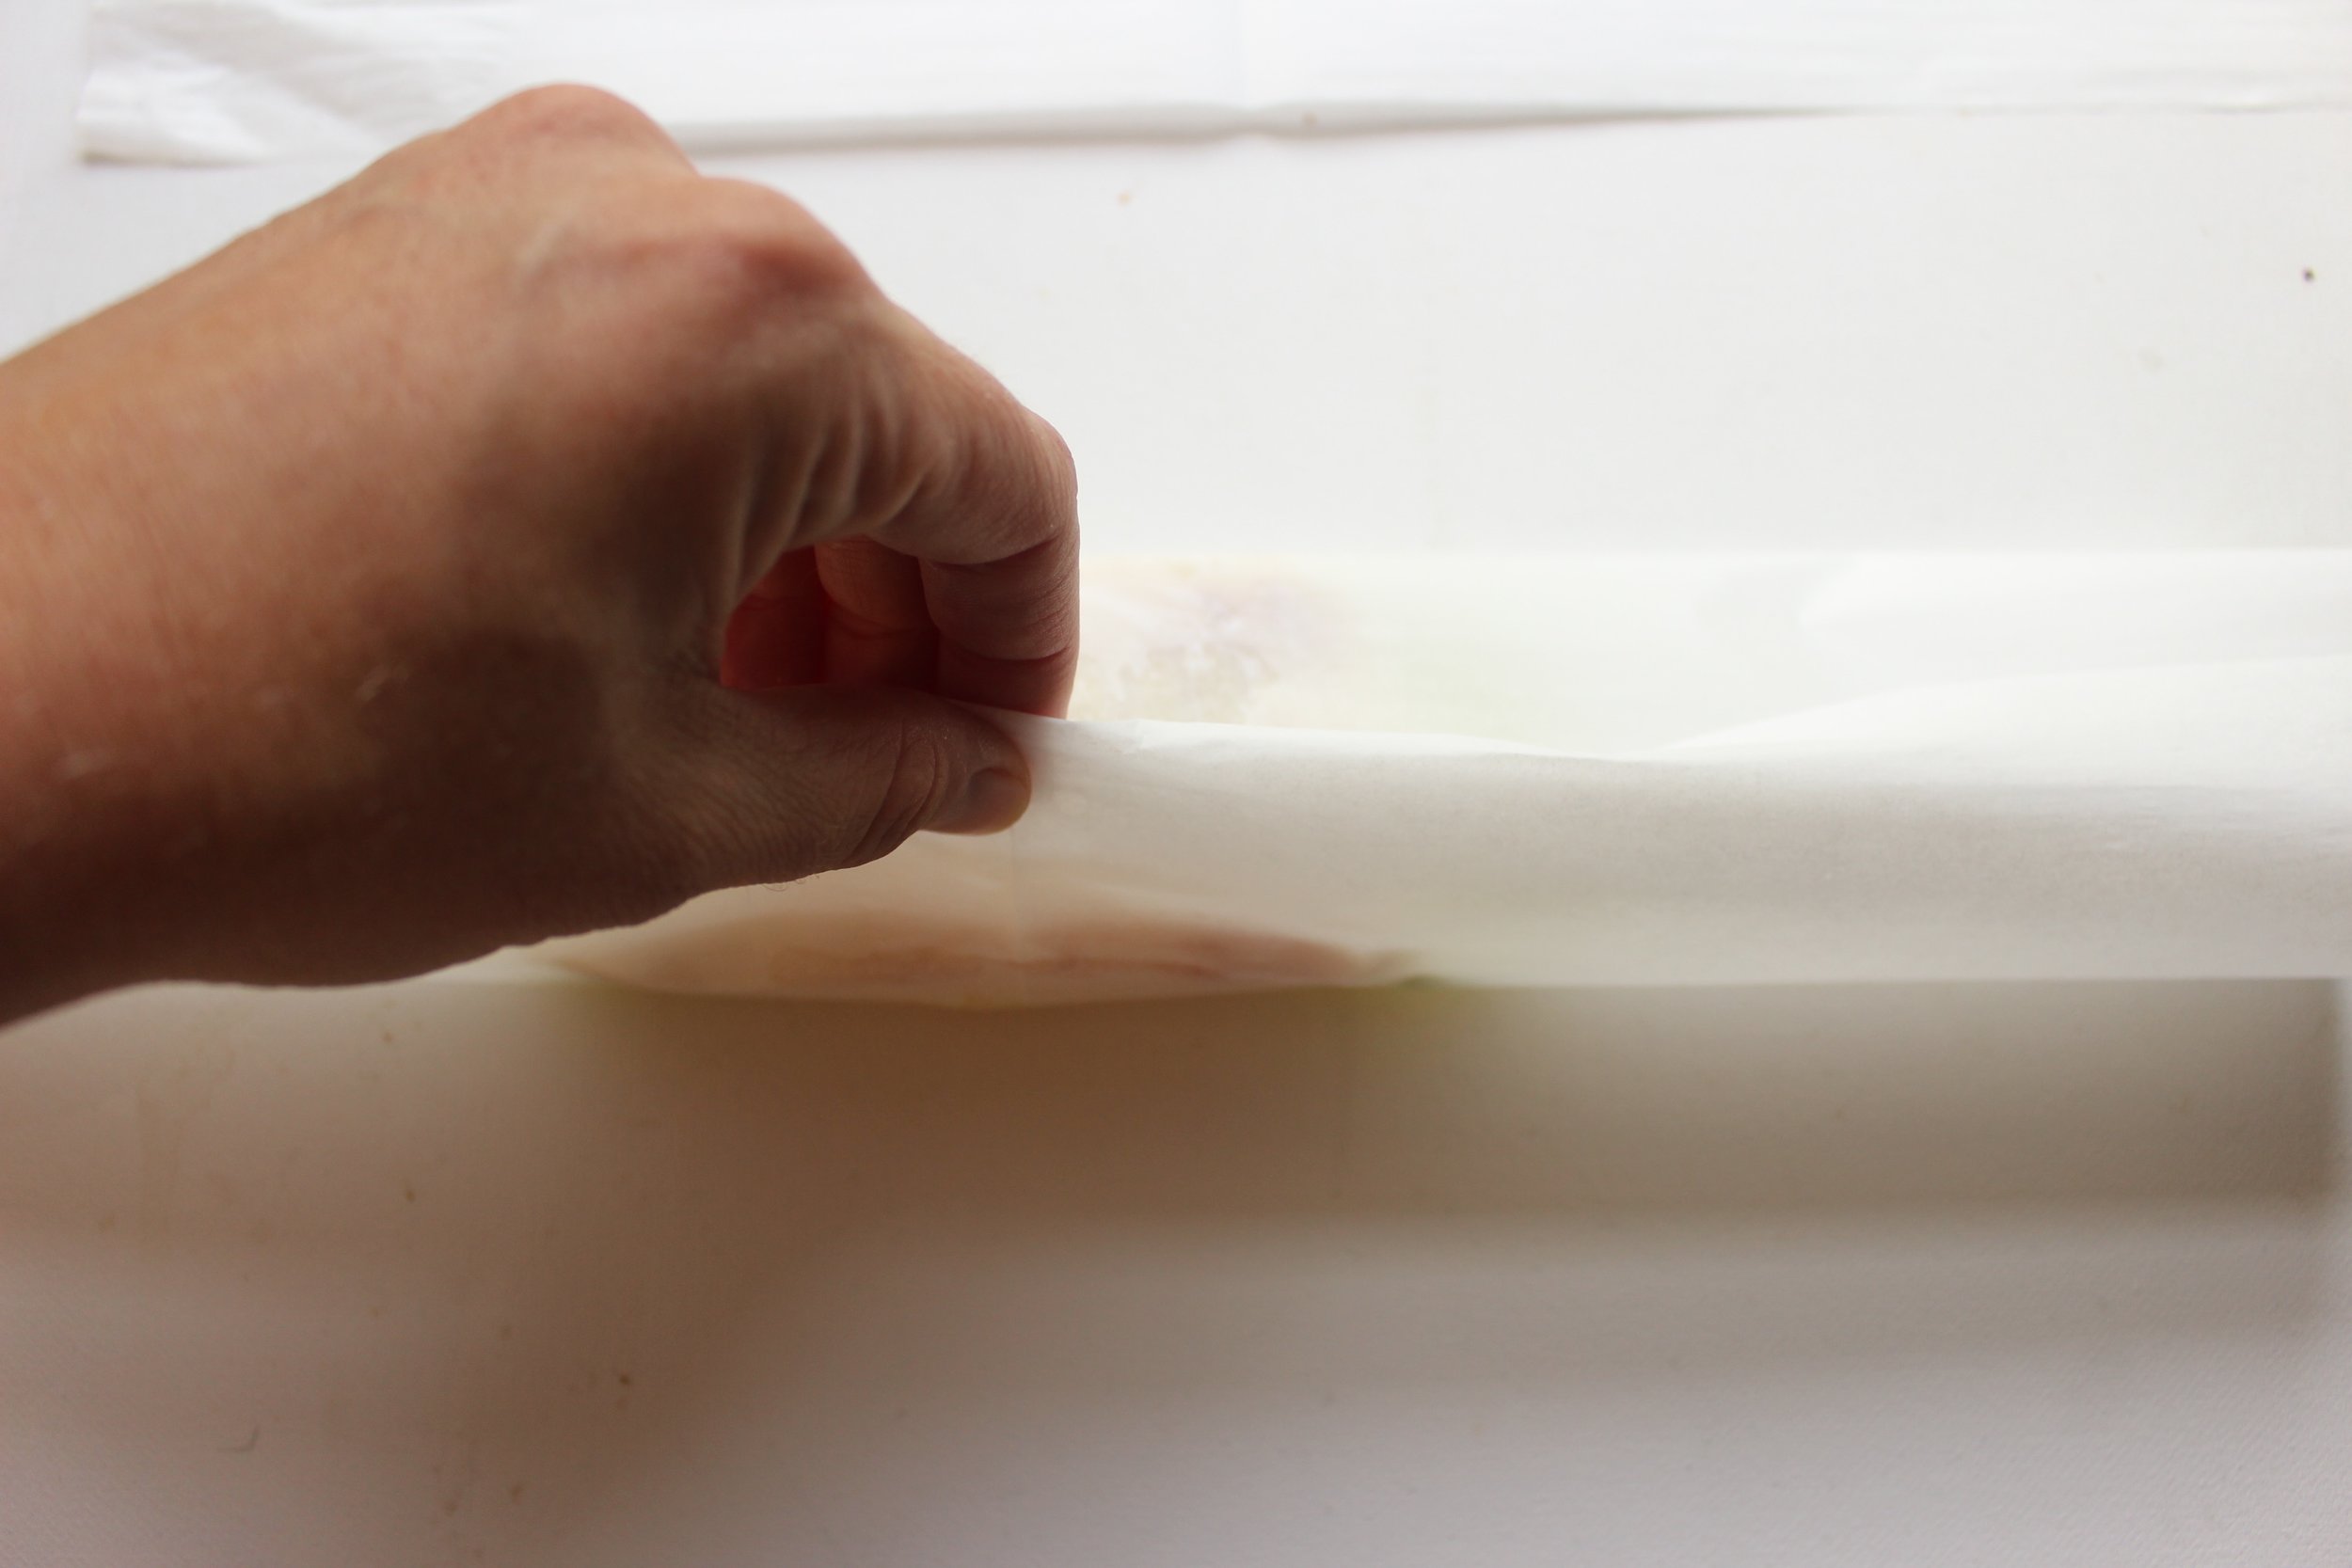
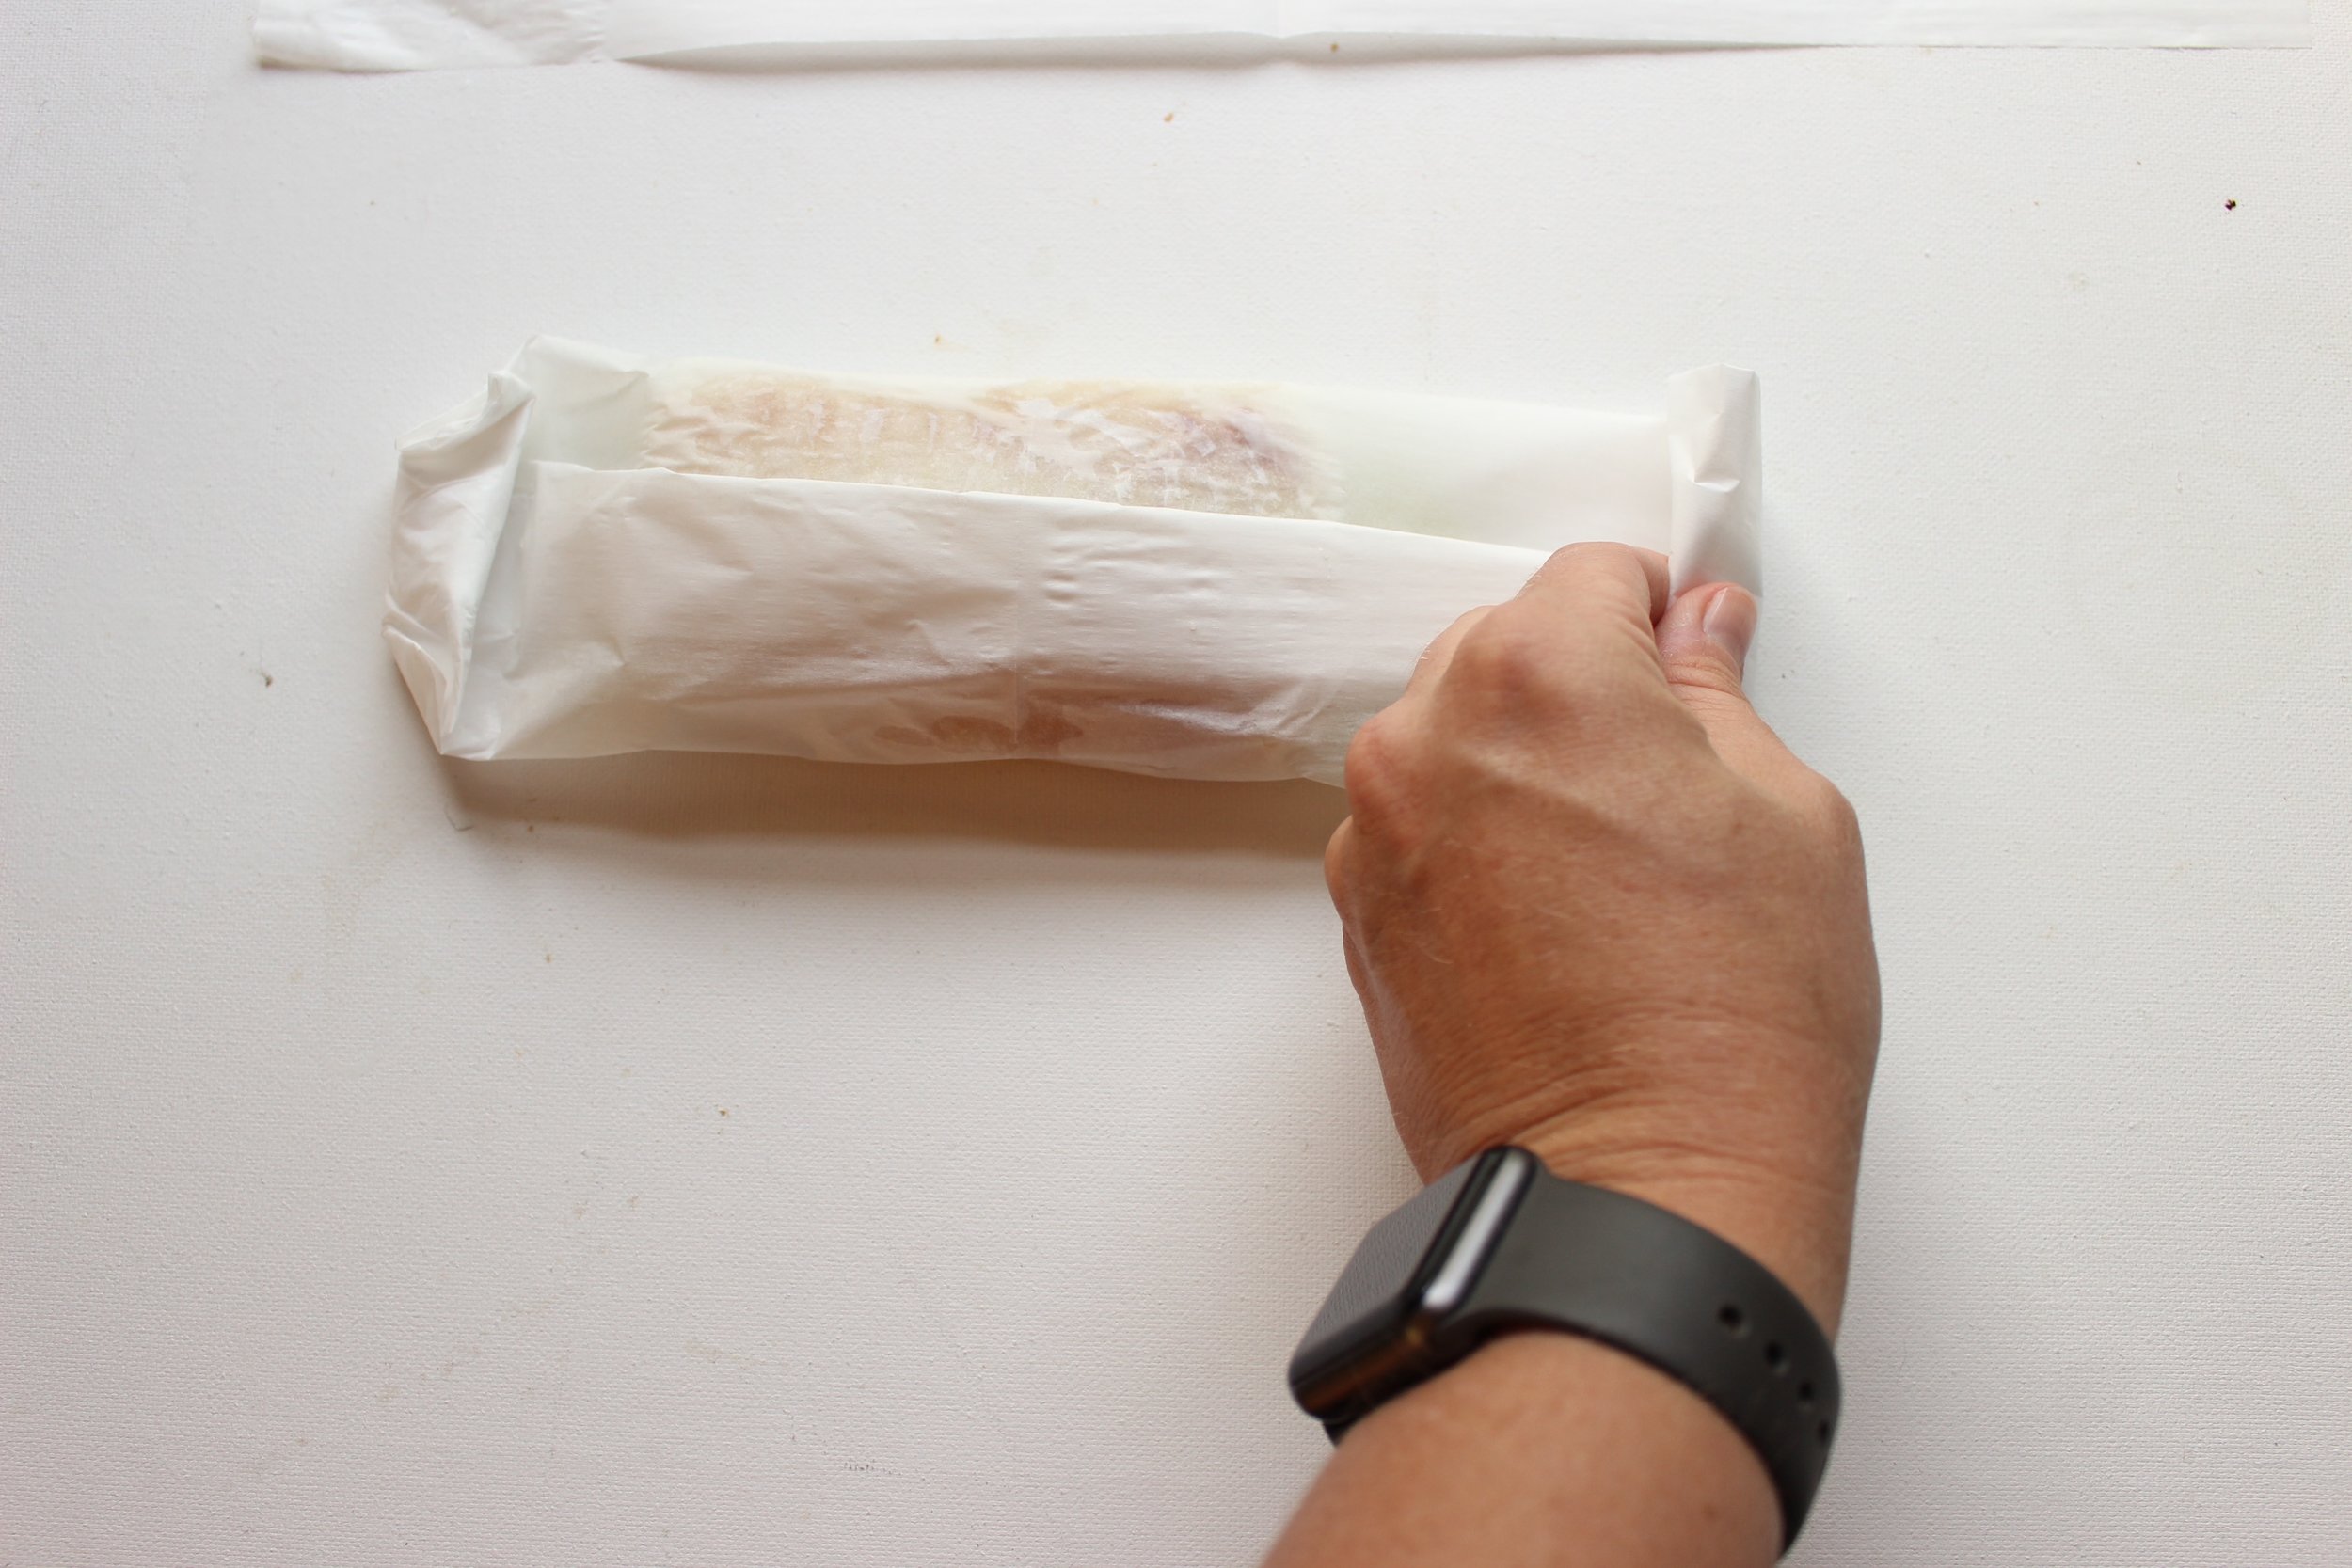
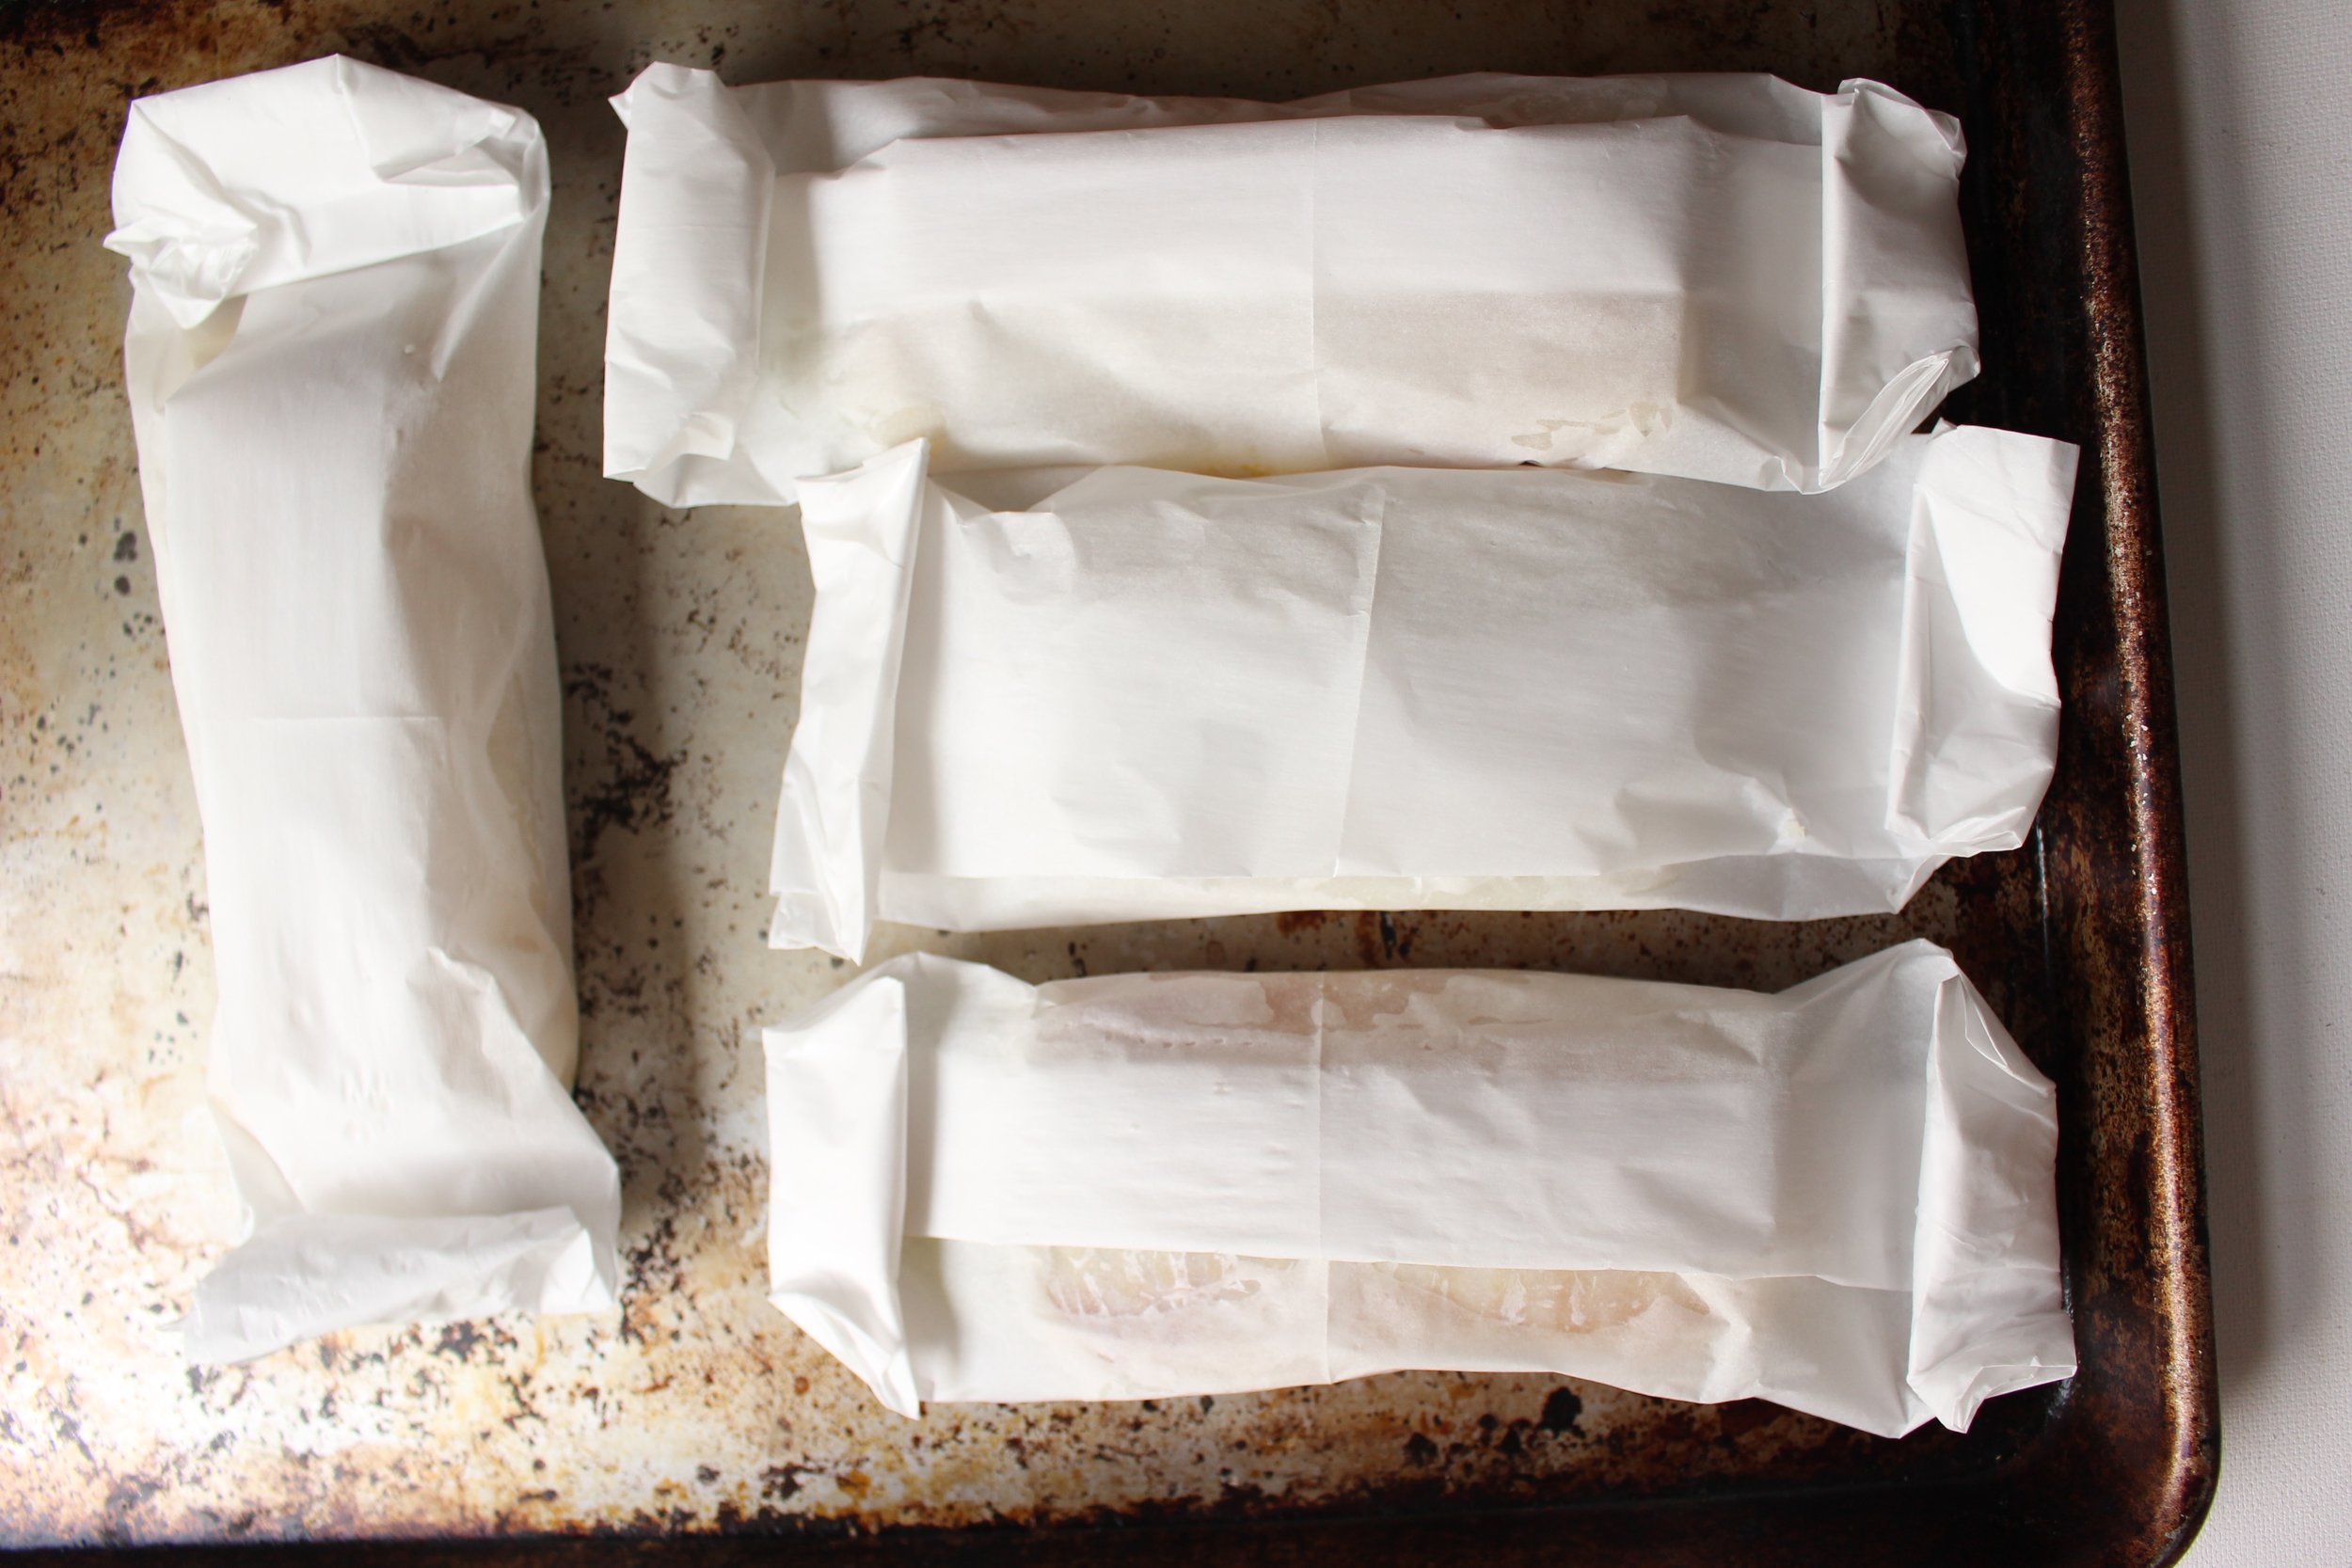
Instead, you're going to wrap up the fish on a bed of lemon and lime in parchment bundles and let them steam on top of the cabbage and scallions to achieve the best of both cooking methods while still only using one pan. Because, it's hot. Here is a handy illustration of my favorite folding method:

So! Wrap up the fish and let it steam in the citrus. Chop the cabbage and scallions, toss with some olive oil, and throw the whole mess into the oven. While it's cooking, heat some taco shells, whizz some avocado crema in the blender, and prep any other toppings you might want (cheese, tomatoes, jicama, beans, etc). Tonight's dinner can be ready in about 30 minutes and is a nice departure from the usual taco night.

Wrapping the white fish in parchment packages helps retain their moisture while also letting the cabbage and scallions get roasted and crispy. It also decreases the mess even more.
Parchment contains the moisture so that the fish steams while the veggies roast.

Roasted cabbage fish tacos with avocado chipotle crema  

½ small head of red cabbage, roughly chopped
½ small head of napa cabbage, roughly chopped (about 6 cups total cabbage)
8 scallions, trimmed and cut in half width-wise
2 Tbsp olive oil
1 large lemon
3 large limes, divided
1 ¼ lb cod or other firm white fish (four medium fillets)
1 Tbsp mayo
1 large avocado
Juice of 1 lime (about 1-2 Tbsp)
4-6 Tbsp water
1 small clove garlic
1-2 tsp chipotles in adobo or chipotle hot sauce
1/2 tsp kosher salt
12 corn tortillas

Preheat oven to 400.

Toss the cabbage and scallions with 2 Tbsp of olive oil and salt and spread onto a baking sheet. Set aside.

Slice the lemon and one of the limes. Spread out four sheets of parchment paper or tin foil on your countertop. Place 2 or 3 slices of the lemon and lime in the middle of the parchment. Place one fish filet onto the citrus bed and sprinkle with salt and pepper.

To fold the bundles, bring the edges of the two longest sides of the parchment together and fold over three or four times until you can’t fold anymore without hitting the fish inside. Next, fold the sides toward the middle until you’ve made a tight rectangle around the fish. Place on top of the veggies, making sure to move the scallions out from beneath the fish and toward the edges of the sheet pan.

Roast until the veggies are wilted and lightly browned and the fish flakes easily with a fork, about 15 minutes. If desired, carefully remove the fish bundles, being aware of steam that might escape, and roast the veggies for another 5 minutes.

Meanwhile, make the chipotle avocado crema. Combine the mayo, avocado, lime juice, water, garlic, chipotles or hot sauce, and salt in a blender or food processor and blend until smooth. If too thick, scrape down the sides and add more water a little bit at a time and blend again until you've reached the right consistency. 

Toast the corn tortillas and prep any other fixings you might want with your tacos (cheese, more avocado, beans, tomatoes, etc). Squeeze some more lime juice over the assembled tortillas and serve.

Yield: 4 servings of three tacos and 1 fish fillet each

Taco night and sheetpan dinner night in one! No mess!
Colorful and healthy family taco night.
Roasted cabbage and scallions are mellow enough for toddlers and picky eaters.

Lemon basil ricotta cake

Bright, zingy lemon and herby, green basil make a perfect pair in this lightly sweet cake that’s easy, quick, and refreshing. #meandthemoose #lemoncake #basil #lemonbasil #cakerecipe #weeknightcake

Bright, zingy lemon and herby, green basil make a perfect pair in this lightly sweet cake that’s easy, quick, and refreshing. #meandthemoose #lemoncake #basil #lemonbasil #cakerecipe #weeknightcake

You may find the idea of turning on the oven insulting given that the weather is so unbelievably hot and humid. But hear me out: This cake requires one bowl and less than 30 minutes in the oven. AND is chock-a-block with sweet, tangy, summery flavor. A weeknight cake if there ever was one.

Take me to the cake!

Bright, zingy lemon and herby, green basil make a perfect pair in this lightly sweet cake that’s easy, quick, and refreshing. #meandthemoose #lemoncake #basil #lemonbasil #cakerecipe #weeknightcake

Bright, zingy lemon and herby, green basil make a perfect pair in this lightly sweet cake that’s easy, quick, and refreshing. #meandthemoose #lemoncake #basil #lemonbasil #cakerecipe #weeknightcake

Bright, zingy lemon and herby, green basil make a perfect pair in this lightly sweet cake that’s easy, quick, and refreshing. #meandthemoose #lemoncake #basil #lemonbasil #cakerecipe #weeknightcake

Bright, zingy lemon and herby, green basil make a perfect pair in this lightly sweet cake that’s easy, quick, and refreshing. #meandthemoose #lemoncake #basil #lemonbasil #cakerecipe #weeknightcake

One of my favorite things about finally having a yard is growing our own herbs. And we can't keep up with how fast the basil grows. It's a good thing I L.O.V.E. pesto. And we've definitely been throwing a handful of basil into just about everything, including our cakes.

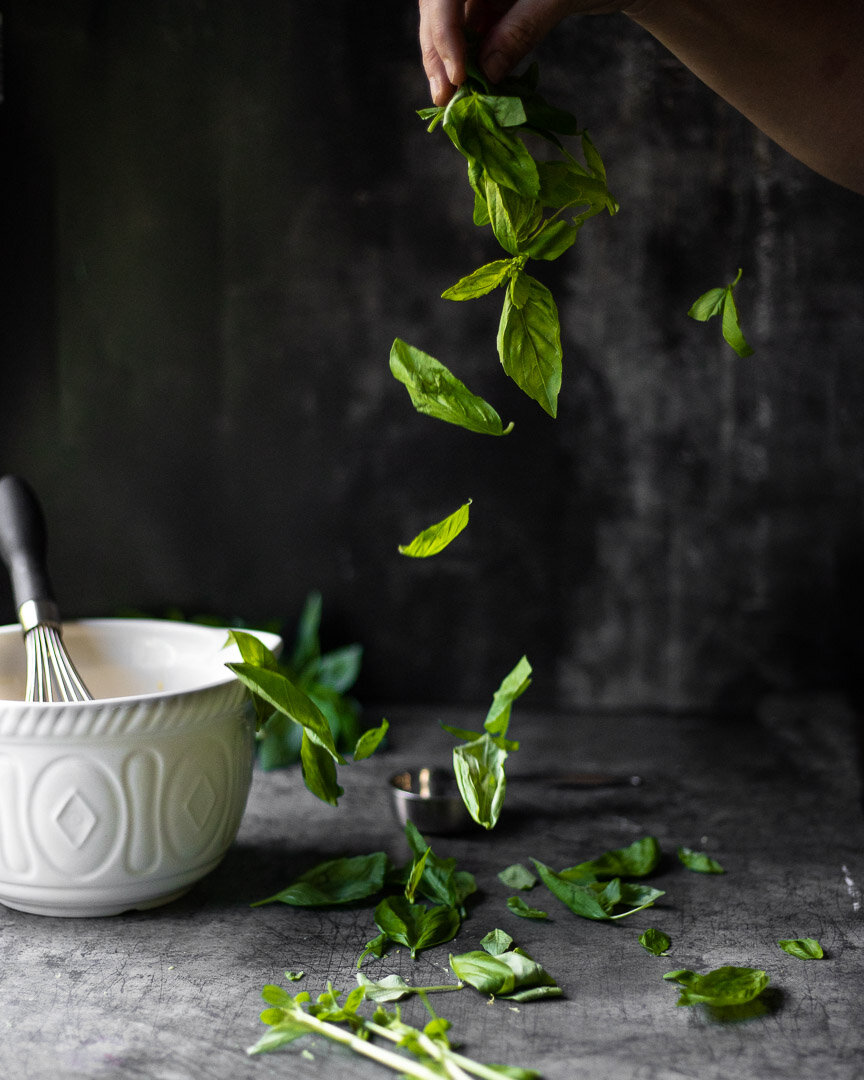
Speaking of basil, this recipe calls for a PACKED 1/4 cup, which is a fair amount of basil:

Bright, zingy lemon and herby, green basil make a perfect pair in this lightly sweet cake that’s easy, quick, and refreshing. #meandthemoose #lemoncake #basil #lemonbasil #cakerecipe #weeknightcake

Bright, zingy lemon and herby, green basil make a perfect pair in this lightly sweet cake that’s easy, quick, and refreshing. #meandthemoose #lemoncake #basil #lemonbasil #cakerecipe #weeknightcake

See?

I didn't “healthify” this recipe at all, but I did use the smallest amount of sugar possible in the batter to have a sweet cake without it being cloyingly so. Not for nothing, there's another 3/4 cup of confectioner's sugar in the glaze (and more if you add the optional cream cheese frosting), so this baby doesn't want for sweetness.

It took some tinkering to figure out the right amounts of basil and lemon to impart a strong flavor without turning the cake bitter (too much basil) or sour (too much lemon). In the end, the basil is a background herby note that plays really well with the bright lemon flavor.

Bright, zingy lemon and herby, green basil make a perfect pair in this lightly sweet cake that’s easy, quick, and refreshing. #meandthemoose #lemoncake #basil #lemonbasil #cakerecipe #weeknightcake

And ricotta! I adapted this recipe from the famous French yogurt cake and the textures are very similar. I think the ricotta makes the cake ever-so-slightly more dense and a little more savory. However, I’ve used yogurt in a pinch when I was out of ricotta and it works perfectly as well.

A quick note: I’ve cooked this cake in all kinds of vessels. The recipe gives directions for a 9” round cake pan, but I’ve also cooked it as a loaf cake, in an 8x8 brownie pan, and in a vintage 10x8 pan (pictured). The shortest cooking time was 20 minutes and the longest was about 30 minutes (for the thicker loaf). Start checking at about 20 minutes, regardless of which vessel you choose.

Bright, zingy lemon and herby, green basil make a perfect pair in this lightly sweet cake that’s easy, quick, and refreshing. #meandthemoose #lemoncake #basil #lemonbasil #cakerecipe #weeknightcake

Bright, zingy lemon and herby, green basil make a perfect pair in this lightly sweet cake that’s easy, quick, and refreshing. #meandthemoose #lemoncake #basil #lemonbasil #cakerecipe #weeknightcake

Lemon basil ricotta cake

Time: About 45-55 with prep, mixing, baking, and glazing; more to cool and frost, if desired
Yield: About 8-10 servings

2 eggs
1 cup ricotta (I've had equal success with part-skim and whole; you can also use greek yogurt)
1/2 cup sugar
¼ cup olive oil
1 teaspoon vanilla
2 Tbsp lemon zest (zest of two extra-large lemons)
¼ cup basil (packed!), minced
2 cups all-purpose flour
1 ½ tsp baking powder
½ tsp baking soda
¼ tsp salt

For the glaze:
¾ cup confectioner’s sugar
¼ cup of lemon juice (juice of 1 very large lemon)

For the cream cheese frosting (optional):
1/2 cup (1 stick) butter, room temperature
8 oz (1 block) cream cheese, room temperature
1 1/2 cups powdered sugar (plus more if you like a sweeter frosting)
1/2 tsp vanilla extract
1 Tbsp lemon zest (from 1 large lemon)
large pinch of salt

In a large bowl with a hand mixer or in the bowl of a stand mixer with the paddle attachment, mix together the butter and cream cheese on medium low speed until well mixed, about 3 minutes.

Add the powdered sugar a few Tbsp at a time and mix on low speed until just combined. Taste for sweetness and add more powdered sugar if desired.

Add the vanilla, lemon zest, and pinch of salt and turn the mixer (hand or stand) up to high and mix for about 5 minutes until the texture of the frosting has become slightly less dense.

*I’m very loosey goosey about my cream cheese frosting because I firmly believe that it’s the hardest frosting to mess up. It tastes amazing and the texture is creamy and smooth even if it hasn’t been mixed exactly the right amount. I also like my frosting less sweet, so you may want to add more sugar in the end.

Make the cake
Preheat the oven to 350. Lightly oil a 9-inch cake pan (see notes about other sized pans above)** and set aside.

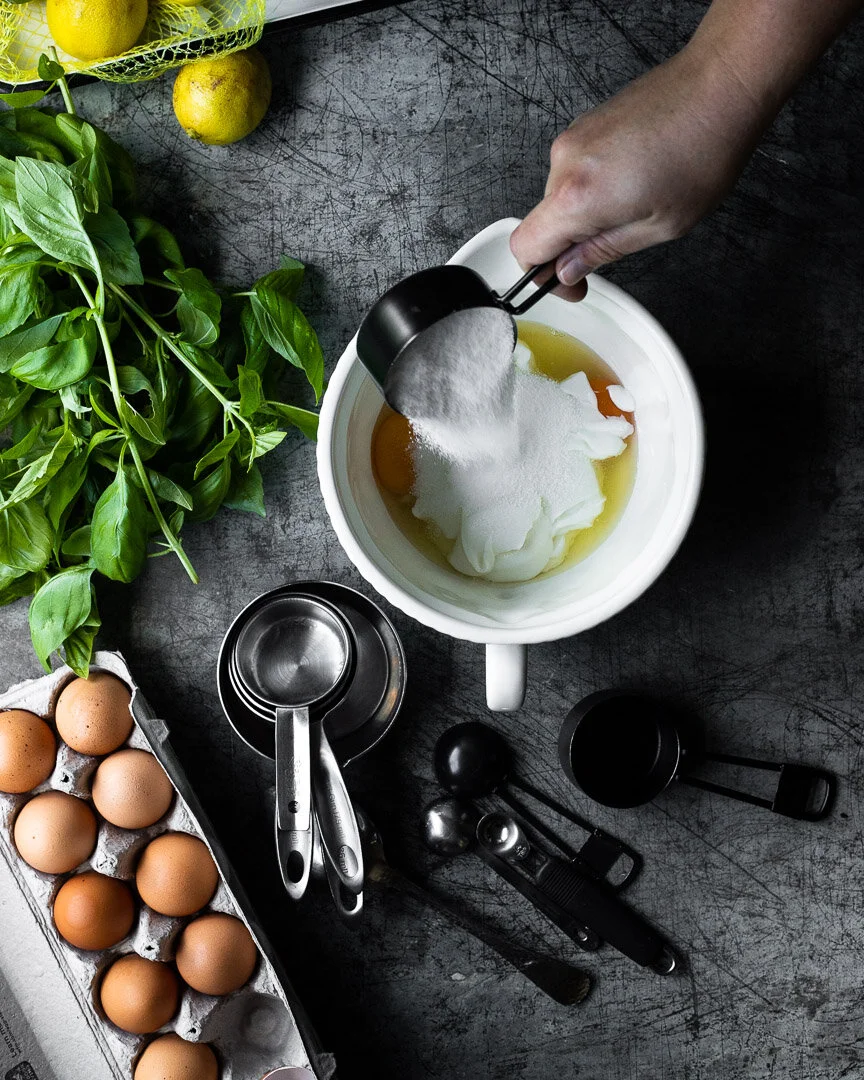
In a large bowl, combine the eggs, ricotta, sugar, olive oil, vanilla, lemon zest, and basil and mix well.

Add the dry ingredients and mix just until the wet and dry components are combined and no clumps of flour remain. The batter will be very thick.

Pour (or plop, as this is a thick batter) the mixture into your prepared pan and bake for 20-30 (again, see notes above for variation in cooking times)** minutes or until the top is golden and a toothpick inserted in the middle comes out clean. (We have a very hot oven, so yours may need more time, but check often to avoid overcooking.)

Let cool for about 5 minutes.

While the cake is cooling, make the glaze. Add the confectioner’s sugar to a medium bowl and slowly pour in the lemon juice, whisking constantly, until you’ve reached your desired consistency (a thin glaze soaks into the cake better, so use your judgment) .

Once the cake is slightly cooled, pour your glaze over the entire top, making sure that the liquid goes into the holes. I sometimes use a brush to coax the glaze into the holes, but this isn't strictly necessary.

Let cool completely in its baking dish.

Frost with the cream cheese frosting, if desired.