Avocado toast with a twist
Refresh your breakfast and lunch avocado toast routines with these three quick and healthy spins on the classic sandwich staple.

Try a new take on the quick, easy, and healthy classic avocado toast with chickpeas, harissa, feta, tzatziki, pesto, arugula, eggs, and dukkah! #meandthemoose #avocadotoast #lunch #easyrecipes #breakfast
I know, I know. Who really needs a recipe for avocado toast? Well, here’s the thing. I’m SO BORED with the standard base and toppings. I love everything bagel seasoning, but if I eat one more avocado smashed with it sprinkled on top, I’m going to turn into an everything bagel. Which might sound okay, but trust me, I would make a VERY SALTY bagel.
Anyway, here are some fun options I’ve been incorporating into the rotation!

Egg, pesto, and arugula liven up the classic avocado toast. #meandthemoose #avocadotoast #pesto #eggs #breakfast #lunch

Egg, pesto, and arugula liven up the classic avocado toast. #meandthemoose #avocadotoast #pesto #eggs #breakfast #lunch
Egg, pesto, and arugula avocado toast
1 piece of bread (your choice!)
1/4 large avocado, smashed
2 Tbsp pesto
1 egg, cooked using your preferred method
1 large handful arugula
flaky sea salt
drizzle of olive oil
Toast your bread.
While the bread is toasting, cook your egg however you like. I’ve used fried, poached, hard-boiled, and scrambled eggs in this and they all taste great.
Prep your other ingredients. I linked to my basic, kid-friendly pesto above, but there are loads of pesto recipes on this site OR feel free to use your own favorite recipe or a store-bought version.
Smash the avocado onto your bread with a fork and spread pesto on top. Add the egg and the arugula. Top with a sprinkle of salt and a drizzle of olive oil.

Crispy chickpeas, dukkah and harissa are a fresh vegan take on the classic avocado toast. #meandthemoose #veganrecipes #veganlunch #chickpeas
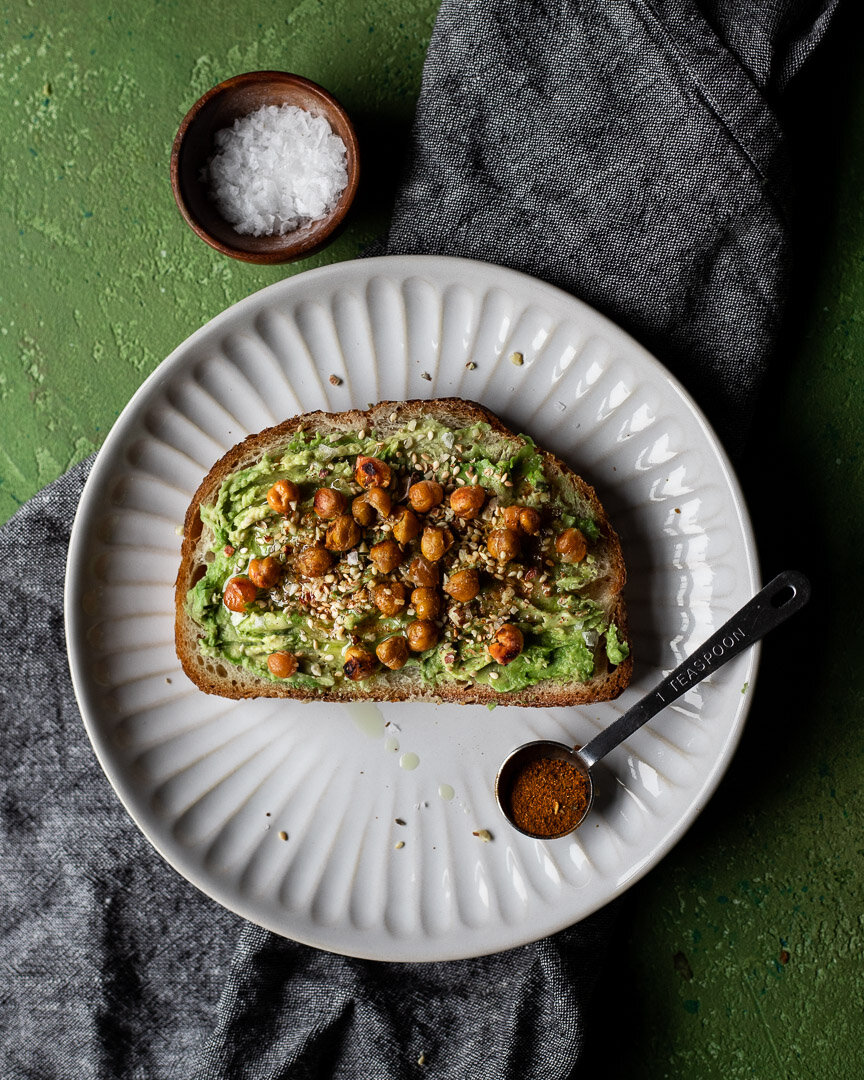
Crispy chickpeas, dukkah and harissa are a fresh vegan take on the classic avocado toast. #meandthemoose #veganrecipes #veganlunch #chickpeas
Dukkah, crispy chickpea, and harissa avocado toast
1 piece of bread (your choice!)
1/4 large avocado, smashed
1 can of chickpeas
1-2 Tbsp olive oil
pinch of sea salt
1 Tbsp dukkah seasoning (I used a Trader Joe’s mix, but dukkah recipes and pre-made mixes are easy to find)
1/4-1/2 tsp harissa spice
flaky sea salt
drizzle of olive oil (I used roasted garlic oil)
Preheat the oven to 400. Spread the drained chickpeas out on a sheet pan and pat dry with a paper towel. Drizzle with the olive oil and a large pinch of sea salt and bake for 10-15 minutes or until the chickpeas are crispy.
While the chickpeas are baking, toast your bread.
Smash the avocado on top of the bread and sprinkle with the dukkah seasoning. Top with about 1/4 cup of the crispy chickpeas. Sprinkle on your desired amount of harissa, flaky sea salt, and olive oil.

Quick-pickled cucumbers and onions add a lightly sweet and tangy bite to the salty feta and creamy, garlicky tzatziki of this new version of avocado toast. #meandthemoose #feta #tzatziki #avocadotoast #lunch #breakfast #quickpickles

Quick-pickled cucumbers and onions add a lightly sweet and tangy bite to the salty feta and creamy, garlicky tzatziki of this new version of avocado toast. #meandthemoose #feta #tzatziki #avocadotoast #lunch #breakfast #quickpickles
Tzatziki, feta, and pickled cucumber avocado toast
1 piece of bread (your choice!)
1/4 large avocado, smashed
1 English or hothouse cucumber (use 3/4 for the pickles and the other 1/4 for the tzatziki if making yourself)
1/2 large white onion
1/2 cup white vinegar
1/2 tsp salt
1 Tbsp sugar
1-2 Tbsp tzatiki (recipe here or use a premade version)
1-2 Tbsp crumbled feta
Thinly slice 3/4 of the cucumber and 1/2 of the onion. Combine with the white vinegar, salt, and sugar in a container with a lid. Shake well and leave to marinate for 5-10 minutes.
Make the tzatziki, if necessary.
Toast your bread. Smash the avocado on the bread and top with pickled cucumbers. Add the tzatziki and top with the crumbled feta.