Zucchini with sage and caramelized onions

This simple dish celebrates summer produce and herbs like zucchini and sage. #caramelizedonions #sage #simplerecipes #dinner #lunch #vegetarian

This simple dish celebrates summer produce and herbs like zucchini and sage. #caramelizedonions #sage #simplerecipes #dinner #lunch #vegetarian

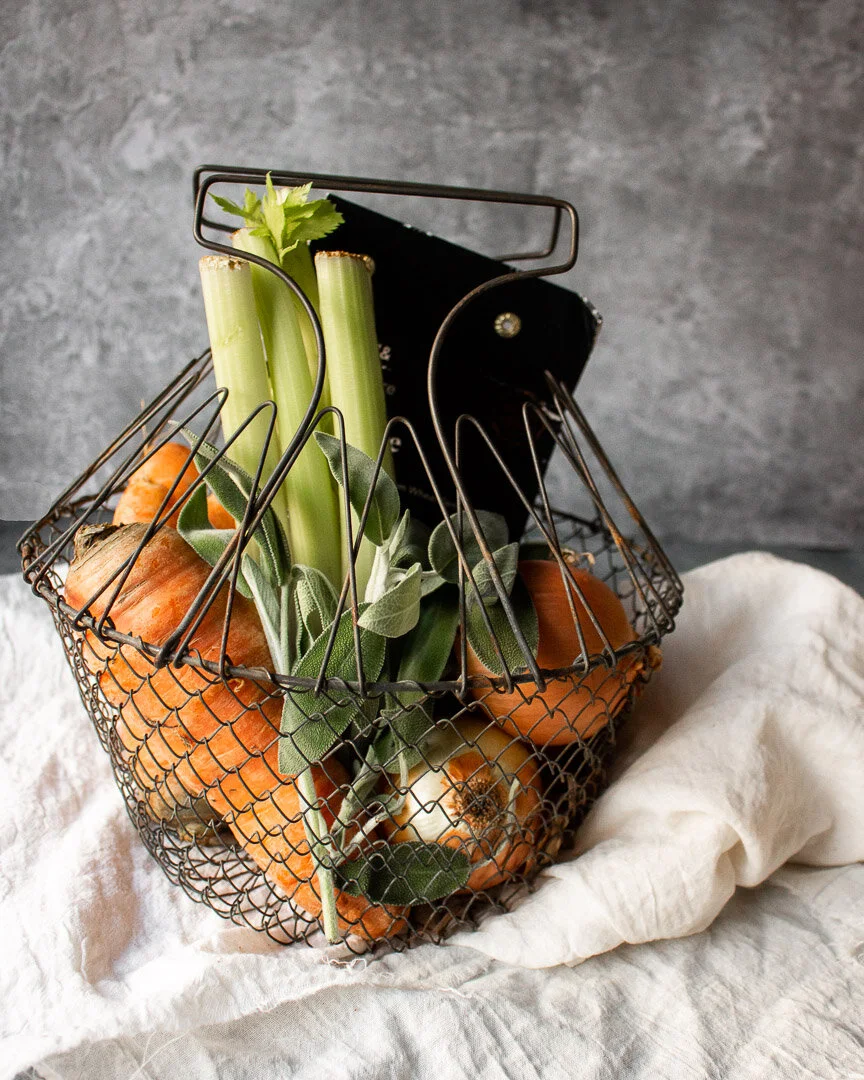
This 5-ingredient dish (I’m not counting water, salt, and pepper) is super simple, but tastes surprisingly complex and can be customized in endless ways to suit your family’s tastes.

Take me to the recipe!

This simple dish celebrates summer produce and herbs like zucchini and sage. #caramelizedonions #sage #simplerecipes #dinner #lunch #vegetarian

This simple dish celebrates summer produce and herbs like zucchini and sage. #caramelizedonions #sage #simplerecipes #dinner #lunch #vegetarian

So, I love zucchini. I actually kind of grieved when my glorious early zucchini plant withered and died thanks to a hungry squash vine borer this summer. But, truth be told, zucchini is kind of a zero in the flavor department. One of its best qualities is that it takes on the personality of whatever it’s paired with, right?

Take zoodles, for example. You would think the titular veg would be the star of the show, but those fake noodles are nothing without a great sauce!

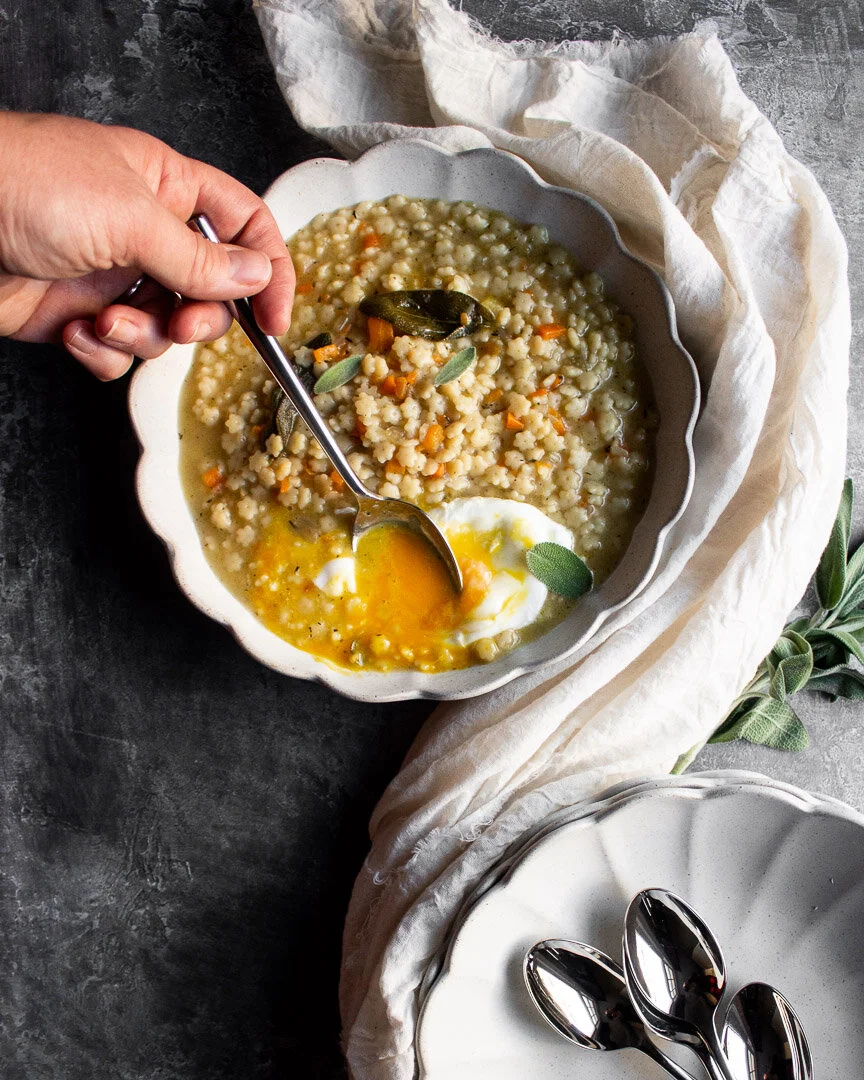
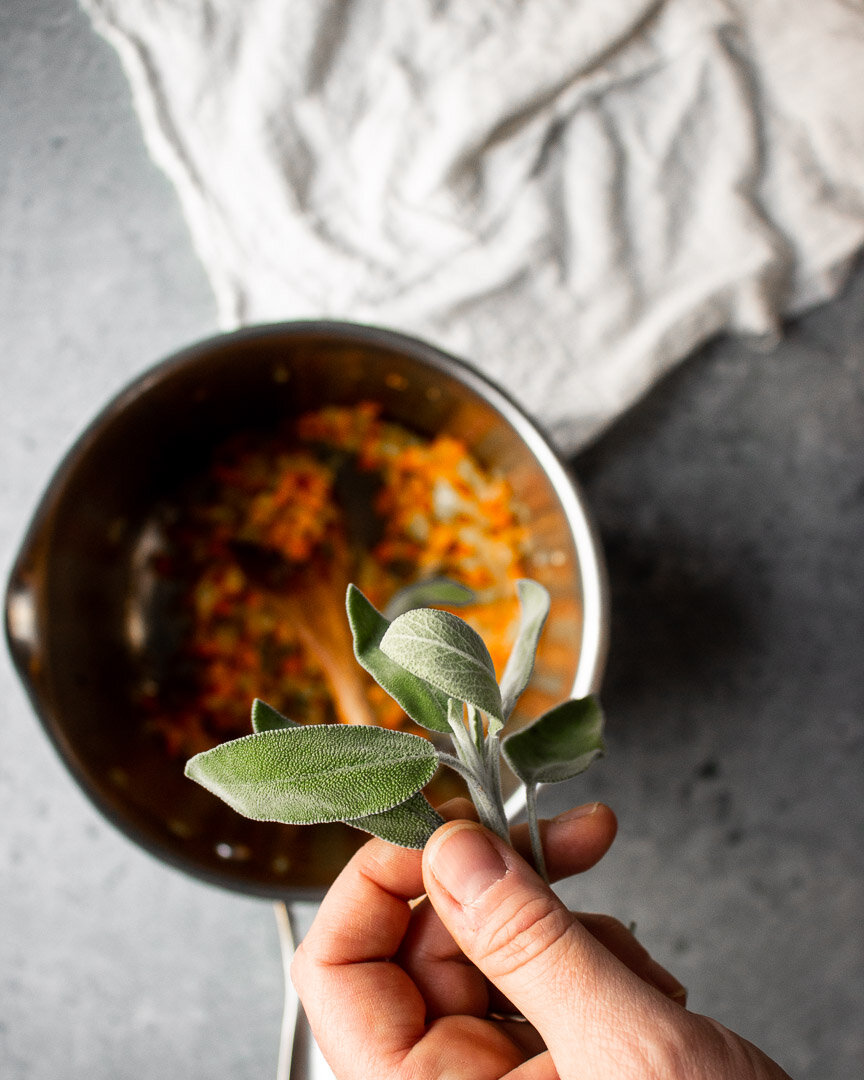
Anyway, THIS zucchini dish has caramelized onions and plenty of salt for flavor, sage for herbiness, and goat cheese to give everything a creamy, saucy vibe. The zucchini is really there for body and to provide a base for the other flavors and it totally does the job!

This simple dish celebrates summer produce and herbs like zucchini and sage. #caramelizedonions #sage #simplerecipes #dinner #lunch #vegetarian

This simple dish celebrates summer produce and herbs like zucchini and sage. #caramelizedonions #sage #simplerecipes #dinner #lunch #vegetarian

This simple dish celebrates summer produce and herbs like zucchini and sage. #caramelizedonions #sage #simplerecipes #dinner #lunch #vegetarian

This simple dish celebrates summer produce and herbs like zucchini and sage. #caramelizedonions #sage #simplerecipes #dinner #lunch #vegetarian

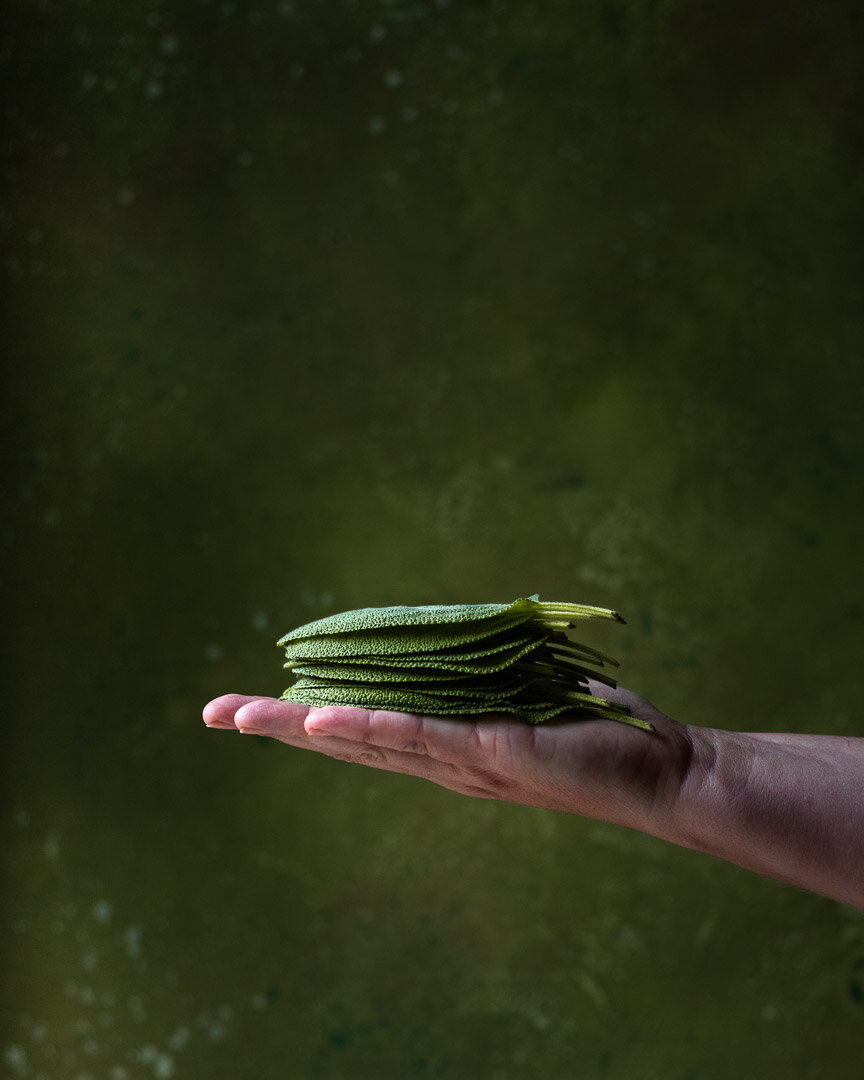
But can we talk about sage for a second? Where our zucchini flopped, our sage flourished and we ended up with the most gigantic and brilliant green leaves. But sage feels so autumnal that I struggle to use it in the summer time. And in all fairness, the combo of caramelized onions, goat cheese, and sage does have an autumn vibe. But when paired with the summery zucchini, you can totally eat this in July without feeling like you’re trying to speed up time.

A couple of notes:

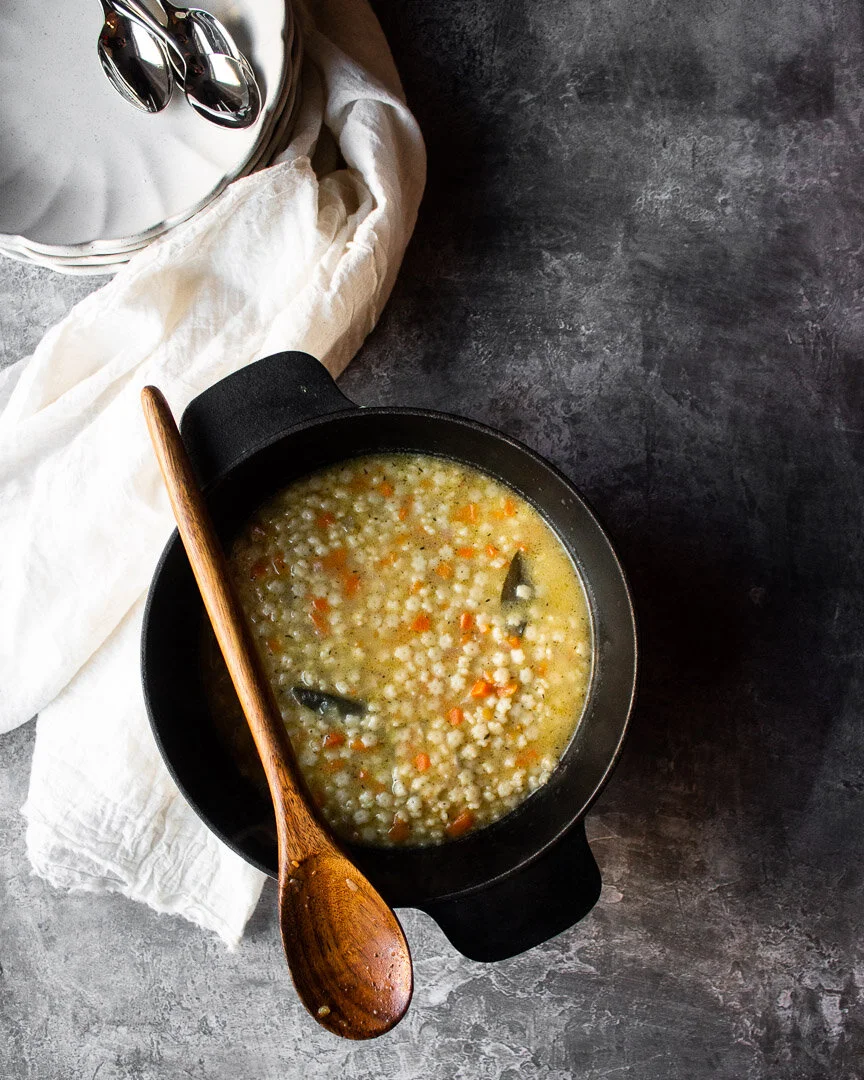
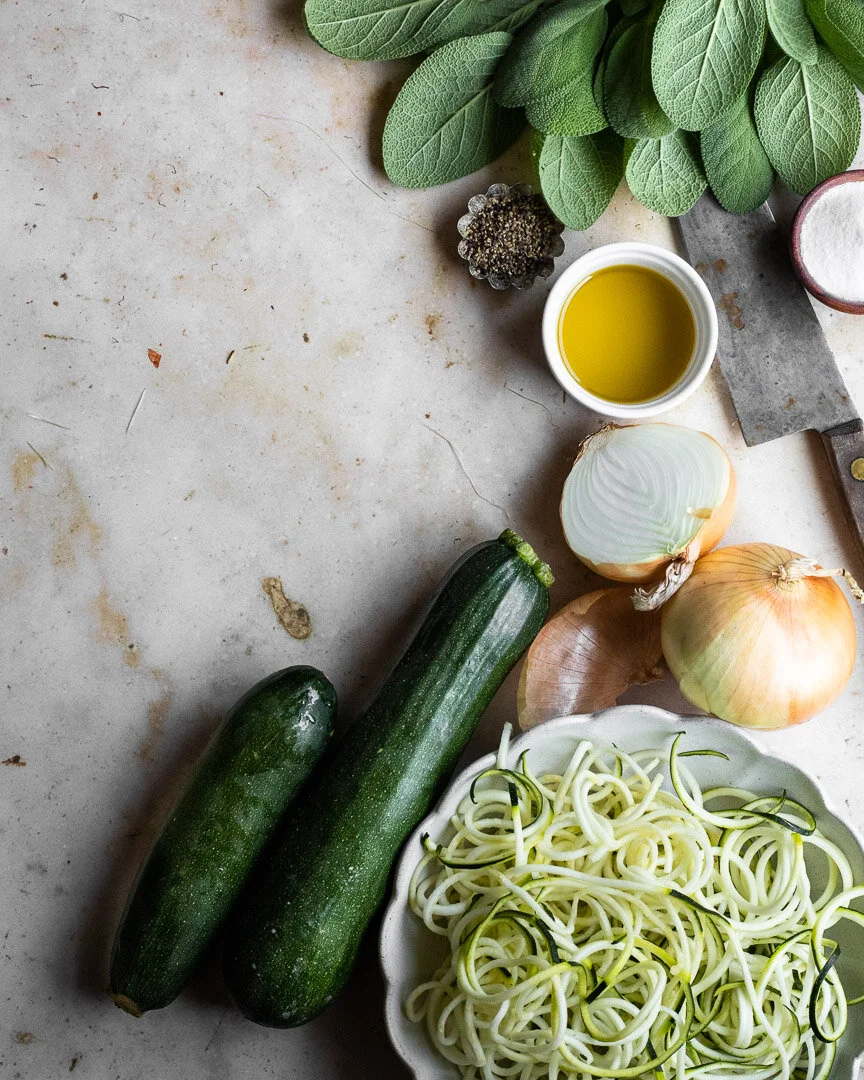
  • I spiralized the zucchini, but when cooking the zoodles, they produce a lot of water. If you want something a little dryer or just don’t have/don’t want a spiralizer, just chop the zucchini into 1/2 inch cubes. They’ll be less wet, but no less delicious.

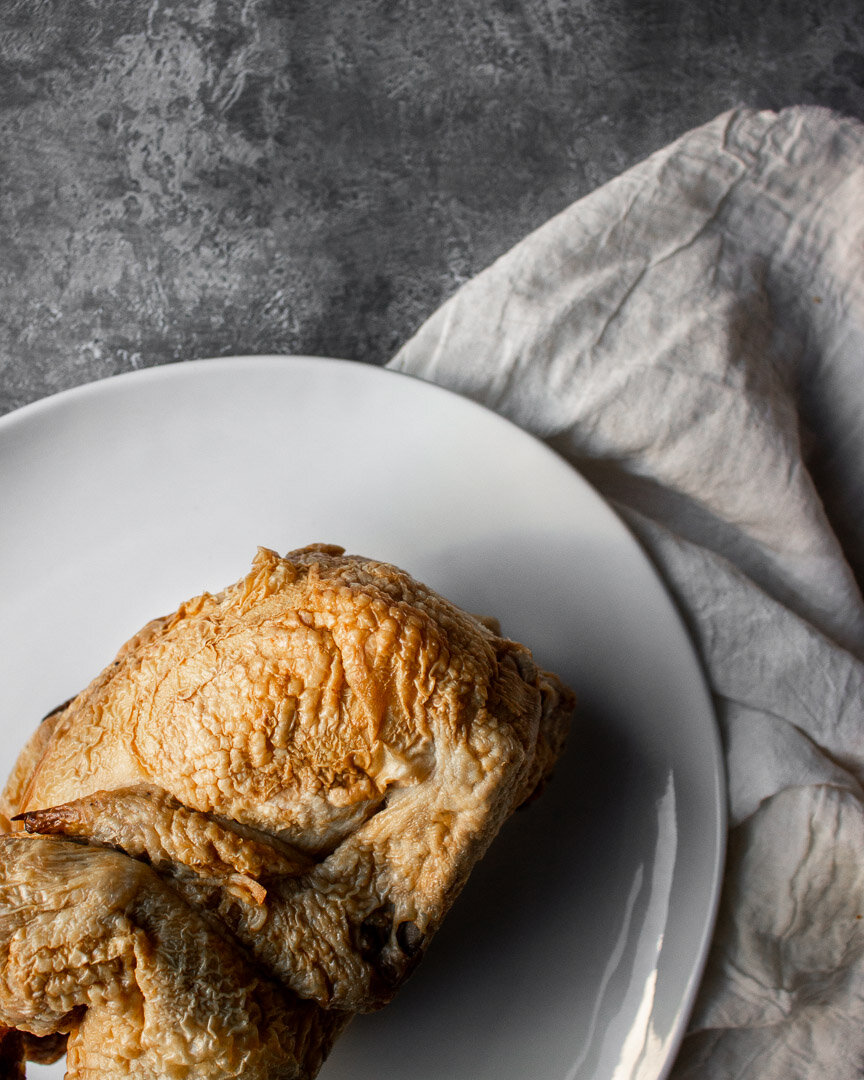
  • We added white fish to this dish the first time we made it and it was my favorite iteration by far. You can absolutely add a can of beans, shredded chicken, or any other protein as well. But anything that requires more than a few minutes of cooking time (the white fish was thin and cooked in about 6 minutes) should be pre-cooked and added along with the zucchini to heat up during the veg’s short cooking time.

This simple dish celebrates summer produce and herbs like zucchini and sage. #caramelizedonions #sage #simplerecipes #dinner #lunch #vegetarian

This simple dish celebrates summer produce and herbs like zucchini and sage. #caramelizedonions #sage #simplerecipes #dinner #lunch #vegetarian

Zucchini with caramelized onions and sage

Time: 30 minutes, all active
Yield: 2 large adult servings, 2 kid servings or more if you add protein

2 large onions, thinly sliced
2 Tbsp olive oil
2 -3 cups water
1 tsp salt, divided, or to taste
5-10 x-large sage leaves (about 1½ to 3 Tbsp chopped fresh sage), to taste
2 large zucchini, chopped or spiralized
Pepper, to taste
½ cup soft goat cheese, or to taste

Heat the olive oil in a large pan with a tight fitting lid until a drop of water sizzles. 

Turn the flame to medium* and add the onions. Stir frequently until some browning begins on the onions or in the pan. Once this happens, add 2-3 Tbsp of water (or, enough to loosen those browned bits from the bottom of the pan), stir and scrape to loosen the browned bits, cover with the lid, and let cook for 2 minutes.**

Repeat this process until the onions are soft and have turned a dark brown color.

*If the onions or the pan are browning too fast, turn down the flame. 

**If there is too much water in the pan when you take off the lid after letting the onions cook for 2 minutes, turn up the flame and let the onions cook with the cover off until there’s more browning on the pan that can be deglazed.

Once the onions are browned to your liking (I usually stop after about 20 minutes), add ½ tsp salt and pepper to taste. 

Add the sage and stir well. 

(If adding protein to the pan, add it now and cook to your preferred doneness.)

Add the zucchini and stir into the onions and sage. Cook for 2-3 minutes, or until the zucchini is slightly wilted. I like the zucchini to have a bit of crunch, so if you like it cooked a bit more, add a few more minutes here.

Add the rest of the salt and pepper to taste. 

Top with the goat cheese and serve.

Shortcut chicken soup

This shortcut chicken soup uses rotisserie chicken and store-bought stock but results in a thick, rich broth that’s warm and comforting on these bone-chilling days. #meandthemoose #soup #chickensoup #easysoup #souprecipe #chickensouprecipe #healthyc…

This chicken soup uses a few shortcuts like rotisserie chicken and store-bought broth to speed up the process, but gets extra oomph from plenty of aromatics, a little extra cooking oil, and teeny tiny pasta cooked right in the broth. A poached egg on top adds even more richness and depth.

Take me to the soup!

This shortcut chicken soup uses rotisserie chicken and store-bought stock but results in a thick, rich broth that’s warm and comforting on these bone-chilling days. #meandthemoose #soup #chickensoup #easysoup #souprecipe #chickensouprecipe #healthyc…

I originally called this “Quick and rich chicken soup,” but it sounded too much like a country band. However, the moniker still applies because this guy is indeed quite rich and quite quick (for a soup that tastes this good, that is!).

I’m not a huge fan of the chicken broth that comes in a box or a can. I mean, it’s fine as a replacement for water when cooking grains and beans, but for soup? It’s a little thin and bland for me. But, I don’t always have homemade stock in the freezer or the wherewithal to make it. (But if I do, this is my recipe!)

This shortcut chicken soup uses rotisserie chicken and store-bought stock but results in a thick, rich broth that’s warm and comforting on these bone-chilling days. #meandthemoose #soup #chickensoup #easysoup #souprecipe #chickensouprecipe #healthyc…

To spice and thicken it up, I use any combination of these:

  • Butter: Adding a little extra cooking fat when you start sautéing your aromatics adds richness to the final product.

  • Tiny pasta: The teenier the better! Orzo, stelline, ditalini, anilline, or any other pasta that’s about the size of a pencil eraser works perfectly. When cooked in the broth, the starch from the pasta thickens the broth significantly.

  • Cheese: Adding some grated cheese at the end is one strategy, but tossing in the leftover rind of any hard cheese adds salt, depth, and richness.

  • Salt: This might sound weird because a lot of canned and boxed broths have A LOT of salt in them, but if you use the unsalted or low salt variety, be sure to add enough salt back in.

  • Poached egg: When the soup is done, adding a poached egg on top enriches it even more!

This shortcut chicken soup uses rotisserie chicken and store-bought stock but results in a thick, rich broth that’s warm and comforting on these bone-chilling days. #meandthemoose #soup #chickensoup #easysoup #souprecipe #chickensouprecipe #healthyc…

In this soup, I used pasta and a poached egg to give it a rich, silky texture. I included a range for the amount of liquid to add depending on how much liquid you like in your soup. Six cups makes the soup very thick, eight cups make it less so.

This shortcut chicken soup uses rotisserie chicken and store-bought stock but results in a thick, rich broth that’s warm and comforting on these bone-chilling days. #meandthemoose #soup #chickensoup #easysoup #souprecipe #chickensouprecipe #healthyc…

Shortcut chicken soup

2 Tbsp olive oil 
1 small onion, diced 
1 medium carrot, peeled and diced (heaping ½ cup)
1 small stalk celery, diced (scant ½ cup)
6 large fresh sage leaves 
½ tsp dried thyme
1 bay leaf 
1 tsp kosher salt
Black pepper to taste 
6-8 cups chicken stock
1 cup tiny pasta 
1-2 cups shredded, precooked chicken
Serving sugggestions: 
Poached egg, parmesan cheese, more seasonin to taste


Time: About 45 minutes, mostly active
Yield: About 6-8 cups of soup, depending on how much water and chicken you add


Heat the olive oil in a large, deep pot over medium high heat. Add the minced onion, carrot, and celery and cook, stirring frequently, until the veggies begin to brown and the onions are translucent, about 6-8 minutes. 

Add the sage and thyme and cook until fragrant, about one minute.

Add the bay leaf, salt, pepper, and chicken stock and mix well. Bring to a boil, reduce the heat, and simmer, covered, for 20 minutes. 

While the soup simmers, shred the chicken and set aside.

Bring back to a boil and add the pasta. Cook according to package directions until al dente. 

Add the shredded chicken and stir. 

Meatless Monday: Pumpkin mac and cheese

This autumnal pasta is creamy and rich thanks to the roasted squash, a little unctuous thanks to the cooked onions, and gloriously herby thanks to the fresh sage.

Take me to the recipe!

This mac and cheese is warming, cheesy, and chock full of veggies. It also works as dinner or lunch (or both!). I’ve made this with some sausage on the side for an even heartier meal, but it’s very filling on its own.

A couple of notes:
- I use half roasted squash and half pumpkin (butternut or acorn squash is my favorite, but you could use kobocha or delicata) because I don’t always love straight pumpkin pasta sauces. There is something heavy and somehow both flavorless and overwhelming about a sauce made with just pumpkin.
- The most time consuming part of this recipe is cooking the onions. A longer, slower cook yields much better flavor that significantly improves the final dish. I recommend taking the time.
- This recipe makes twice as much sauce as you need for a pound of pasta. You can either freeze half, or make two boxes of pasta for a large family. We’ve found that using 1 box of pasta and freezing half of the sauce yields one dinner for the four of us and some leftovers for lunch the next day.

Pumpkin mac and cheese

Time: 45 minutes, mostly active
Yield:
4 adult-sized dinner servings, 6 kid-sized dinner servings, or more if you’re serving this for lunch

2 Tbsp olive oil, butter, ghee, or your fat of choice
1 large onion, sliced thinly
2 large cloves garlic, diced
10 large sage leaves, minced
2/3 cup pumpkin puree
1 cup squash, roasted
½ tsp kosher salt
1/2 cup milk, or more, to create desired consistency
½ cup gruyere, shredded
½ cup cheddar cheese, shredded
¼ cup grated parmesan
1 lb pasta
1/2 cup reserved pasta water

Preheat the oven to 425. Cut your squash in half lengthwise and place cut side down on a parchment-covered baking sheet. Bake until fork tender, about 20-30 minutes.  

Bring a large stock pot of salted water to a boil. Cook your pasta according to package directions (towards the end of cooking your onions). Reserve 1/2 cup of pasta cooking water.

Heat a large sauté pan with the cooking oil over medium heat. Turn the heat down slightly and add the thinly sliced onions. Cook, stirring often, until caramelized, about 25- 30 minutes.

Add the garlic and sage to the pan with the onions and cook until fragrant, about 2-3 minutes. Remove from the heat.

In a blender or food processor, combine the cooked onions, garlic, sage, squash, pumpkin, salt, and cheese. Blend on high. Slowly add the milk until you’ve reached your desired consistency.* Scrape down the sides as needed.

Pour about 1/2 of the sauce into a large container for another time.

Drain your pasta, but reserve ½ cup of the pasta water. Put the pasta back into the pasta pot, top with ½ of the sauce, and thin out as needed with the reserved pasta water. Taste for seasoning and add salt and pepper as needed.

*The amount of milk you’ll need depends largely on your squash. Some squash have more water in them, so you’ll need less milk. Start with ¼ cup and add more as needed.

Barley and squash "risotto"

Barley and squash “risotto” |  Me & The Moose. This faux risotto uses barley instead of the usual arborio rice, which needs a lot less stirring, but is just as delicious. Add in some breakfast sausage, roasted squash, cheese, and lots of sage an…

Friends, lets talk about when your toddlers refuse to eat (and the blinding rage that sometimes ensues!). Despite my best efforts, this happens to us frequently (the hunger strikes, not necessarily the rage). I work HARD not to take it personally because I know it's developmentally appropriate (oral stage, individuation, changing taste buds, yadda yadda yadda). One thing I can say with certainty is that it always passes. This is our basic game plan, which we stick to, but not rigidly:

1) If he's hungry, he'll eat. Most of the time, we let him determine how much he wants. We encourage him a little if he says "all done" after two bites because sometimes he's referring to the high chair and not the food. I'm not particularly good at recognizing my own hunger/satiety cues, so I want to help M be more attuned to his body.

2) Push the veggies and protein, especially when your kids are most hungry. M is a morning eater and tends to gobble up whatever we put in front of him before 11 am, so I pack that meal with as much goodness as possible. Similarly, I offer him some veg, some protein, and some good fat in all of his meals. It's much easier to get him to eat fruit and grains, so I don't push those: They end up eaten anyway. 

3) Don't "hide" veggies, cook with them. Find the happy medium with more nutritious food. I agree with folks like Amy Palanjian from Yummy Toddler Food about not "hiding" veggies. But that doesn't mean you have to serve your kids a head of steamed broccoli and call it a day. Conversely, all veggies don't have to be smothered with chocolate or cheese. If you're making a grilled cheese, throw in some spinach and tell them that it's in there.

4) Don't become a line cook. In other words, if your kid is refusing to eat, don't twist yourself into knots preparing something else. This is the hardest to stick to and probably the least rigid of our rules, especially because M is under 2.  His tastebuds are legitimately changing, so what tasted great one day, may actually taste different the next. If he's eaten well at his other meals, we don't sweat a small dinner. Another strategy we use is, instead of making him something entirely new, we'll add a pouch or piece of toast with almond butter while encouraging him to take a few bites of the rejected food. Sometimes he refuses to eat because he's tired or too hungry and a few bites of something familiar can help him calm down and eat the other food too.

Barley and squash “risotto” | Me & The Moose. This faux risotto uses barley instead of the usual arborio rice, which needs a lot less stirring, but is just as delicious. Add in some breakfast sausage, roasted squash, cheese, and lots of sage and…

All of that to say, the first few times I made this "risotto" M loved it, until last night when he acted like I had made RANCID barley and squash risotto. I assure you, this dish is delicious and though there are a few steps, they can be done simultaneously, so it's less effort than most risotto dishes. And there's barely any stirring!

I used Kabocha squash, which has a creamier consistency when roasted than butternut or delicata squashes and a thicker texture than the pumpkin or acorn varieties. But feel free to swap in any squash you can find in your store or have on hand. Also swap in spinach or any other greens for the kale, and/or turkey, chicken, or beef for the pork sausage. I wouldn't recommend adding fish to this guy, but serving a veggie version alongside a piece of fish would be great. Last note: I used hulled barley instead of pearled barley, which is the browner of the two in the bulk bins of your Whole Foods. It takes longer to cook, but is more nutritious if you don't mind the extra cooking time. 

Barley and squash “risotto” | Me & The Moose. This faux risotto uses barley instead of the usual arborio rice, which needs a lot less stirring, but is just as delicious. Add in some breakfast sausage, roasted squash, cheese, and lots of sage and…

Barley and squash risotto

3 cups water
1 cup hulled barley
2 cups chicken stock
½-1 bunch kale, stems removed and chopped into pieces
1 cup roasted Kombucha squash, about half of a small squash
1/2 cup grated Parmesan cheese
8 oz pork sausage, de-cased
2 medium shallot
1 clove garlic
10 fresh sage leaves or ½ tsp dried sage

Combine barley and water in a large pot and bring to a boil. Reduce heat and simmer, covered, over low heat until water is absorbed, about 45-60 minutes.

Meanwhile, cut squash in half and place cut side down on a parchment-covered baking sheet. Roast at 400 degrees for 30- 45 minutes or until the flesh is easily pierced with a fork. Let cool slightly and scoop out 1 cup (or half) of the cooked squash and set aside.

In a separate pan, brown the sausage. When fully cooked, remove and drain on a paper towel and add the shallots and garlic to the pan with the leftover pork fat and saute until translucent, about 5 minutes. Add the sage and cook until aromatic.

When barley is done, add chicken stock and bring back to a boil. Add chopped kale and cook until wilted, about 5 minutes. Reduce heat and add squash, parmesan, salt, and pepper. If the risotto looks too wet, let simmer for a few minutes until enough liquid has evaporated, but remember that the risotto will firm up as it cools. (Basically, you want the mixture to be oozy, but you shouldn’t see any excess liquid.) When ready, add the sausage, sage, onion, and garlic mixture and let heat through. Serve with a sprinkle of parmesan cheese on top.

Yield: About 8 servings, ¾ cup each

Need ideas for using the leftover squash? Try these grain-free waffles but swap in squash for the sweet potato.

Barley and squash “risotto” | Me & The Moose. This faux risotto uses barley instead of the usual arborio rice, which needs a lot less stirring, but is just as delicious. Add in some breakfast sausage, roasted squash, cheese, and lots of sage and…

Buffalo chicken and cauliflower burgers

Buffalo chicken burger | Me & The Moose. This burger is perfect for lunch or dinner or game day snacks. Throw an egg on top and it could also be breakfast. #meandthemoose #Glutenfree #burgers #easydinner #quickdinner #dinnerrecipes #lunch

Buffalo chicken burger | Me & The Moose. This burger is perfect for lunch or dinner or game day snacks. Throw an egg on top and it could also be breakfast. #meandthemoose #Glutenfree #burgers #easydinner #quickdinner #dinnerrecipes #lunch #lunchrecipes #gamedaysnacks #buffalochickenburger

These burgers have all the familiar flavors of a buffalo wing, but with a little extra nutrition from the cauliflower, ground almonds, and ground chicken.

Take me to the recipe!

Buffalo chicken burger | Me & The Moose. This burger is perfect for lunch or dinner or game day snacks. Throw an egg on top and it could also be breakfast. #meandthemoose #Glutenfree #burgers #easydinner #quickdinner #dinnerrecipes #lunch

Buffalo chicken burger | Me & The Moose. This burger is perfect for lunch or dinner or game day snacks. Throw an egg on top and it could also be breakfast. #meandthemoose #Glutenfree #burgers #easydinner #quickdinner #dinnerrecipes #lunch #lunchrecipes #gamedaysnacks #buffalochickenburger

Frank’s Red Hot and butter do a lot of the heavy lifting, flavor-wise. But these patties are so easy to throw together and taste so good. Using pre-riced cauliflower saves a step. For the rest, you just throw the ingredients together in a bowl, mix with your hands, and sear a couple of burgers in a hot skillet while basting with a mixture of the melted butter and hot sauce.

If you’re worrying that the cauliflower ruins an otherwise good burger, fear not. You can’t actually taste the cauliflower at all.

I also use almond meal or flour (either is fine- use whatever you have) as a binder with an egg, but since these are burgers and not a meatloaf or meatball, the binding is less important. Lots of burgers are simply meat and spices mixed together, so you can leave out the almond meal if you have an allergy or don’t have any.

Buffalo chicken burger | Me & The Moose. This burger is perfect for lunch or dinner or game day snacks. Throw an egg on top and it could also be breakfast. #meandthemoose #Glutenfree #burgers #easydinner #quickdinner #dinnerrecipes #lunch

Buffalo chicken burger | Me & The Moose. This burger is perfect for lunch or dinner or game day snacks. Throw an egg on top and it could also be breakfast. #meandthemoose #Glutenfree #burgers #easydinner #quickdinner #dinnerrecipes #lunch #lunchrecipes #gamedaysnacks #buffalochickenburger

These burgers are also really versatile if you want to make them into sliders or meatballs as a game day snack. You can also make extras and freeze a batch for the future. I like throwing a fried egg on top and calling these breakfast or tossing them into a salad with some crumbled blue cheese for lunch or a light dinner.

Buffalo chicken burger | Me & The Moose. This burger is perfect for lunch or dinner or game day snacks. Throw an egg on top and it could also be breakfast. #meandthemoose #Glutenfree #burgers #easydinner #quickdinner #dinnerrecipes #lunch

Buffalo chicken burger | Me & The Moose. This burger is perfect for lunch or dinner or game day snacks. Throw an egg on top and it could also be breakfast. #meandthemoose #Glutenfree #burgers #easydinner #quickdinner #dinnerrecipes #lunch #lunchrecipes #gamedaysnacks #buffalochickenburger

Buffalo chicken burgers

Time: 30 minutes
Yield: 6 burgers

1 lb ground chicken
1 cup riced cauliflower
½ medium red onion, finely chopped
2 large cloves garlic, minced
½ cup almond meal
1 egg
1/2 tsp kosher salt
1/4 tsp black pepper
1/4 cup plus 1 Tbsp butter
4-6 Tbsp Frank’s hot sauce

Add chicken, cauliflower, onion, garlic, almond meal, and egg to a large bowl and combine using your hands or a spatula. Form into 6 equal patties using a 1/3 cup measure.

In a separate bowl, melt the butter in the microwave. Add the hot sauce and stir to combine. Set aside.

Melt 1 Tbsp butter and heat over a medium low flame. When hot, add chicken patties and turn up the flame to medium.

While the first side is browning, sprinkle some of the butter/hot sauce mixture onto each patty being careful not to touch the raw meat with your brush or spoon. When the first side has a good sear, flip the burgers over and coat the other side with butter/hot sauce.

After 2-3 minutes, check the sear. If brown enough for your liking, turn the flame down to medium-low, cover, and let cook for another 5-6 minutes. When meat thermometer has reached 165, your burgers are done.