Sweet potato muffins

Thanksgiving is here! I love this holiday and the season that follows, but there are definite downsides. I’ve talked about keeping expectations in check with kids and holidays. And while it’s exciting and fun that there’s always something going on: Making cookies, making gifts, buying gifts, wrapping gifts, listening to music, decorating, holiday events, holiday parties, holiday-themed school things, concerts, visiting relatives, etc, it can be…a lot. And for a little one like mine who’s always searching for his equilibrium, it can be.. A WHOLE LOT.

Sweet potato muffins | Me & The Moose. These one-bowl, whole grain muffins sneak in some vegetables at breakfast, lunch, or snack time. #sweetpotatomuffins #meandthemoose #sweet potatorecipes #thanksgiving #healthybaking

So, let’s not add even more by completely abandoning our commitment to balanced eating, mkay?

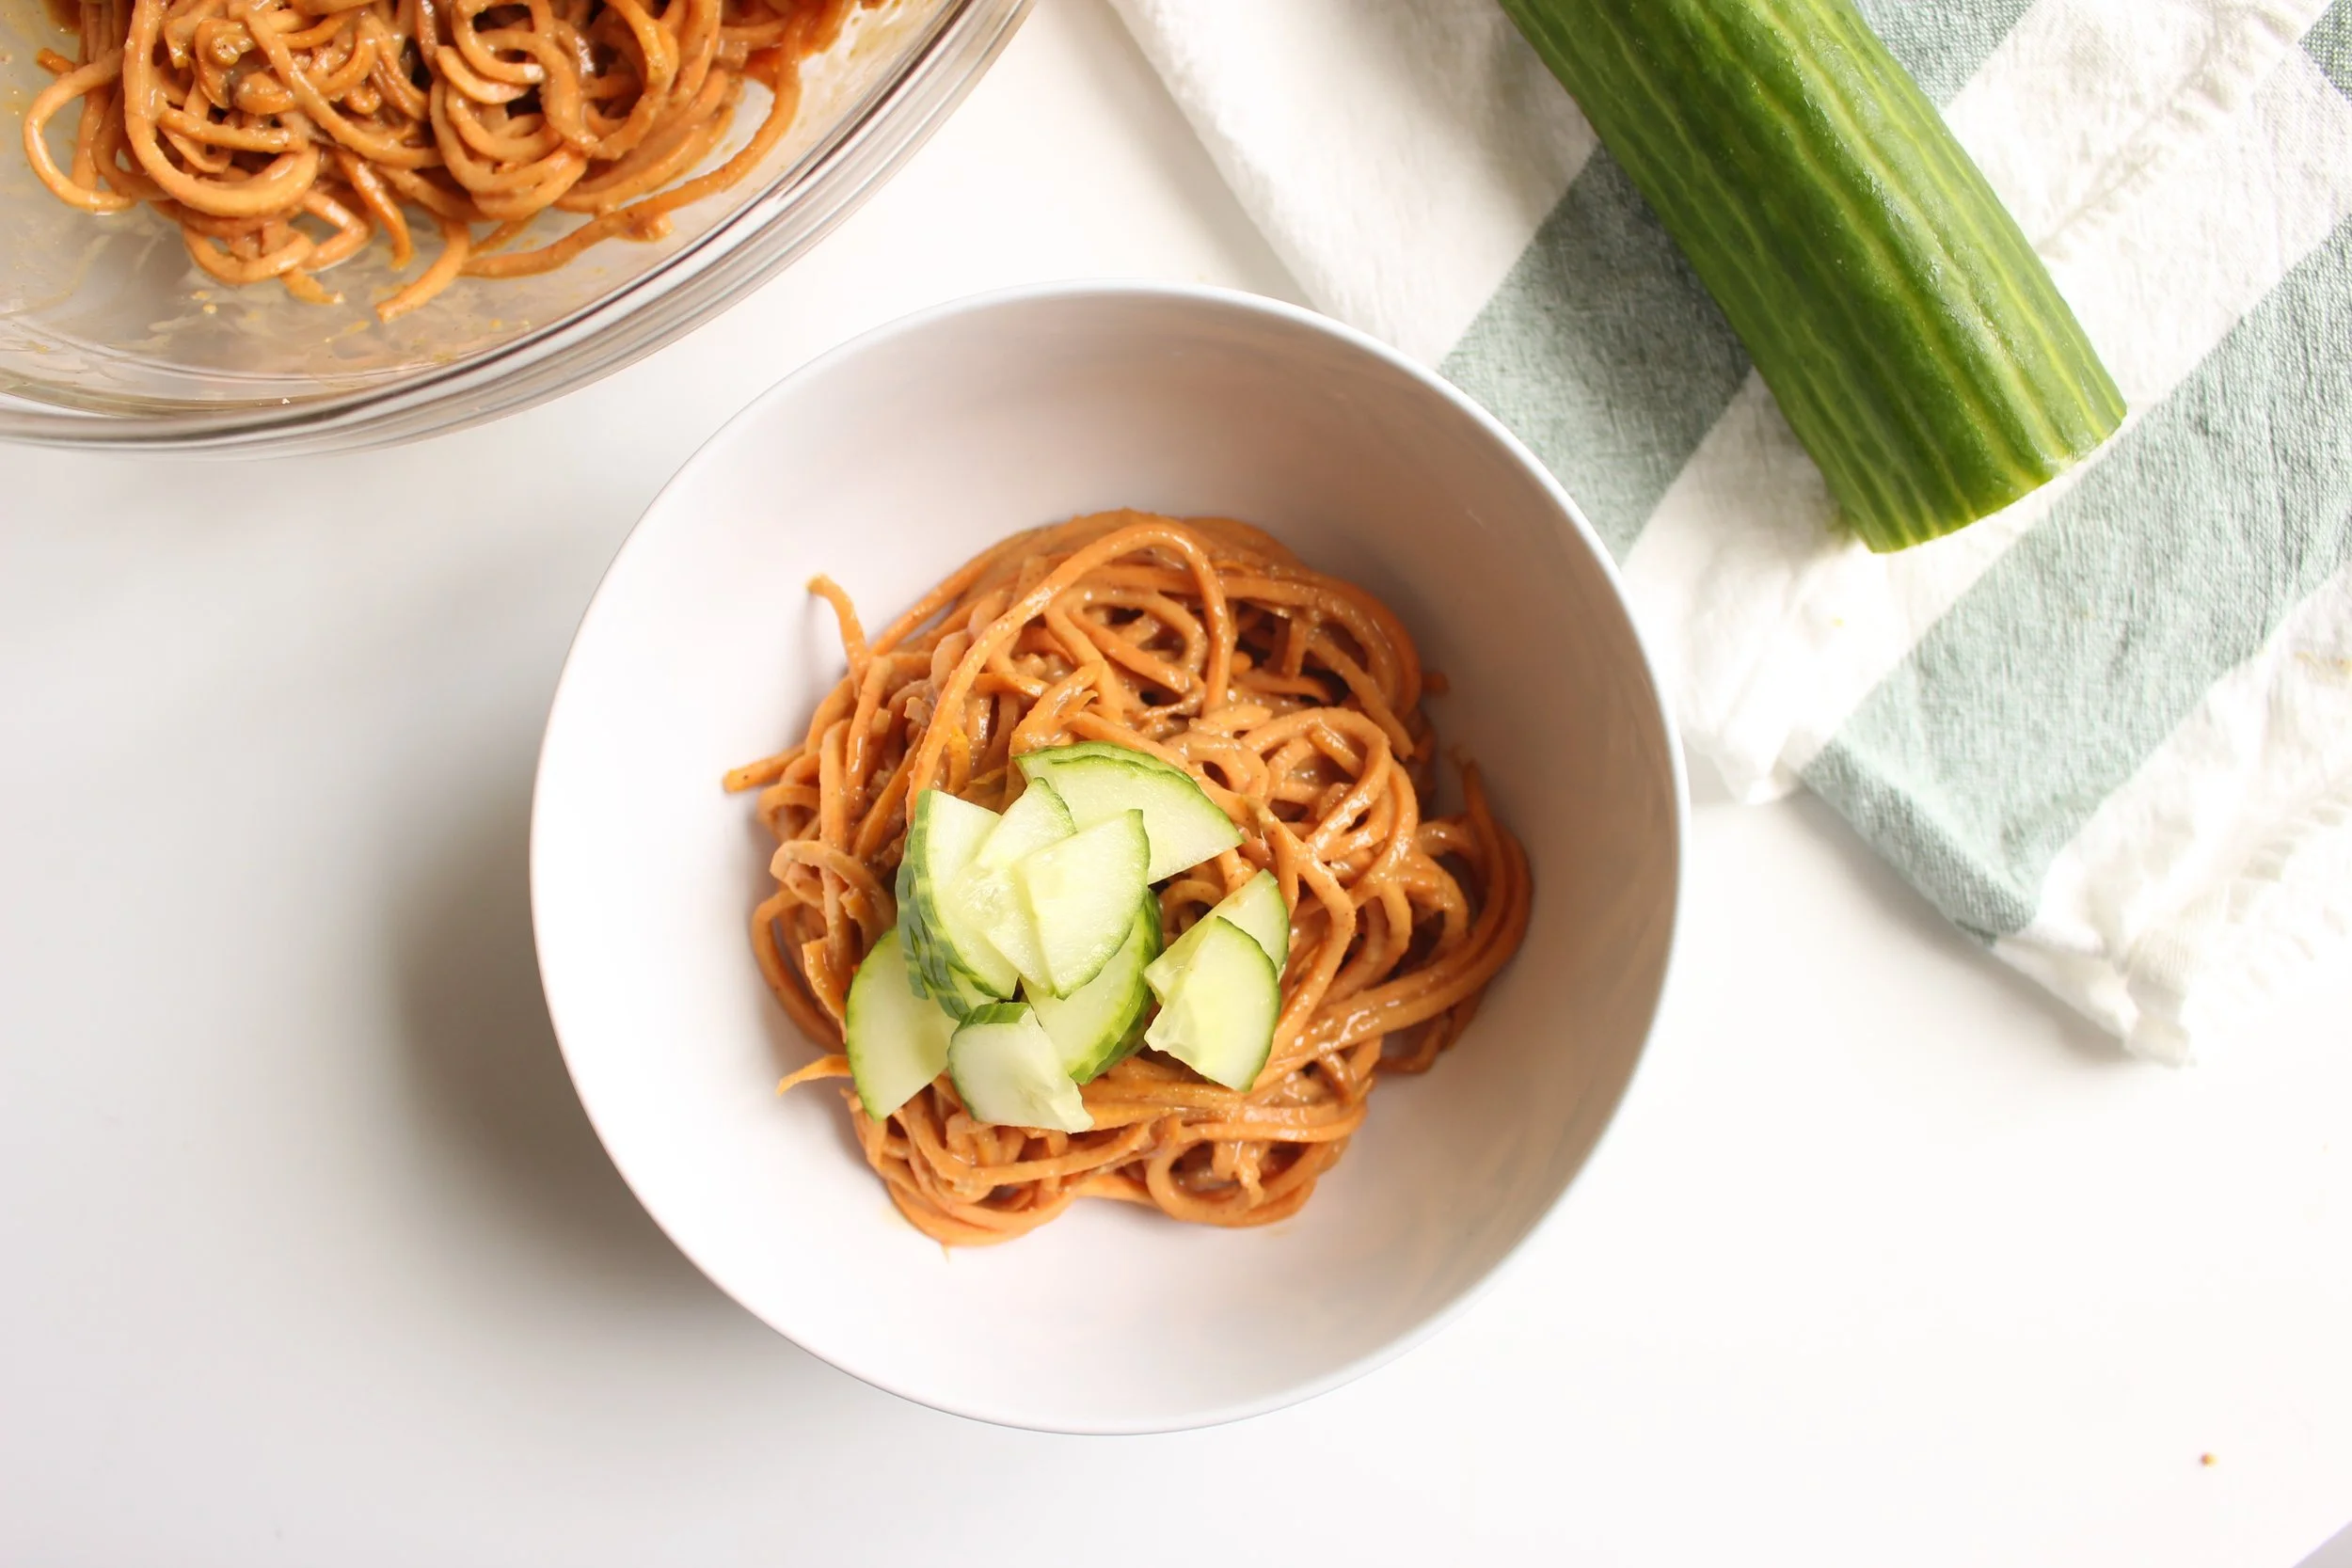
These sweet potato muffins are a fantastic “sweet” to have around. They feel festive and would certainly make a fitting Thanksgiving breakfast to watch in front of the parade or DOG SHOW (!!!!!!!), but are just sweet enough thanks to the applesauce, a few Tbsp of brown sugar divided between the batter and the muffin tops, a handful of golden raisins, and sweet potatoes.

And did I mention that they only require one bowl? You’ll have enough dishes this week.

IMG_8787-3.jpg

A couple of notes:
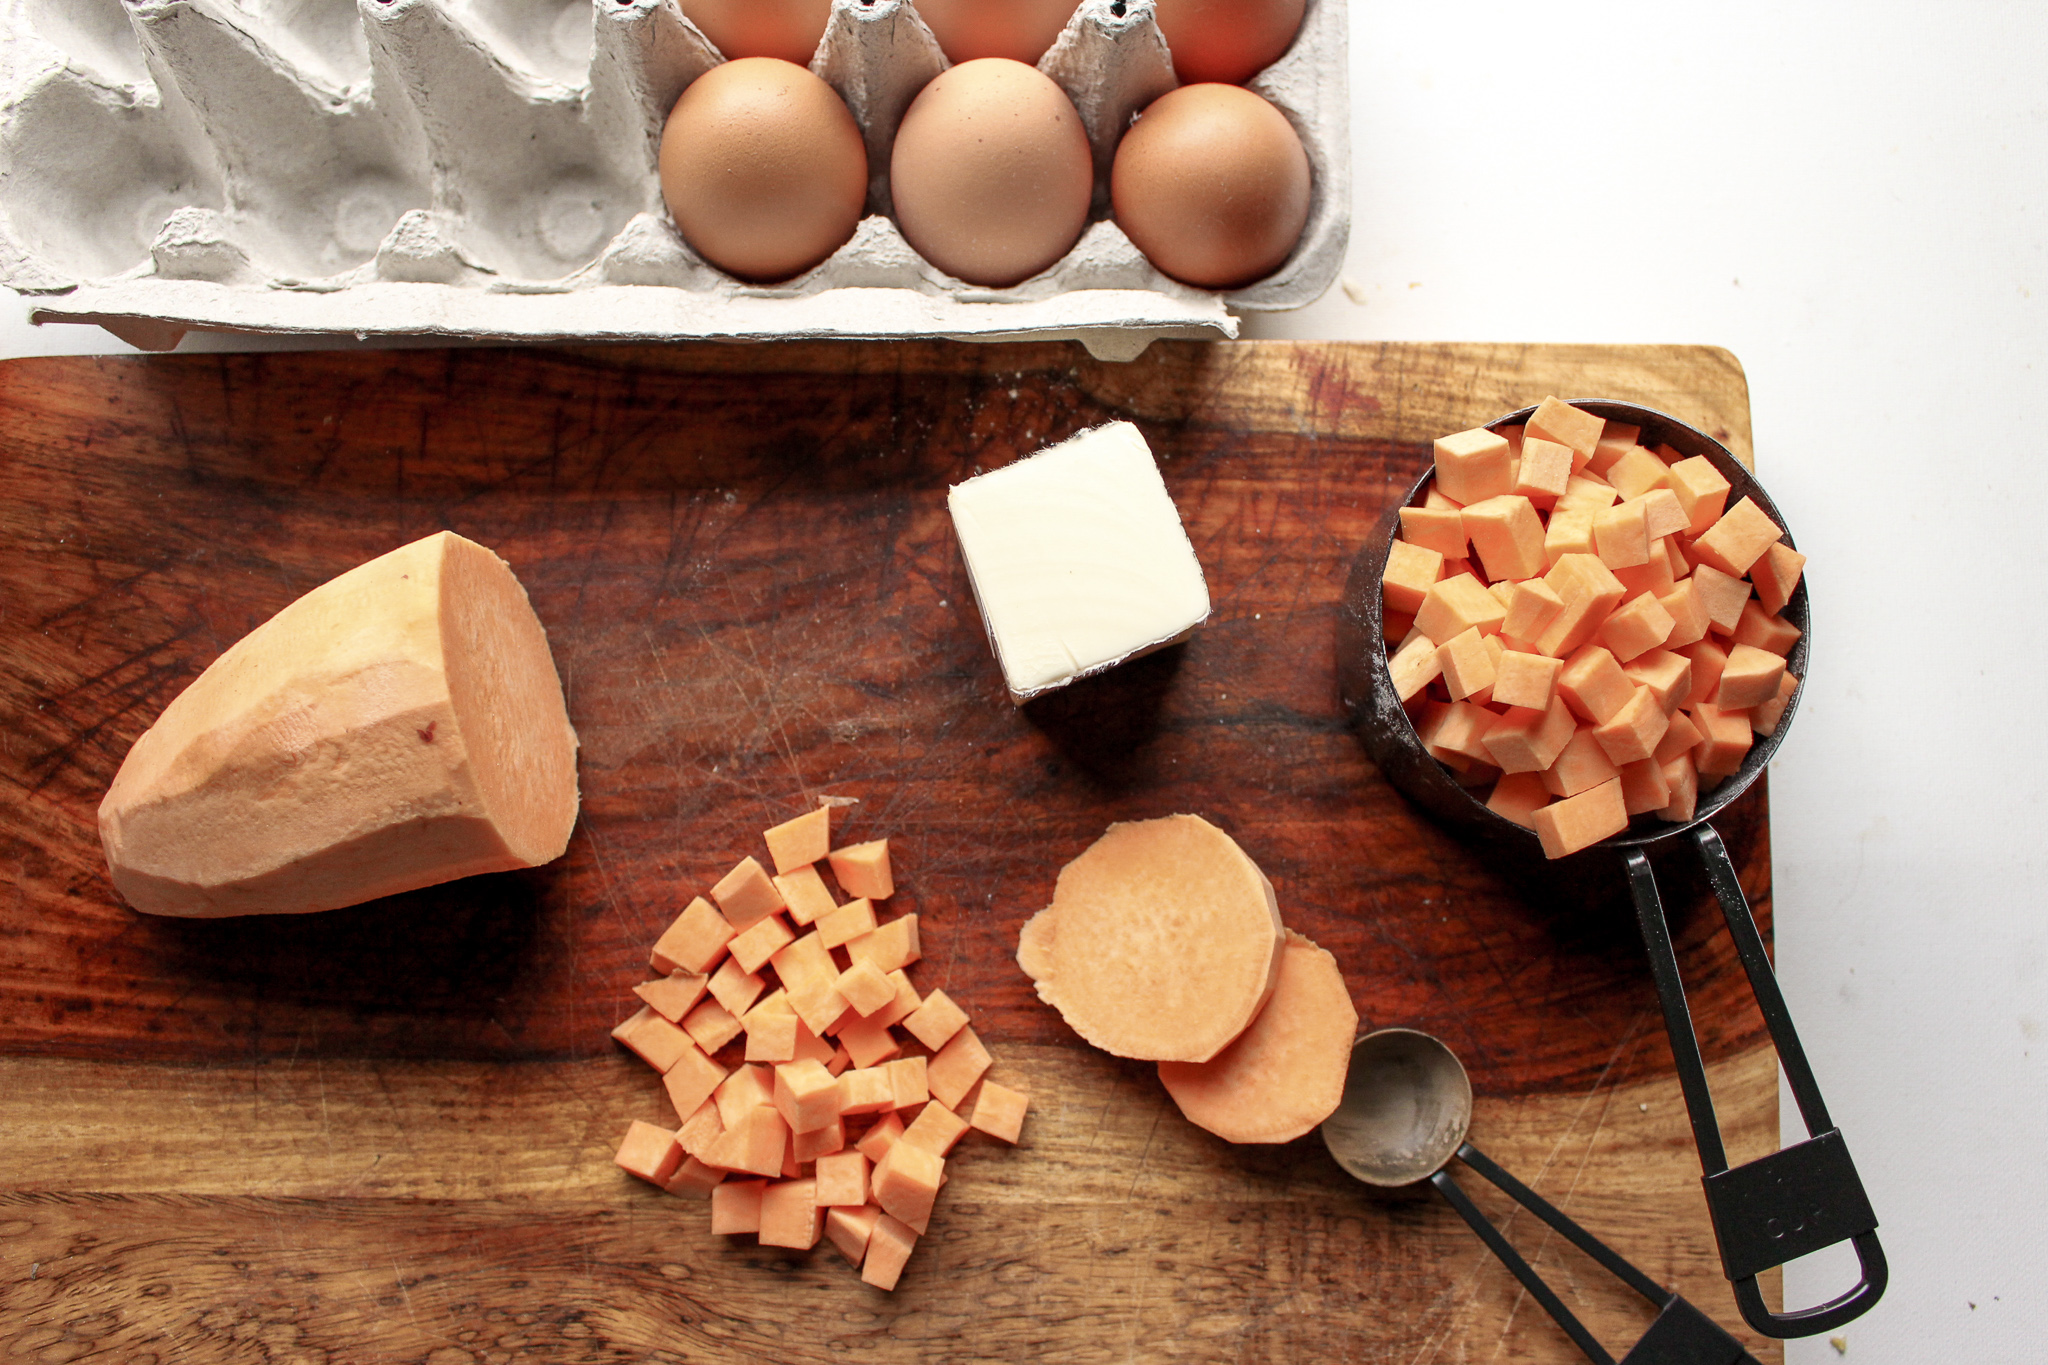
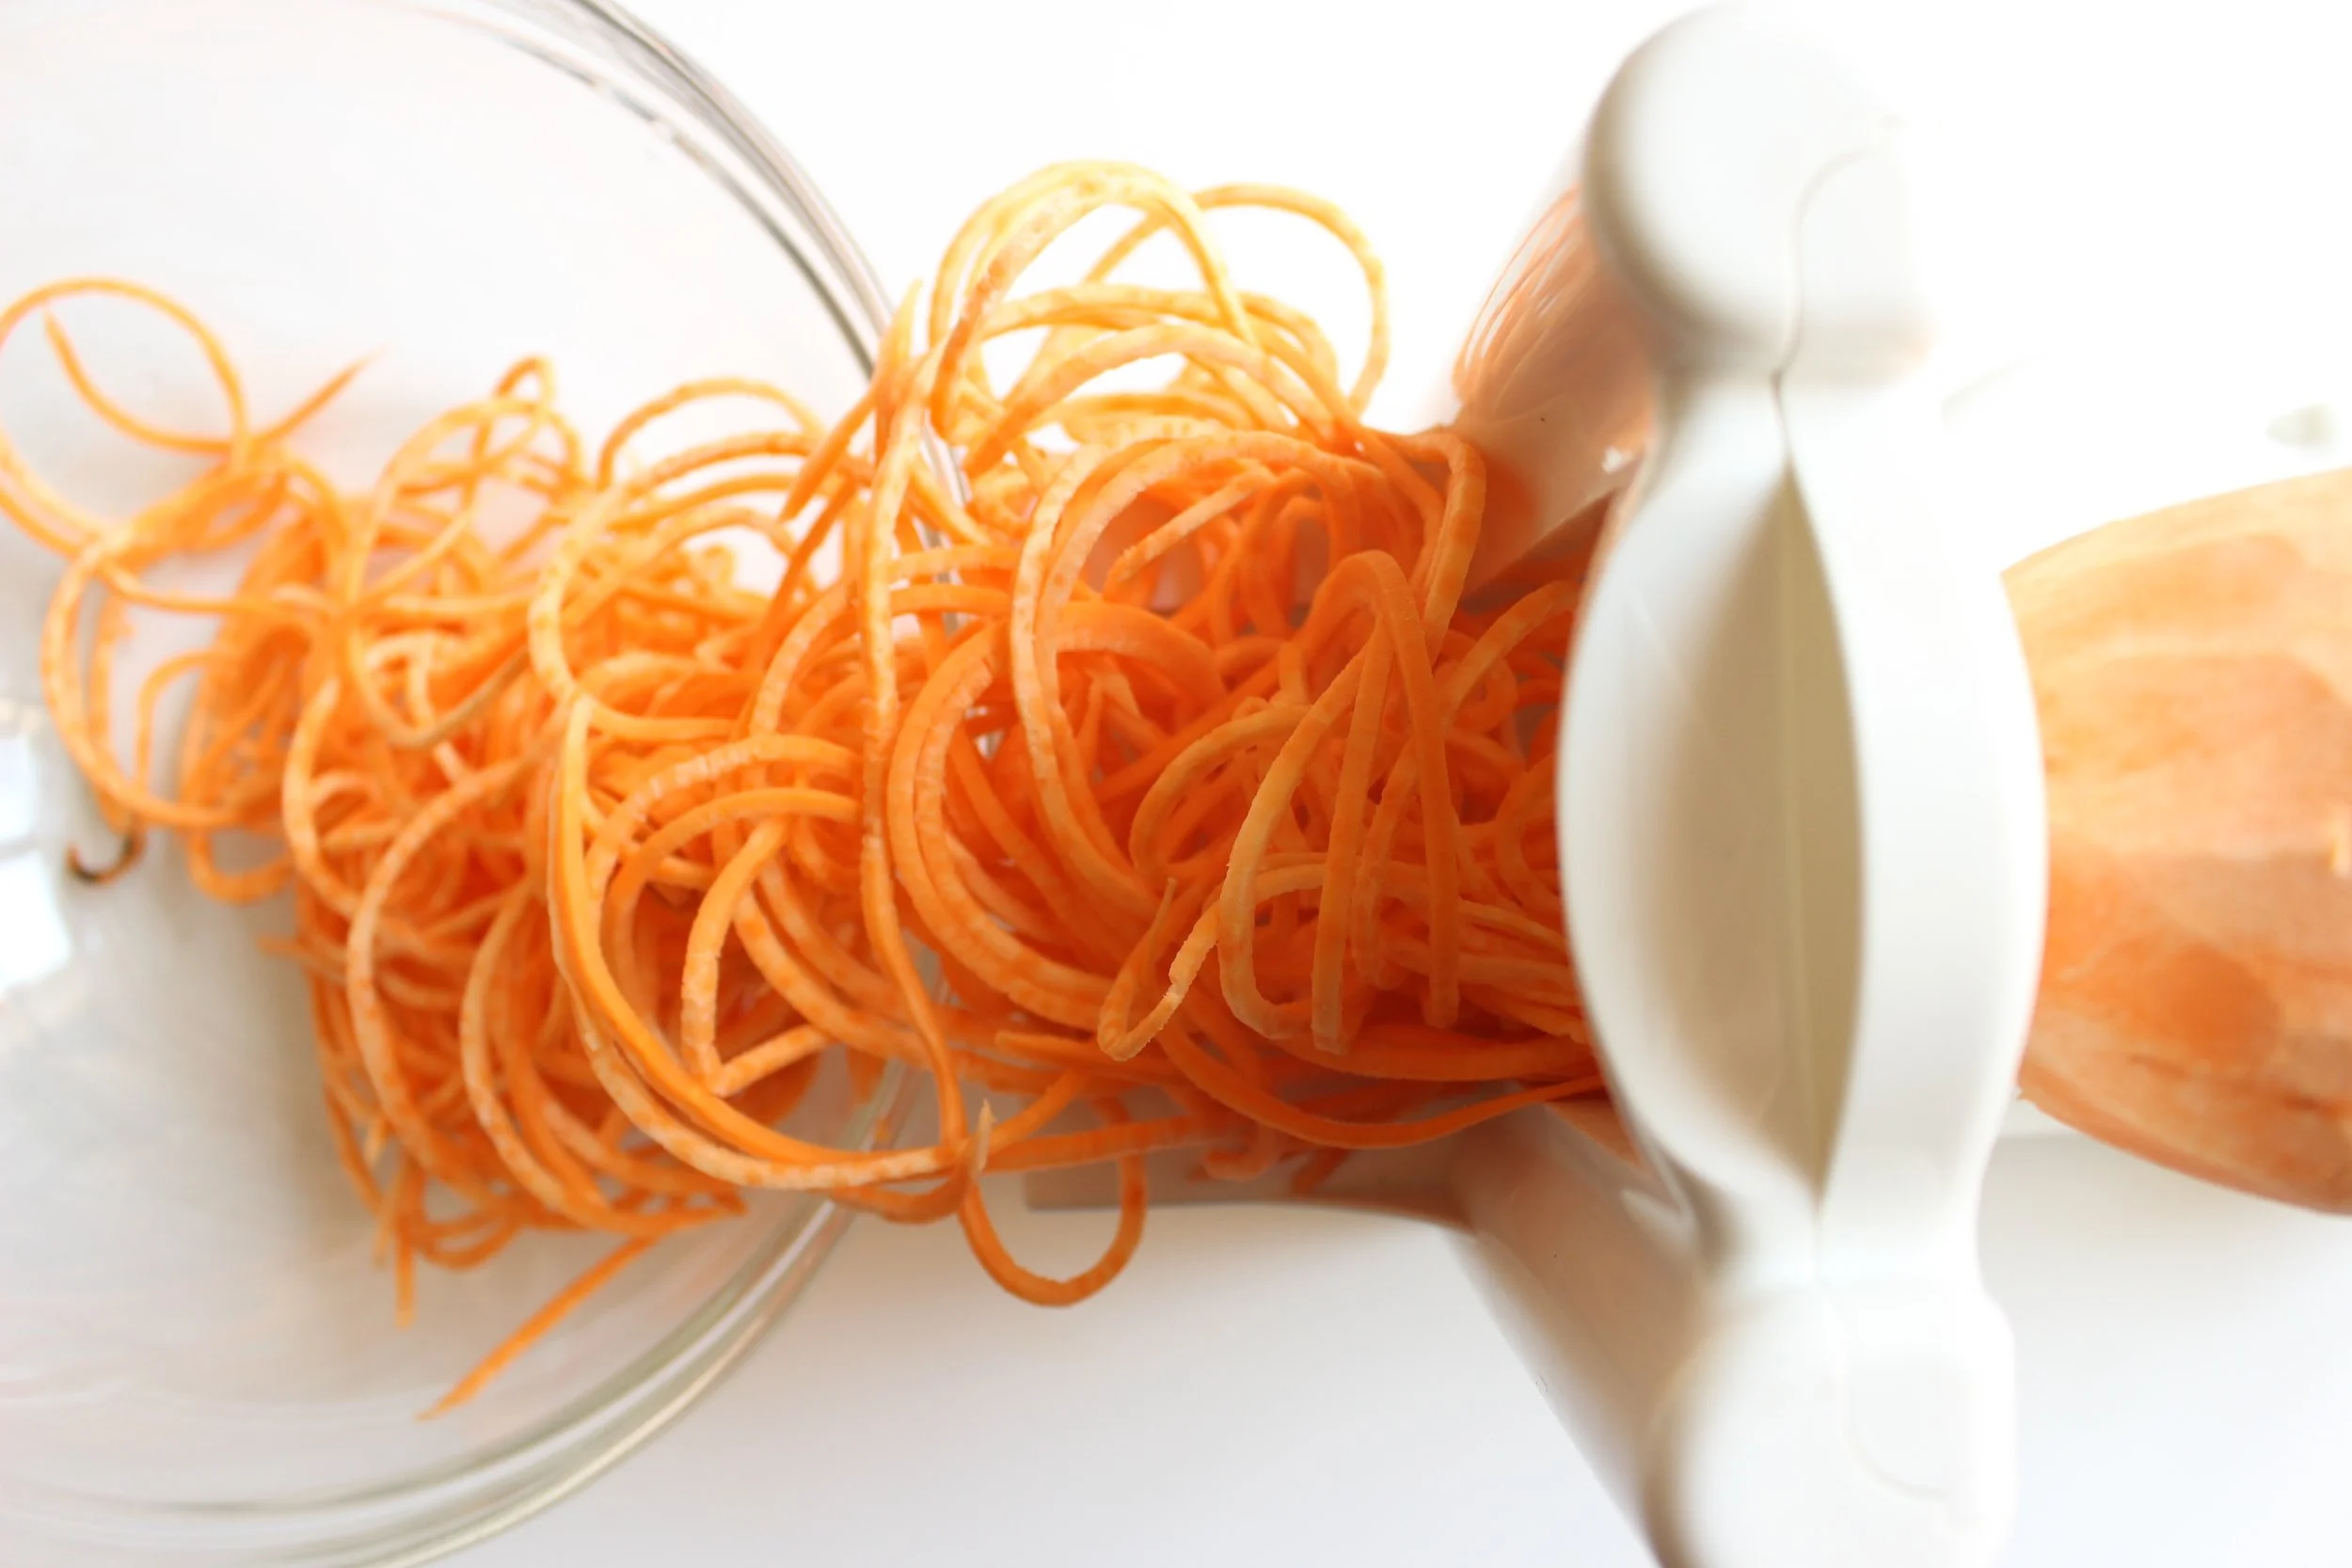
- Chop the sweet potatoes into 1/3-1/2 inch chunks. Any bigger and they may not soften enough during baking, but if you shred them, they disappear and make the batter a bit too wet.
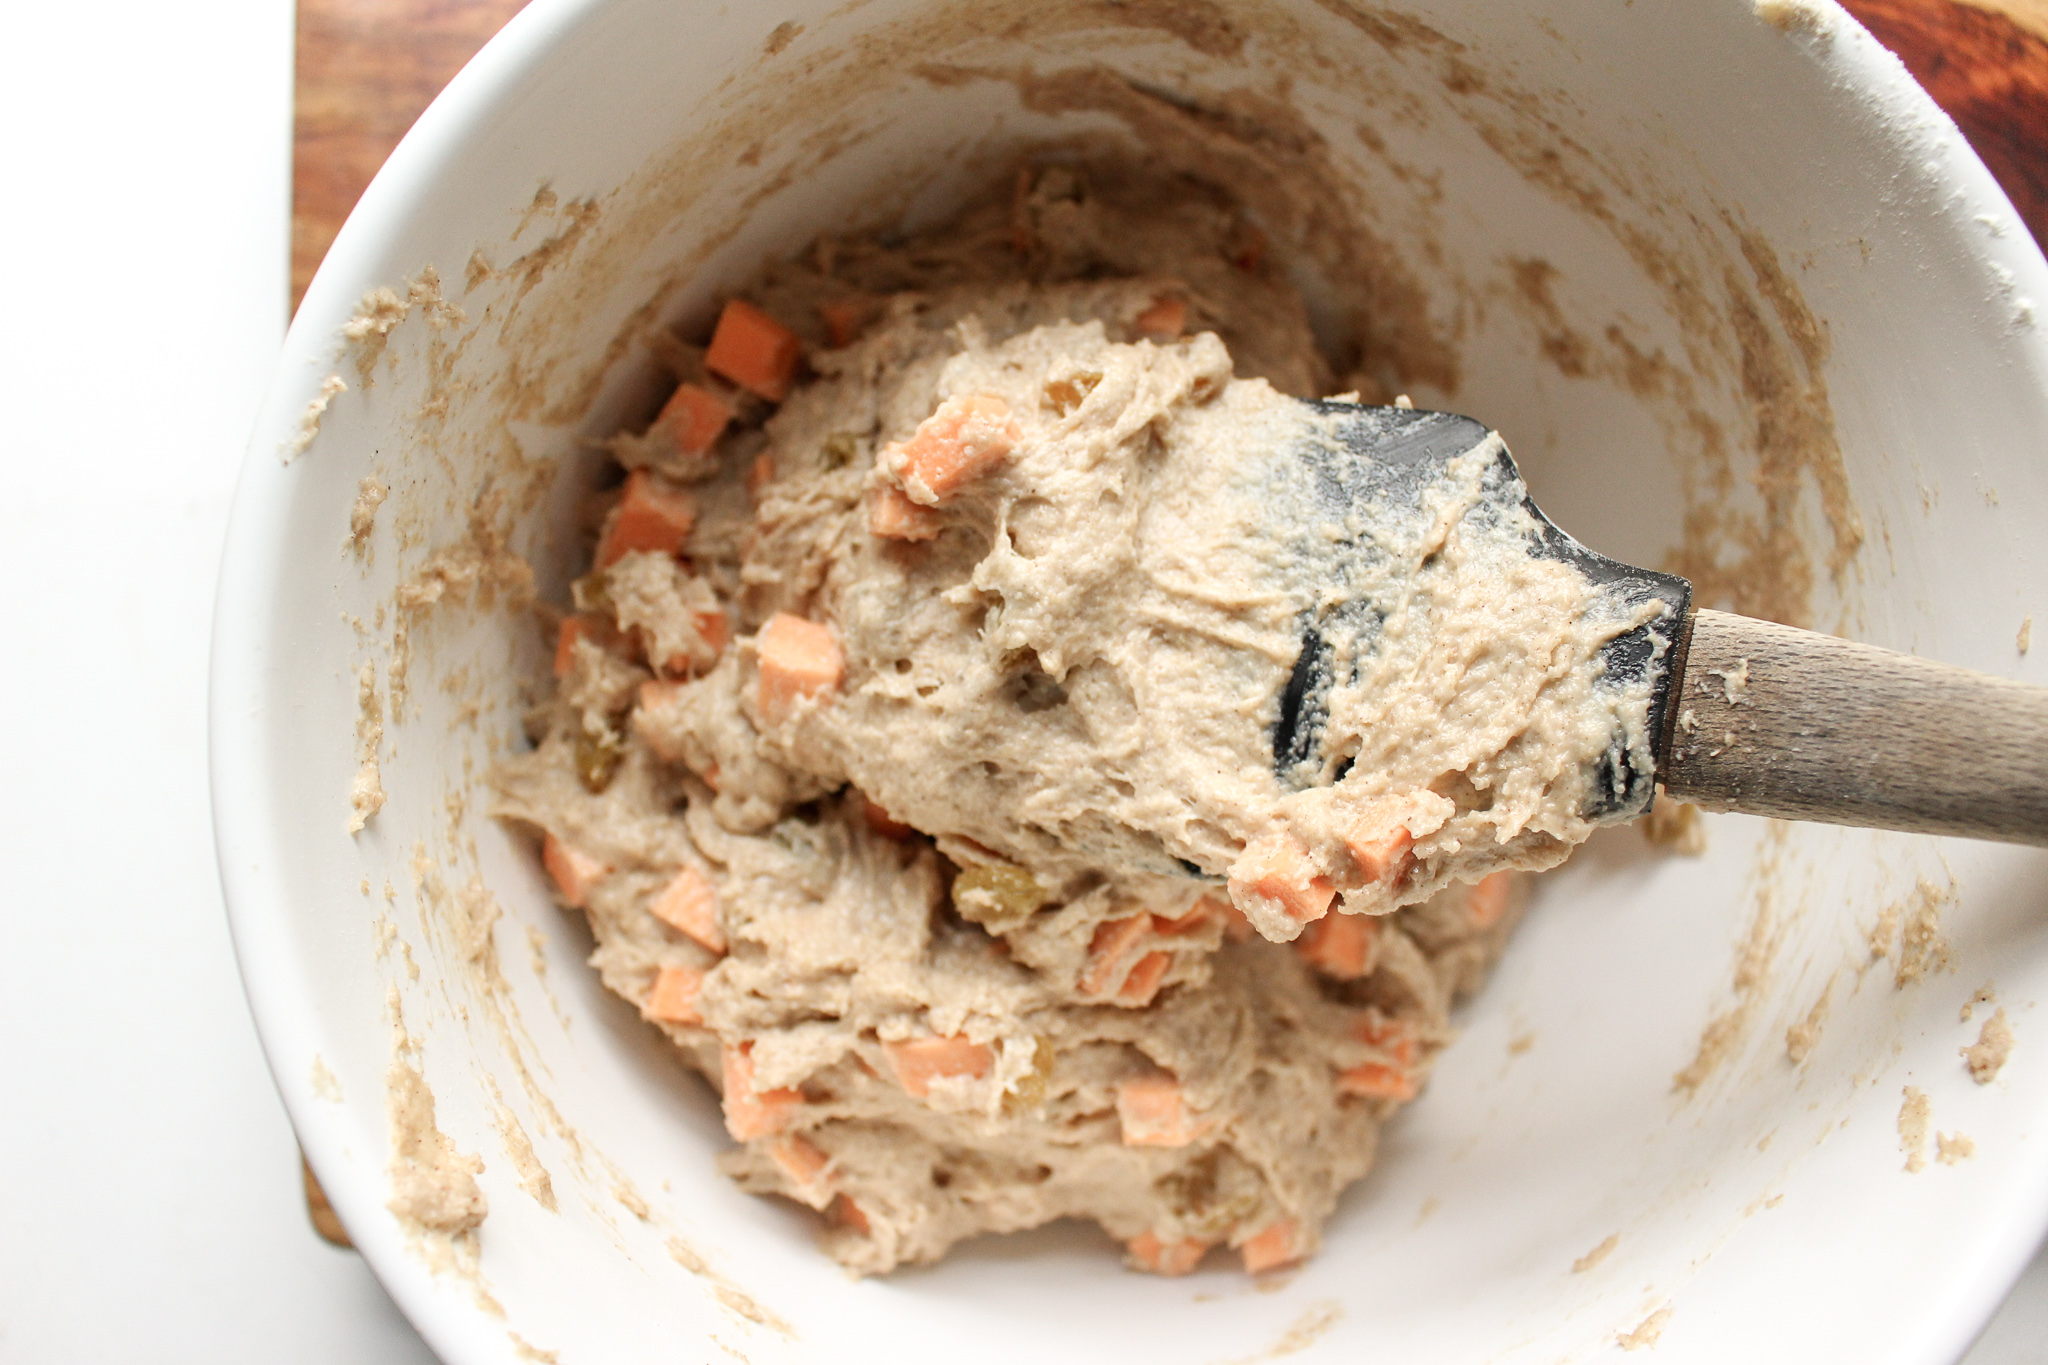
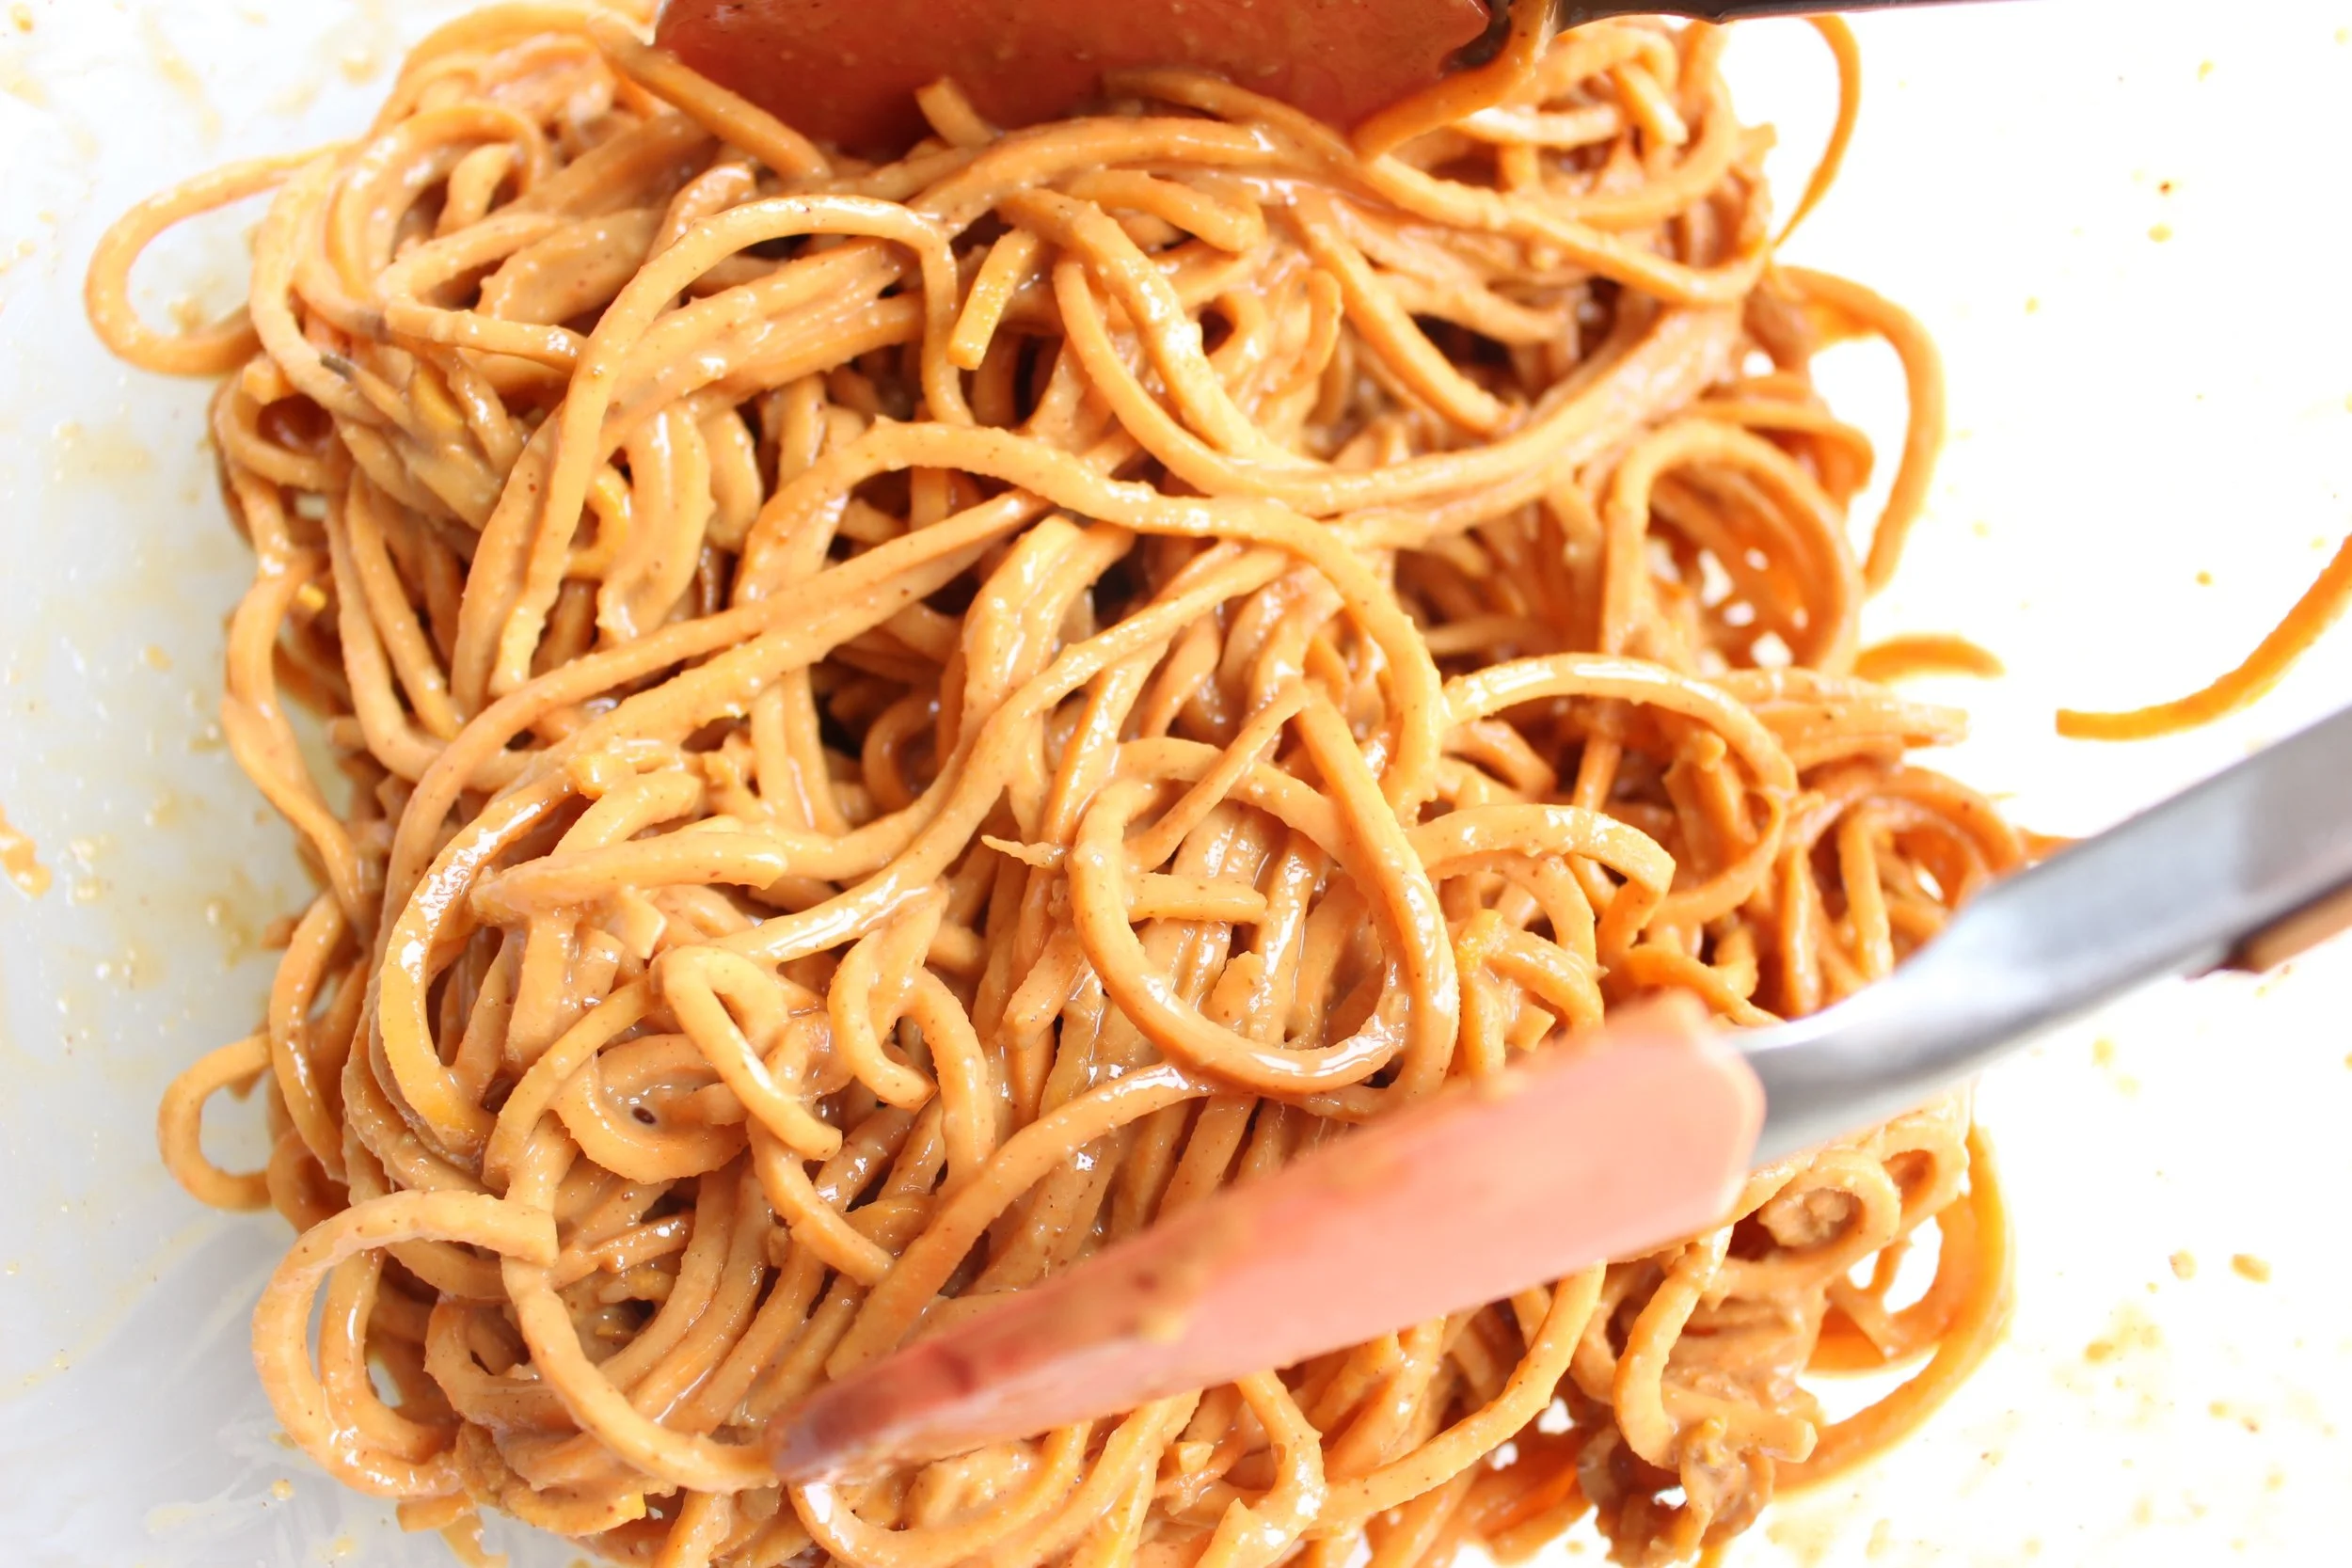
- This is a thick batter, almost dough-like in consistency. Don’t worry. It always puffs up well in the oven and results in an airy, light muffin.

Sweet potato muffins | Me & The Moose. These one-bowl, whole grain muffins sneak in some vegetables at breakfast, lunch, or snack time. #sweetpotatomuffins #meandthemoose #sweet potatorecipes #thanksgiving #healthybaking

Sweet potato muffins

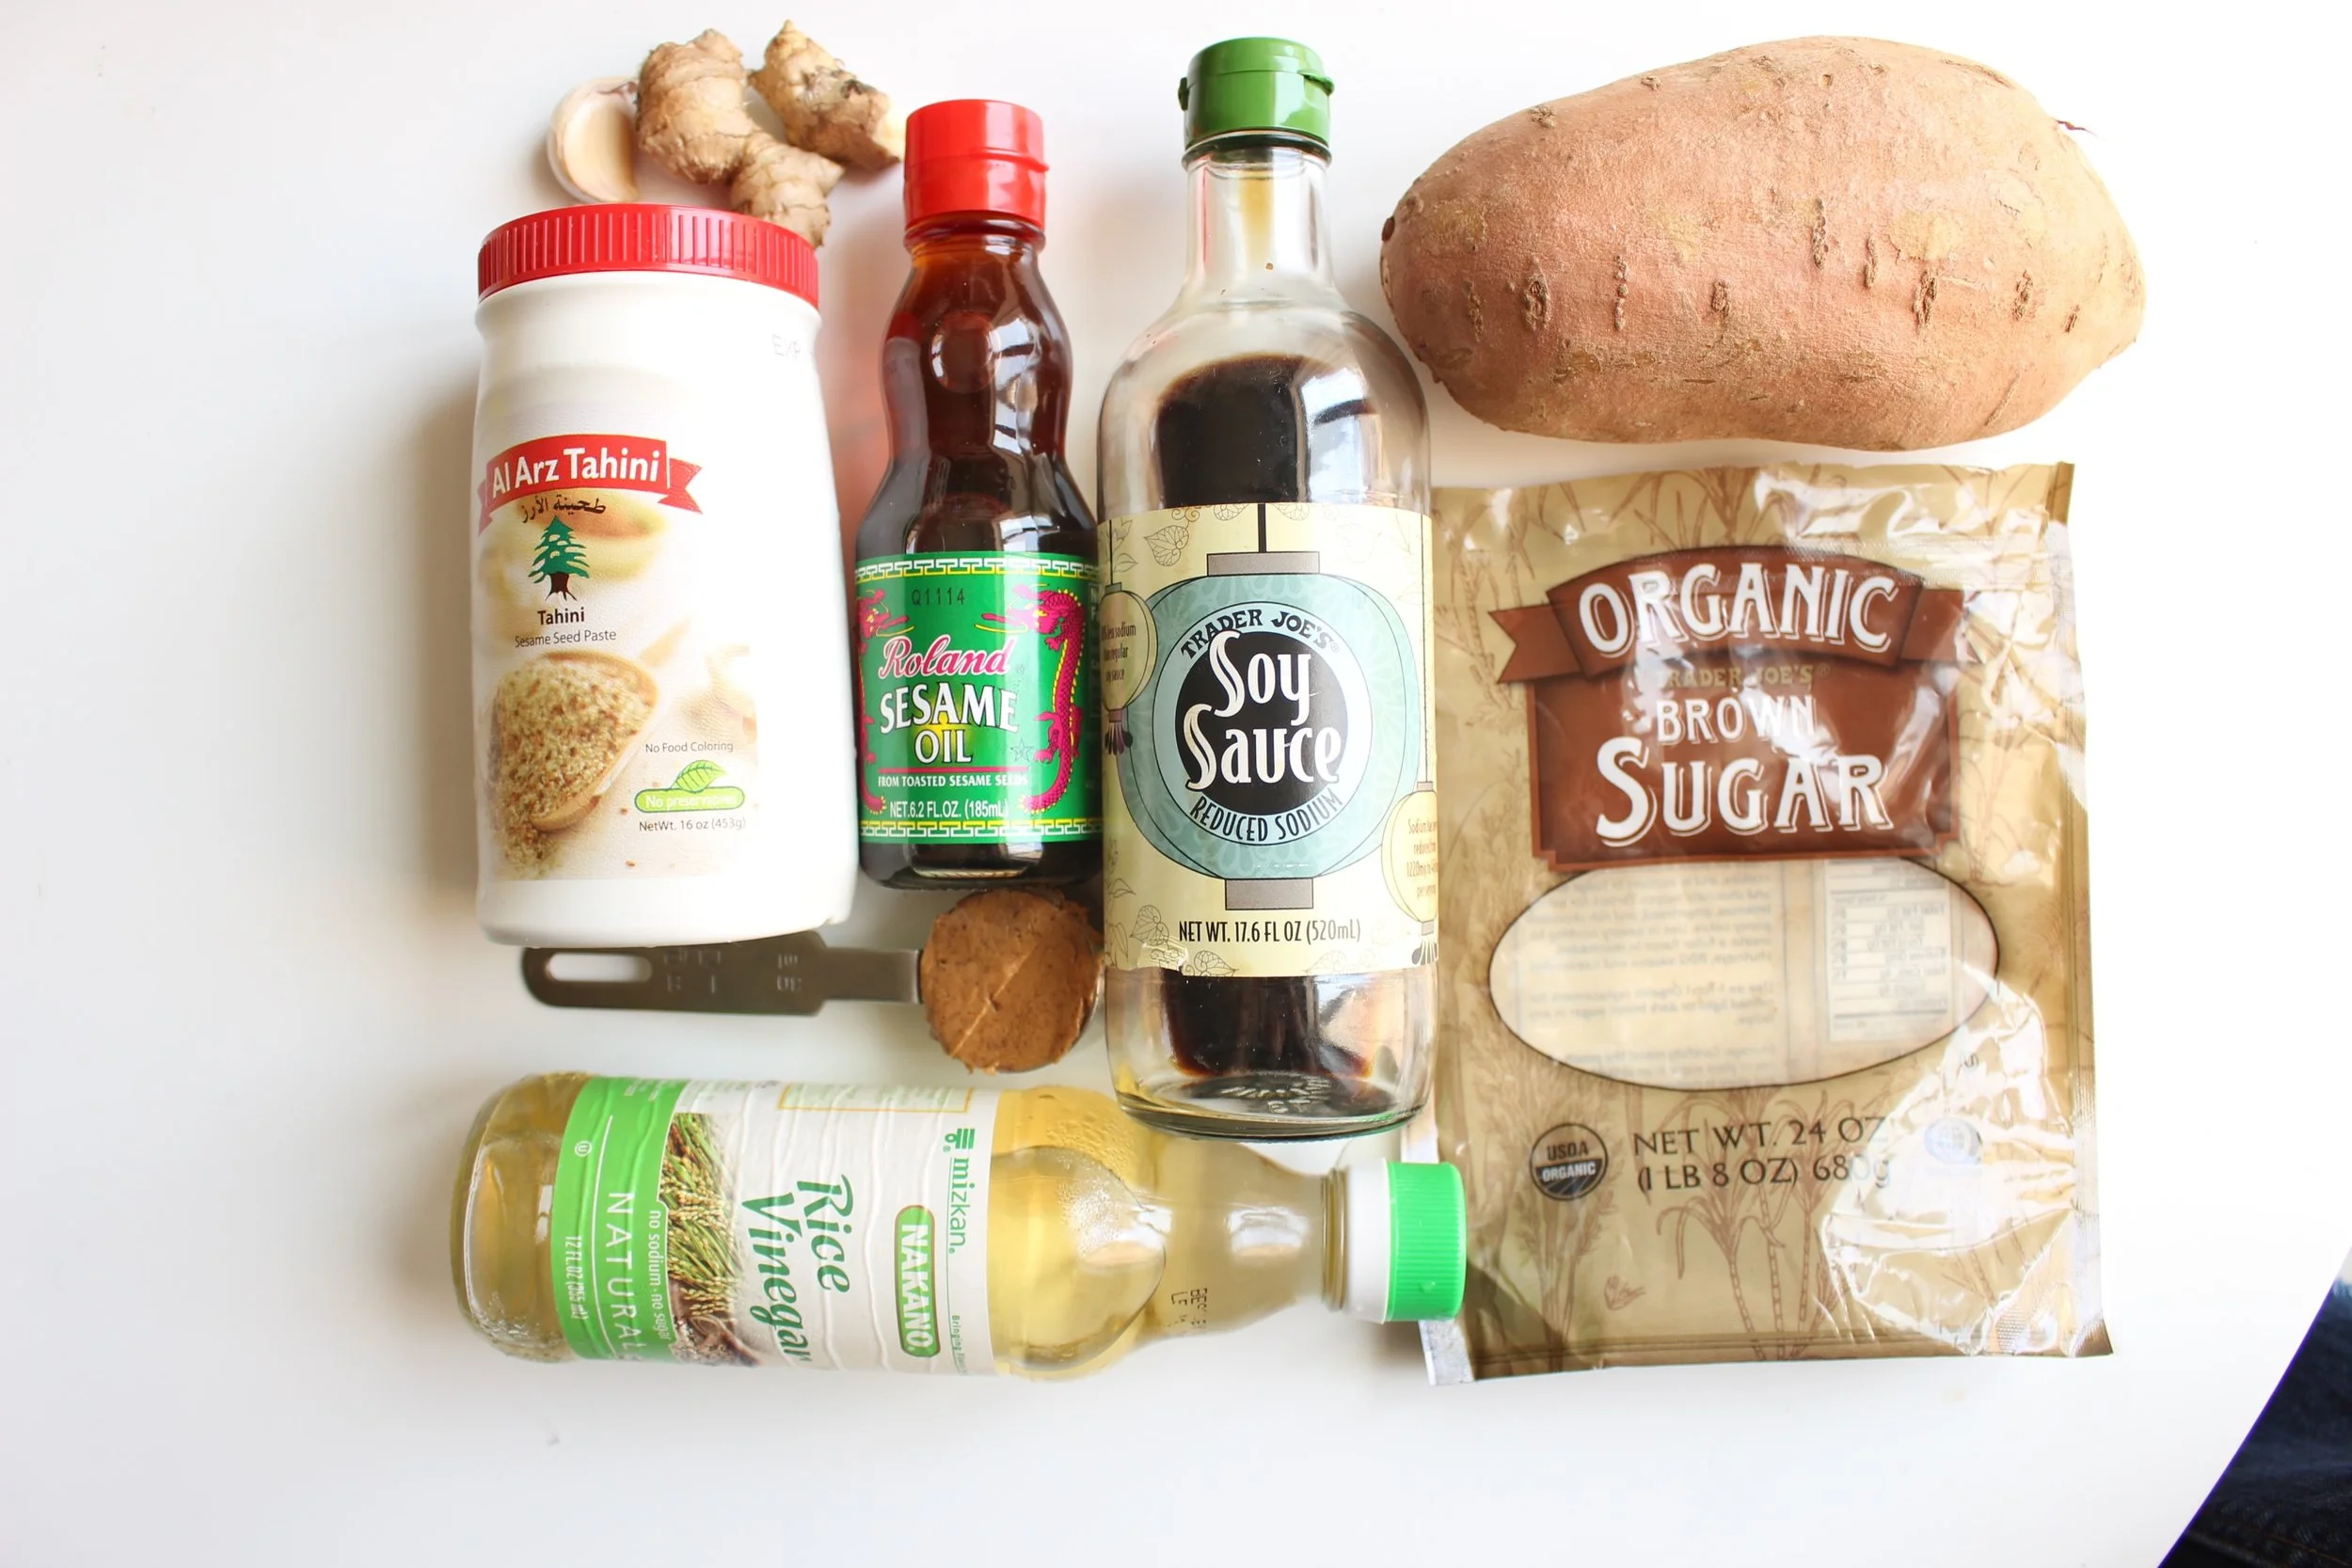
4 Tbsp butter or coconut oil, partially melted
½ cup applesauce
1 egg 
1/2 cup brown sugar, divided  
3/4 cup yogurt 
1 tsp vanilla extract
1 cup wheat flour 
1 cup white flour 
1 tsp baking powder
1 tsp baking soda 
1 tsp cinnamon
1/4 tsp salt 
1 medium sweet potato, cut into tiny squares (about 1.5 cups)
¼ cup golden raisins

Move your oven rack to the bottom or lower middle portion of the oven. Preheat to 375.

In a large bowl, partially melt the butter or coconut oil. Microwave it for a few seconds until it just begins to liquify, but is still partially solid.

Mix in the applesauce, egg, 1/4 cup of brown sugar, yogurt, and vanilla extract. Add the dry ingredients and mix until combined and no streaks of flour remain.

Add the chopped sweet potatoes and raisins and stir again to combine.

Spoon the batter into the cups of a muffin tin, filling about 3/4 of the way. Top each muffin with a large pinch or two of brown sugar.

Bake for 18-22 minutes until firm to the touch and a tester in the middle comes out clean. Check after 12-15 minutes and cover if the sugar browns too fast.

Sweet potato muffins | Me & The Moose. These one-bowl, whole grain muffins sneak in some vegetables at breakfast, lunch, or snack time. #sweetpotatomuffins #meandthemoose #sweet potatorecipes #thanksgiving #healthybaking

Chai spiced sweet potato and orange oatmeal

This puree is delicious with oatmeal, yogurt, or on its own. Though the chai mixture contains a lot of different spices, the end result is very mild. And yes, I realize that "Chai" actually means tea, but I think Starbucks has conditioned us all to use "Chai" as shorthand for versions of this spice combo.

IMG_7053.jpg

I boiled the sweet potatoes here, but feel free to use the microwave, steamer, or oven if that suits you better. I find boiling to be the fastest and easiest method.

IMG_7069.jpg

Though it's more work, use whole oranges instead of orange juice since the juice doesn't have nearly as much fiber as the actual fruit.

IMG_7052.jpg

Chai spiced sweet potato and orange oatmeal

Chai spice mixture:
1 tsp cinnamon
1 tsp ginger
1 tsp cardamom
¼ tsp nutmeg
1/8 tsp cloves
¼ tsp fennel seeds
1/8 tsp salt

For the puree:
1 lb sweet potatoes (1 x-large or two small), peeled and cubed
2-3 large oranges, peeled
water (as needed)
1-1½  tsp chai spice mix

Cube potatoes and place in a medium saucepan. Add water until just covered or until the potatoes just start to float.

Bring to a boil over high flame. Once boiling, turn the flame down to medium. You want a strong simmer, but not a boil. Cook for 8-10 minutes or until the potatoes are fork tender, but not falling apart.

Drain and add to the blender. Peel and add oranges and 1 tsp of chai spice mixture. Blend until combined, pausing to scrape down the sides as needed. Hold off on adding water until the oranges are fully broken down because you won't likely need more liquid. If the mixture is too dry, add 1 Tbsp of water at a time until you've reached your desired consistency.

Yield: 2.5-3 cups or 22-25 oz


To eat with oatmeal:
1/2 cup oatmeal
1 cup water
1/4 cup coconut milk
1/3 cup chai spiced sweet potato and orange puree
2 Tbsp toasted coconut flakes (unsweetened)
1 Tbsp juice-sweetened dried cranberries
1 Tbsp maple syrup (optional)

 Yield: One serving

IMG_7060.jpg
IMG_7063.jpg
IMG_7065.jpg

Sweet potato peanut noodles

I love love love peanut noodles, sesame noodles, and basically any noodle with a creamy, nutty, salty sauce, as does my child. He likes to pretend he can use chop sticks (he's actually pretty good, considering) and make a huge mess. It's adorable.

I swapped out the soba or lo mein noodles that are the usual base for this dish and used swoodles instead and they're fantastic. A little bit crunchy and just a tiny bit sweet to balance out the salty sauce. Yum. The toddler agrees.

I like to saute the noodles briefly with a little olive oil and a hot pan. Really, you just need a few minutes to take away the rawness of the sweet potatoes. I don't look for any color, just a slight opaqueness. You aren't really cooking the noodles, just making them not raw, if that makes any sense. I'm guessing you could eat them totally raw and it would be fine, I just haven't done it. I also feel like swoodles beat zoodles in a "could this pass for pasta" contest, hands down. If you don't have a spiralizer, you could just use a vegetable peeler to make long, thin noodles. 

I've tried many different recipes and have winged it many times in making peanut noodles, but I always come back to Smitten's recipe. It's a little lighter than your typical peanut sauce because Deb swaps in some tahini for peanut butter. I always want to add tahini to this dish, but never seem to get the right balance when adapting other recipes. I add one more Tbsp of peanut butter and use an even 4 Tbsp of soy sauce because I really like peanut butter and salt. I also use half of the sugar because the sweet potato noodles are already sweet, but other than that, I use the recipe as written. I love it.

This base is also perfect with just some crisp cucumbers on top, but you could also add edamame, leftover protein, dried seaweed, toasted sesame seeds, and ANY other raw, steamed, or roasted veggies. You could kind of use this as a base for a noodle bowl.

Sweet potato peanut noodles

1 extra large sweet potato (about 1 lb), peeled and spiralized
1 Tbsp avocado or other neutral oil
2 Tbsp toasted sesame oil
2 Tbsp tahini
2 Tbsp peanut butter
4 Tbsp soy sauce
2 Tbsp rice vinegar
½ Tbsp brown sugar
1-inch piece of peeled fresh ginger
1 medium garlic clove

Heat 1 tbsp of avocado or other neutral oil in a pan over medium flame. Add the sweet potato noodles and sauté for 5 minutes until the potatoes are slightly opaque. Flip the noodles and cook for about 5 minutes more. Let cool.

In a food processor or blender, combine all the ingredients from sesame oil to the garlic and blend until smooth.

Toss the noodles with the sauce and serve. Also, this dish lasted for quite some time in the fridge and maintained its crunch and freshness for at least 1 week.

Yield: about 4 servings

Buffalo chicken and cauliflower burgers

Buffalo chicken burger | Me & The Moose. This burger is perfect for lunch or dinner or game day snacks. Throw an egg on top and it could also be breakfast. #meandthemoose #Glutenfree #burgers #easydinner #quickdinner #dinnerrecipes #lunch

Buffalo chicken burger | Me & The Moose. This burger is perfect for lunch or dinner or game day snacks. Throw an egg on top and it could also be breakfast. #meandthemoose #Glutenfree #burgers #easydinner #quickdinner #dinnerrecipes #lunch #lunchrecipes #gamedaysnacks #buffalochickenburger

These burgers have all the familiar flavors of a buffalo wing, but with a little extra nutrition from the cauliflower, ground almonds, and ground chicken.

Take me to the recipe!

Buffalo chicken burger | Me & The Moose. This burger is perfect for lunch or dinner or game day snacks. Throw an egg on top and it could also be breakfast. #meandthemoose #Glutenfree #burgers #easydinner #quickdinner #dinnerrecipes #lunch

Buffalo chicken burger | Me & The Moose. This burger is perfect for lunch or dinner or game day snacks. Throw an egg on top and it could also be breakfast. #meandthemoose #Glutenfree #burgers #easydinner #quickdinner #dinnerrecipes #lunch #lunchrecipes #gamedaysnacks #buffalochickenburger

Frank’s Red Hot and butter do a lot of the heavy lifting, flavor-wise. But these patties are so easy to throw together and taste so good. Using pre-riced cauliflower saves a step. For the rest, you just throw the ingredients together in a bowl, mix with your hands, and sear a couple of burgers in a hot skillet while basting with a mixture of the melted butter and hot sauce.

If you’re worrying that the cauliflower ruins an otherwise good burger, fear not. You can’t actually taste the cauliflower at all.

I also use almond meal or flour (either is fine- use whatever you have) as a binder with an egg, but since these are burgers and not a meatloaf or meatball, the binding is less important. Lots of burgers are simply meat and spices mixed together, so you can leave out the almond meal if you have an allergy or don’t have any.

Buffalo chicken burger | Me & The Moose. This burger is perfect for lunch or dinner or game day snacks. Throw an egg on top and it could also be breakfast. #meandthemoose #Glutenfree #burgers #easydinner #quickdinner #dinnerrecipes #lunch

Buffalo chicken burger | Me & The Moose. This burger is perfect for lunch or dinner or game day snacks. Throw an egg on top and it could also be breakfast. #meandthemoose #Glutenfree #burgers #easydinner #quickdinner #dinnerrecipes #lunch #lunchrecipes #gamedaysnacks #buffalochickenburger

These burgers are also really versatile if you want to make them into sliders or meatballs as a game day snack. You can also make extras and freeze a batch for the future. I like throwing a fried egg on top and calling these breakfast or tossing them into a salad with some crumbled blue cheese for lunch or a light dinner.

Buffalo chicken burger | Me & The Moose. This burger is perfect for lunch or dinner or game day snacks. Throw an egg on top and it could also be breakfast. #meandthemoose #Glutenfree #burgers #easydinner #quickdinner #dinnerrecipes #lunch

Buffalo chicken burger | Me & The Moose. This burger is perfect for lunch or dinner or game day snacks. Throw an egg on top and it could also be breakfast. #meandthemoose #Glutenfree #burgers #easydinner #quickdinner #dinnerrecipes #lunch #lunchrecipes #gamedaysnacks #buffalochickenburger

Buffalo chicken burgers

Time: 30 minutes
Yield: 6 burgers

1 lb ground chicken
1 cup riced cauliflower
½ medium red onion, finely chopped
2 large cloves garlic, minced
½ cup almond meal
1 egg
1/2 tsp kosher salt
1/4 tsp black pepper
1/4 cup plus 1 Tbsp butter
4-6 Tbsp Frank’s hot sauce

Add chicken, cauliflower, onion, garlic, almond meal, and egg to a large bowl and combine using your hands or a spatula. Form into 6 equal patties using a 1/3 cup measure.

In a separate bowl, melt the butter in the microwave. Add the hot sauce and stir to combine. Set aside.

Melt 1 Tbsp butter and heat over a medium low flame. When hot, add chicken patties and turn up the flame to medium.

While the first side is browning, sprinkle some of the butter/hot sauce mixture onto each patty being careful not to touch the raw meat with your brush or spoon. When the first side has a good sear, flip the burgers over and coat the other side with butter/hot sauce.

After 2-3 minutes, check the sear. If brown enough for your liking, turn the flame down to medium-low, cover, and let cook for another 5-6 minutes. When meat thermometer has reached 165, your burgers are done.

Rainbow vegetable quiche

Rainbow vegetable quiche | Me & The Moose. This quiche is a tasty and pretty way to get your toddlers to eat veggies. It also cubes easily for a finger food. #meandthemoose #quiche #vegetarian #vegancrust #brunch

Rainbow vegetable quiche | Me & The Moose. This quiche is a tasty and pretty way to get your toddlers to eat veggies. It also cubes easily for a finger food. #meandthemoose #quiche #vegetarian #vegancrust #brunch

Isn't she puuuurty? This dish combines a lot of M's favorite foods: Eggs, cheese, milk, and bread (or at least, something bread-adjacent). Also, quiches are basically fancy casseroles with all of the benefits (big-batch; make ahead and reheat; easily customized based on preferences; etc), but are less messy than some of the saucier casseroles and are cube-able, which means that quiche = toddler finger food. This particular quiche is so pretty that I would happily feed it to a crowd. It's also so tasty that I would happily eat it all by myself (which I pretty much did because M went on a hunger strike after I made it).

Rainbow vegetable quiche | Me & The Moose. This quiche is a tasty and pretty way to get your toddlers to eat veggies. It also cubes easily for a finger food. #meandthemoose #quiche #vegetarian #vegancrust #brunch

Rainbow vegetable quiche | Me & The Moose. This quiche is a tasty and pretty way to get your toddlers to eat veggies. It also cubes easily for a finger food. #meandthemoose #quiche #vegetarian #vegancrust #brunch

I used a pre-made crust because I'm lazy.

Rainbow vegetable quiche | Me & The Moose. This quiche is a tasty and pretty way to get your toddlers to eat veggies. It also cubes easily for a finger food. #meandthemoose #quiche #vegetarian #vegancrust #brunch

Rainbow vegetable quiche | Me & The Moose. This quiche is a tasty and pretty way to get your toddlers to eat veggies. It also cubes easily for a finger food. #meandthemoose #quiche #vegetarian #vegancrust #brunch

I also recommend pre-cooking the potatoes a little bit, but this step isn't crucial. I just like predictability and pre-cooking means that all of the veggies will be evenly cooked. Tossing them in raw is more of a gamble, though after 45+ minutes of cooking, they'll probably be fully cooked. Also, slicing the potatoes thinly ensures that they cook at the same rate as the squash and tomatoes, which you can make a little thicker.

Rainbow vegetable quiche | Me & The Moose. This quiche is a tasty and pretty way to get your toddlers to eat veggies. It also cubes easily for a finger food. #meandthemoose #quiche #vegetarian #vegancrust #brunch

Rainbow vegetable quiche | Me & The Moose. This quiche is a tasty and pretty way to get your toddlers to eat veggies. It also cubes easily for a finger food. #meandthemoose #quiche #vegetarian #vegancrust #brunch

Rainbow vegetable quiche | Me & The Moose. This quiche is a tasty and pretty way to get your toddlers to eat veggies. It also cubes easily for a finger food. #meandthemoose #quiche #vegetarian #vegancrust #brunch

Rainbow vegetable quiche | Me & The Moose. This quiche is a tasty and pretty way to get your toddlers to eat veggies. It also cubes easily for a finger food. #meandthemoose #quiche #vegetarian #vegancrust #brunch

Rainbow Veggie Quiche

Time: About 1.5 hours (most action up front and then waiting for the quiche to cook)
Yield: 6-8 servings as a main; 8-10 servings as a side

1 large tomato, sliced into about 1/4-inch rounds
½ large sweet potato, sliced into 1/4-inch rounds
½ large yellow squash, sliced into about 1/4-inch rounds
2 large handfuls fresh spinach or 1/2 cup frozen spinach, thawed and drained
3 small purple potatoes (or regular potatoes if you can’t find purple), sliced into 1/4-inch rounds
olive oil
4 large eggs
¾ cup whole milk
2-3 large garlic cloves, minced
¾ cup cheddar cheese (or whatever cheese you prefer)
Salt and pepper to taste
1 9” pre-made pie crust (or your favorite homemade crust in a 9-inch pie plate)

Preheat the oven to 400.

Slice sweet potatoes, purple potatoes, into 1/8th-inch slices. You can use a mandolin or just eyeball it. Spread them in a single layer on a baking sheet and brush lightly with olive oil and sprinkle with salt. Cook in the oven for about 8-10 minutes, just until the sweet potatoes become pliable.

In the meantime, combine 4 eggs and milk and whisk to combine. Add the minced garlic. Grate the cheese and add ½ cup to the egg/milk mixture, reserving ¼ cup for topping the quiche. Season generously with salt and pepper. Stir to combine and set aside.

Next, using a fork, make holes all over your pie crust. Once the veggies have softened, turn the oven down to 375 and cook the empty pie crust for 10 minutes.

Remove the crust from the oven and begin assembly. I recommend putting a sheet pan beneath your crust to catch any spillover.

Starting with the purple potatoes, spread a single layer over the bottom of the crust (pie crust should peek through). Then, add two handfuls of spinach. Pour about 1/3 of the milk/cheese/egg mixture over these layers and tap the quiche once to remove air bubbles.

Then, add the yellow squash layer and the sweet potato layer. Pour over the other 1/3 of the milk/cheese/egg mixture. Tap once to remove air bubbles. By this point, the liquid should be even with the sweet potato layer and everything should be up to about the rim of the pie crust. If not, add more liquid and veggies.

Bake in the oven for 30 minutes, uncovered.

After 30 minutes, remove the quiche and add the tomato layer. Pour a bit of the remaining egg/milk/cheese mixture over the tomatoes (if possible- there may not be enough room for more of the egg mixture and that’s totally fine) and top with the remaining cheese.

Return to the oven for 15 minutes, or until the quiche is set. You should be able to rotate the entire thing without much movement from the contents.

If the quiche is not set after 45 minutes, but the cheese on top is browning, cover with foil and check again after another 10 minutes.

Let cool before serving.