Roasted squash and pear salad with cider vinaigrette

This hearty fall salad is filling, healthy, and comforting. #meandthemoose #saladrecipe #noboringsalads #salad #fall #fallsalad #squash #kale #pear #fallcomfortfood

This salad is complex enough for the foodies in your life, but filled with ingredients yummy enough for even discerning little ones (maybe paired down to its component parts, but it depends on your kid).

Take me to the salad!

This hearty fall salad is filling, healthy, and comforting. #meandthemoose #saladrecipe #noboringsalads #salad #fall #fallsalad #squash #kale #pear #fallcomfortfood

So, I’ve mostly succumbed to my existential dread and begun inhaling the Halloween candy that I SWORE I wouldn’t open until October 31st. Since my snacking has taken a turn and I also feel like it’s not really fall until I post a kale salad with some sort of roasted squash, I’m coming in hot with this baby today.

Lacinto kale (Tuscan/Dinosaur kale) is the base. This is my favorite kale to use in salads because you can dress it way in advance and it’ll stay crisp for days (and no one can complain about soggy lettuce!). It also stands up well against the nuts, seeds, roasted veggies, and tangy dressing here.

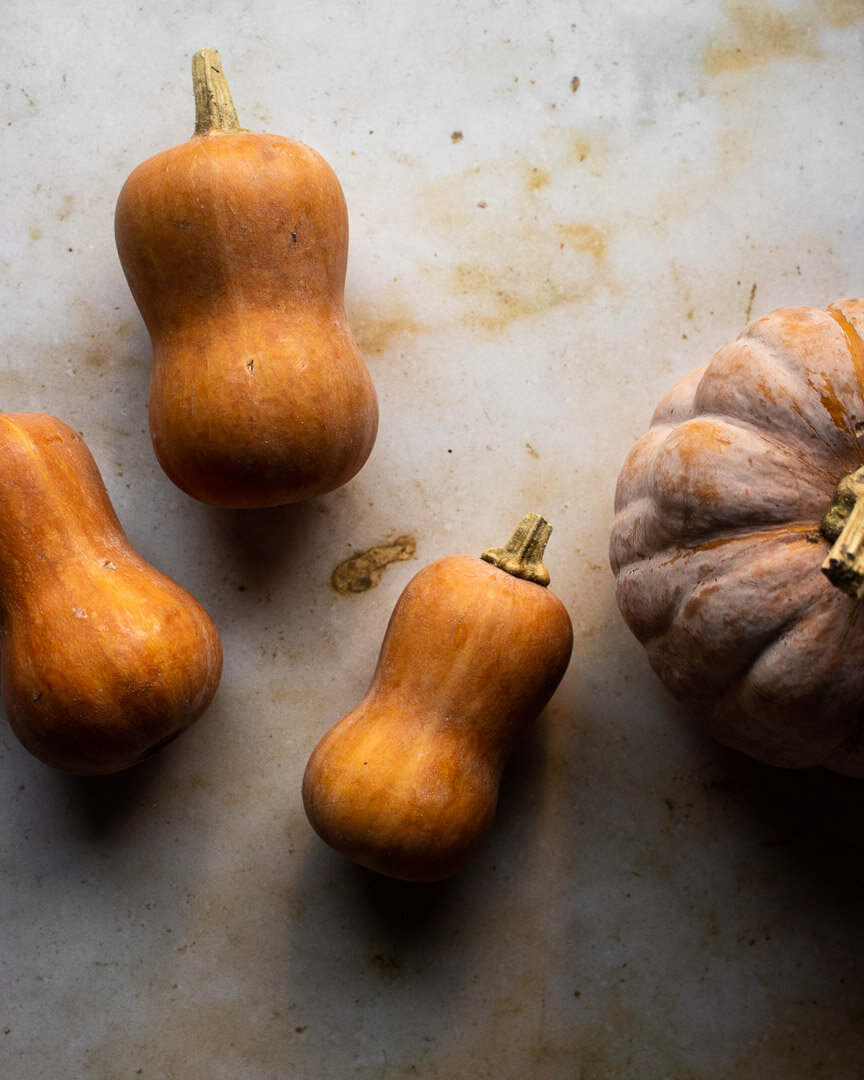
I roasted some honeynut squash (above) which looks like a mini butternut, but is oh so much better. I find butternut squash a little too bland and watery and there are so many other varieties with more taste and body like kabocha and koginut. Plus, they’re so puuuurty.

You might be thinking— “What is this woman smoking if she thinks I’m going to roast squash, toast nuts, fry sage and shallots, AND make a dressing mid-day on a Wednesday.” But hear me out. My squash-roasting method is so easy: split the squash in half, scoop out the seeds, and place it on a baking sheet cut side down and roast at 425 until fork tender (no peeling or stem trimming required!). Set it and forget it!

The nuts and seeds can be toasted alongside the squash in a separate small pan for like 4-5 minutes without any sort of prep at all (skins still on!).

Finally, the sautéed shallots and sage…well, there’s no way to make them easier. They’re not HARD by any stretch, but they require a little more work than your average salad, I’ll give you that. But they make this salad an EVENT, so if you CAN slow down and make yourself a nice lunch, I guarantee it’ll be worth it. Also, my kid loves fried shallots, so it’s a selling point in his book.

This hearty fall salad is filling, healthy, and comforting. #meandthemoose #saladrecipe #noboringsalads #salad #fall #fallsalad #squash #kale #pear #fallcomfortfood

Roasted Squash and Pear Salad with Cider Vinaigrette

Time: 1 hour (about 40 minutes active)
Yield: 2 meal-sized salads or 3 side salads

2-4 small, firm fleshed squash like Delicata, Koginut, or Kabocha
1 bunch Lacinto kale (also called Tuscan or Dinosaur), washed, de-stemmed, and torn
1 Tbsp olive oil
Large pinch of salt
1/4 cup raw hazelnuts
2 Tbsp raw pumpkin seeds
1 Tbsp butter
1 large or 2 small shallots, thinly sliced
5-6 large sage leaves
1/4 cup feta, goat’s cheese, or any other cheese you like
1 large pear, cored and sliced
Large pinch of Allepo pepper (optional)
Cider vinaigrette (recipe below)

For the cider vinaigrette
2 Tbsp olive oil
2-3 Tbsp apple cider vinegar
1/2 tsp honey
1/2 tsp kosher salt
1/4 tsp smoked paprika

Preheat the oven to 425. Split the squash down the middle with a sharp knife, scoop out the seeds and stringy bits from the center, and place cut side down on a parchment or foil lined baking sheet. DO NOT trim the ends or the stem off of the squash. Bake until the outer skin and inner flesh is fork tender, about 35-40 minutes depending upon the size and amount of squash (I like to roast a lot at once so I can freeze the extra and use it for future dishes). Let cool. The skin will slip off of the flesh easily.

While the squash is cooking, prep the kale. Wash, tear the leaves off of the tough inner stems, and then rip the leaves into medium pieces. Top with 1 Tbsp of olive oil and massage and squeeze the kale with your hands to make it more tender. Sprinkle with a large pinch of salt.

In a separate pan, place the raw nuts and seeds. Toast in the oven with the squash for 4-5 minutes or until the nuts and seeds begin to toast and smell nutty. Keep a close eye to prevent burning.

In a small saute pan, melt the butter over a medium high flame. Add the shallots and cook, stirring, until they begin to brown, about 5 minutes. Add the sage leaves and cook until they go dark and crispy.

Make the dressing: Combine all of the ingredients in a small bowl and whisk until well combined. Or use a small jar with a lid and shake until combined.

Top the lettuce with enough of the dressing to coat well. Add the squash, nuts, seeds, fried shallots, fried sage, and cheese. Just before serving, core and slice the pear and add to the salad (to prevent browning). Top with a large pinch of Aleppo pepper or other little bit of heat and more salt if necessary. Top with the rest of the dressing.

Cashew and blueberry granola

Cashew and blueberry granola is so fast and easy to make at home. There’s also less sugar and preservatives than in store bought versions AND you can customize the nuts, berries, and other add-ins with whatever you like best! #meandthemoose #granola…

Granola may seem like something that’s easier to buy in a store, but let me set the record straight: Homemade granola is simple, fast, and so much healthier than most of the commercially made stuff. Also, it makes your house smell amazing.

Take me to the recipe!

Cashew and blueberry granola is so fast and easy to make at home. There’s also less sugar and preservatives than in store bought versions AND you can customize the nuts, berries, and other add-ins with whatever you like best! #meandthemoose #granola…

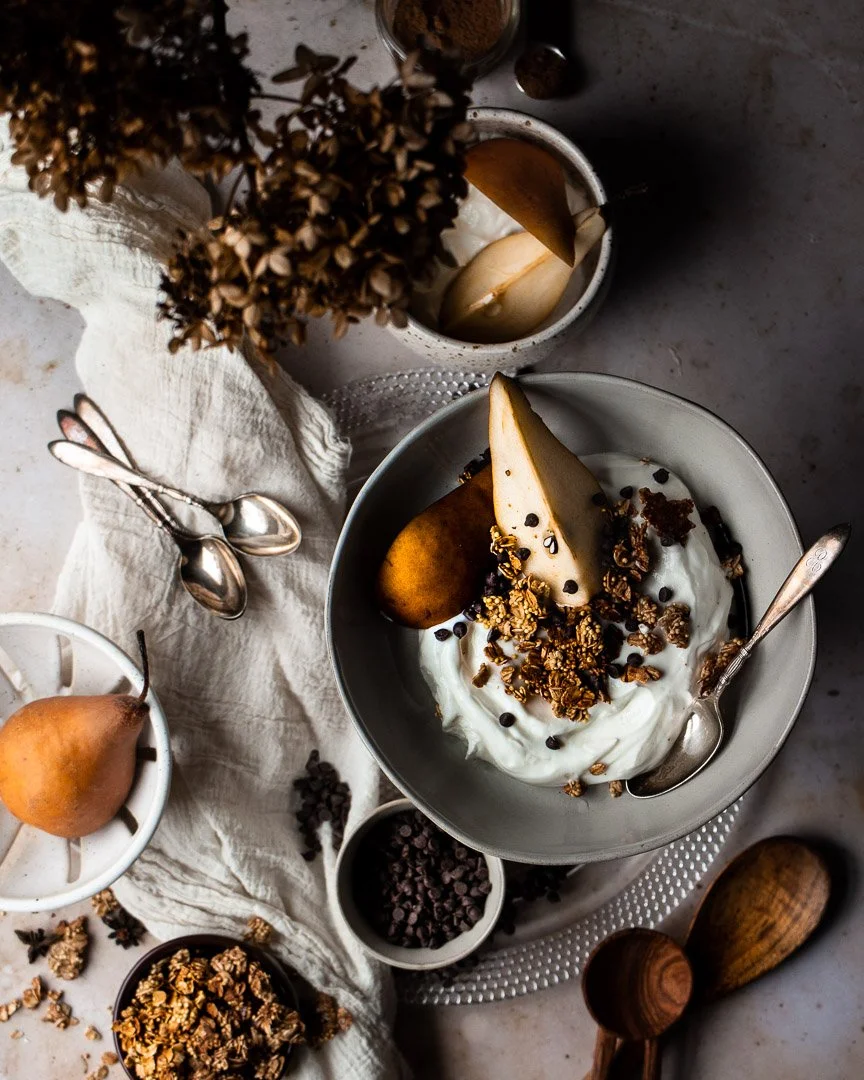
Let’s talk about granola and kids. I love granola because it’s a fun topper for lots of different things: yogurt, apple sauce, purees, pancakes, fruit, ice cream, etc. I like to pretend that it’s nature’s sprinkles. But there may be a chunk of kids who think granola is too crunchy or who don’t like the mix of textures. For them, I would add some mini chocolate chips or chocolate covered sunflower seeds and call it “trail mix.”

But granola is a great way to add some whole grains and make a more balanced snack.

I include millet in my granola and also my granola cups because it’s super crunchy and adds fiber, calcium, and iron, which we always need more of in our diet.

This recipe is my favorite combo of dried fruit and nuts, but feel free to sub in whatever kinds you like best.

Also, I like to toast the nuts separately and add them when eating this granola at home and leave them out for school lunches and snacks.

Cashew and blueberry granola is so fast and easy to make at home. There’s also less sugar and preservatives than in store bought versions AND you can customize the nuts, berries, and other add-ins with whatever you like best! #meandthemoose #granola…

A couple of notes:

  • If you have trouble finding millet, you can sub in uncooked quinoa or amaranth. I always have luck finding millet in the bulk sections of our our Whole Foods or any other health food store.

  • When spreading the uncooked granola mix onto your sheet pan, make sure to leave some holes in the middle of the pan. If you spread it as one large mass, the middle will be undercooked while the edges start to burn. With some holes and thinner spots in the middle, you’ll get a more even bake and better chunks in your final product!

  • Be mindful that when the outsides start to brown, the thicker parts may still be a bit undercooked, but that the whole thing will continue to cook and crisp while it cools. Once you see browning on the edges, take it out of the oven and let it cool completely. If there are any undercooked spots, feel free to re-toast them in the oven or a toaster oven for a few minutes before eating. But DON’T toast any fruit that you may add.

Cashew and blueberry granola is so fast and easy to make at home. There’s also less sugar and preservatives than in store bought versions AND you can customize the nuts, berries, and other add-ins with whatever you like best! #meandthemoose #granola…

Cashew and blueberry granola

Yield: about 3-4 cups of granola, depending on how many nuts and berries you add
Time: 25-28 minutes (5 minutes active time, 20-23 minutes baking time)

2 cups old fashioned rolled oats
½ cup millet
2 Tbsp brown sugar
1 tsp cinnamon
2 large pinches of kosher salt
½ cup whole cashews (optional)
2 egg whites, slightly whipped
1 Tbsp olive oil
1 tsp vanilla extract
¼ cup maple syrup
1/3 cup dried blueberries

Preheat the oven to 350. In a large bowl, mix together the oats, millet, brown sugar, cinnamon, and salt. Add the untoasted nuts, if using.

In a large measuring cup, mix together the egg whites, olive oil, and vanilla. Pour over the dry ingredients and mix together thoroughly.

Spread out on the mixture on a large sheet pan, leaving gaps and holes in the middle.

Bake for 20-23 minutes, or until the edges of the pan and any edges next to gaps in the middle start browning.

Let cool completely.

Add the dried blueberries (or other dried fruit) and crunch up the baked granola so that you have some chunks and some smaller bits.

Store in an airtight container at room temperature for up to 3 weeks.


Creamy chickpea and halloumi skillet dinner

This easy, quick chick pea and haloumi tikka masala uses a couple of shortcuts to pack in big flavor, but in half the time. #meandthemoose #dinnerrecipes #shortcuts #tikkamasala #haloumi #meatlessmonday #chickpeas #vegetarian

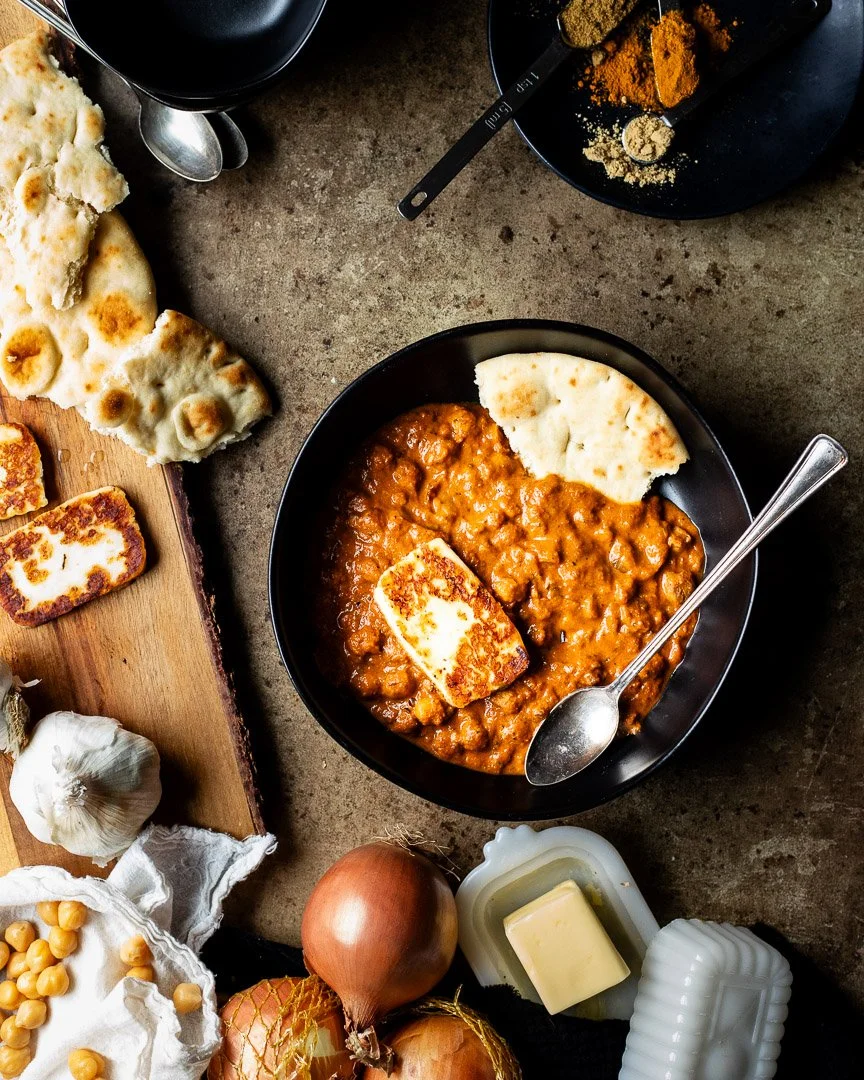
Cheat the clock with this vegetarian dish inspired by the flavors of tikka masala that uses shortcuts for both time and flavor!

Take me to the recipe!

This easy, quick chick pea and haloumi tikka masala uses a couple of shortcuts to pack in big flavor, but in half the time. #meandthemoose #dinnerrecipes #shortcuts #tikkamasala #haloumi #meatlessmonday #chickpeas #vegetarian

It’s January! That means we can’t binge eat cookie dough for dinner anymore.

I KID! Heartburn is my constant companion lately, so poor eating is much less appealing. That said, I’m feeling pretty great this pregnancy. I am, however, exhausted by 5 pm, so easy dinners that don’t require a lot of prep or cleanup and that cook super fast are at the top of our meal rotation. And I’m looking for shortcuts EVERYWHERE.

There’s absolutely nothing “authentic” about this tikka masala-inspired dish, but it’s so easy and so good, that I can overlook it just the once. The flavors recall your favorite takeout and the halloumi adds a tangy, salty bite.

I normally shy away from recipes that “cheat” with jarred sauces, but I’m making an exception in the interest of time. Rao’s is by far our favorite jarred sauce, but the first time I made this, I was trying to use up another jarred sauce that we didn’t like. It’s great either way.

This easy, quick chick pea and haloumi tikka masala uses a couple of shortcuts to pack in big flavor, but in half the time. #meandthemoose #dinnerrecipes #shortcuts #tikkamasala #haloumi #meatlessmonday #chickpeas #vegetarian

A couple of tips:

  • Be sure to cook the spices with the onions and garlic before you add the tomato sauce or cream. Since this dish cooks fast, you need to deepen the flavors by giving the spices a quick sear.

  • Speaking of cream, don’t forget to let it warm up while you make the rest of the recipe. Adding cold dairy to hot tomato sauce can make the cream curdle. It’ll still taste fine, but the dairy will look like little beads in your tomato sauce instead of mixing together completely.

  • You might notice that there’s not a lot of salt in this recipe. Since we’re using jarred sauce and really salty cheese, I recommend waiting until the end to add salt if it’s necessary.

  • Garam masala may not already in your spice rack, but it should be! It’s available all over the place and is really just a mixture of familiar spices that you might not have on hand. Try some!

  • Wait until the last minute to add the chickpeas because putting them in the sauce too early will soften them too much.

  • Finally, if you can’t find haloumi or if it’s too expensive, feel free to sub in farmer’s cheese, feta, cojita, queso blanco, or any other salty cheese. If using another type of cheese, no need to cook it beforehand, just add it to the tomato, cream, and chick pea mixture right before serving.

This easy, quick chick pea and haloumi tikka masala uses a couple of shortcuts to pack in big flavor, but in half the time. #meandthemoose #dinnerrecipes #shortcuts #tikkamasala #haloumi #meatlessmonday #chickpeas #vegetarian

Chickpea and haloumi tikka masala


Yield: 4 grown-up servings
Time: about 35 minutes, all active

1 large can chickpeas, drained and rinsed
1 Tbsp olive oil
Salt and pepper to taste
1-2 Tbsp butter, ghee, or oil of choice
½ large onion minced
3 large garlic cloves, minced
2½ tsp garam masala
2 tsp cumin
½ tsp ground ginger
½ tsp turmeric
2 cups jarred tomato sauce (about 24 oz)
½ cup cream or half and half
Haloumi, sliced
Naan or flatbread for serving


Preheat the oven to 400.

Pour the half and half or cream and set aside to warm up.

Wash and drain the chickpeas and dry them off lightly with a paper towel. Toss with the olive oil and sprinkle with salt. Roast until crispy, about 20 minutes.

While the chickpeas cook, heat the butter, ghee or oil over medium high heat in a large skillet. Add the onions and cook until soft and translucent, about 5 minutes.

Add the garlic and cook for 1-2 minutes until fragrant.

Add the spices and cook, stirring to mix well, for 2-3 more minutes until fragrant.

Add the tomato sauce, mix well, and turn the flame up to high. Let the sauce come to a boil and turn the heat off.

Heat a small skillet over a high flame until a few drops of water bubble immediately when they hit the skillet. Add the cheese and sear until golden brown, about 2 minutes. Flip and repeat on the other side. Turn the skillet off and set aside.

Check the chickpeas for crispness.

Mix the chickpeas and cream into the tomato sauce. Test for salt, keeping in mind that the haloumi is quite salty. Top with the seared haloumi.

Coconut and cardamom alfajores

Alfajores made easier with store-bought dulce de leche and a streamlined recipe and method. Save time AND make delicious cookies this year! #meandthemoose #holidaybaking #Christmascookies #alfajores #shortbreadcookies #dulcedeleche #cookierecipes #b…

You may think you don’t need another holiday cookie recipe, but these are subtly spiced, barely sweet, and super easy. Win, win, win!

Take me to the cookies!

Alfajores made easier with store-bought dulce de leche and a streamlined recipe and method. Save time AND make delicious cookies this year! #meandthemoose #holidaybaking #Christmascookies #alfajores #shortbreadcookies #dulcedeleche #cookierecipes #b…

First of all, who’s had Alfajores before? If not, get thee to an Argentinian bakery because they. are. delicious. This South American staple uses dulce de leche in between two soft, cakey, vanilla cookies and is then rolled in shredded coconut.

In the US version, we often swap the softer cookie for a crispier vanilla shortbread, which I prefer. Also, I decided to skip the shredded coconut on the outside and opt for a coconut-flavored shortbread because, while I love the taste of coconut, I don’t always love its texture.

Alfajores made easier with store-bought dulce de leche and a streamlined recipe and method. Save time AND make delicious cookies this year! #meandthemoose #holidaybaking #Christmascookies #alfajores #shortbreadcookies #dulcedeleche #cookierecipes #b…

I started with this Coconut Shortbread recipe from Food52, but simplified the method, dialed down the sugar, swapped two egg yolks for one whole egg, and added a tiny bit of cardamom for a warmer, spicier flavor that felt right for the holidays.

You know what else feels right for the holidays? Shortcuts. In this version of the recipe, we use only one bowl and mix up cold fats with the rest of the ingredients in a food processor instead of a mixer.

AND, this part might seem like sacrilege to some, but I used jarred dulce de leche. I know, I know. Bad food blogger, bad! I like this one the most and found it at World Market, but you can also find it online. If you feel like making your own, here are some options:

Smitten Kitchen’s stovetop dulce de leche
Displaced Housewife’s olive oil dulce de leche
Live Well Bake Often’s oven-baked dulce de leche
The Spruce Eats boiled condensed milk dulce de leche

Here we go!

Alfajores made easier with store-bought dulce de leche and a streamlined recipe and method. Save time AND make delicious cookies this year! #meandthemoose #holidaybaking #Christmascookies #alfajores #shortbreadcookies #dulcedeleche #cookierecipes #b…

Coconut and cardamom alfajores

Yield: 24 cutout cookies; 12 sandwiches
Time: 90 minutes (about 30 active)

½ cup (1 stick) butter, cut into ½ inch cubes
6 Tbsp coconut oil (solid)
½ cup cane sugar (can substitute granulated sugar if necessary)
1 tsp vanilla extract
1 egg
2 cups all-purpose flour
¼ cup coconut flour
1/4 tsp cardamom
¼ tsp sea salt
1 15-oz jar of dulce de leche

Cube the butter and add it to a food processor. Add the coconut oil (making sure it’s solid). Run the food processor until the butter and coconut oil have combined and are smooth, about 30 seconds. You may have to scrape down the sides.

Add the sugar, vanilla extract, and egg. Run the machine until the ingredients are well combined. Again, you may have to scrape down the sides.

Add the dry ingredients and pulse just until the dough comes together. I often need to scrape the sides once. The end result of the dough should be a crumbly wet dough that’s in large and small sandy chunks that come together easily when pressed.  The dough should be wetter than a pie dough, but slightly more crumbly than your typical sugar cookie dough.

Divide the dough roughly in half and place one dough chunk on a sheet of parchment paper. Using the paper or your hands to form a ball. Place another piece of parchment on top of the dough ball and roll out to a ¼-inch thick disk. Repeat with the other half of the dough. Chill both dough disks in the refrigerator for 30 minutes.

When the dough has chilled for about 25 minutes, preheat the oven to 325.

Working one disk at a time, remove the top parchment sheet from each half and use it to line a cookie sheet. Cut out as many shapes as possible and gently transfer them. Re-roll the dough to cut out more shapes. For the cookies that will be the base of each sandwich, score gently with a fork. For the top cookie, cut out any shape you like from the middle.

Bake the cutout cookies for 14-17 minutes, turning once during baking to ensure even cooking. The cookies are done when they just begin to brown. Let cool.  

When the cookies are cool, top each bottom portion with 2-3 Tbsp of dulce de leche and top with a cutout cookie.

Fried green tomatoes

IMG_8384.jpg

If your child loves french fries and tomatoes, then they will love fried green tomatoes. Or, they will reject them out of hand because they're mercurial toddlers like mine. One day, M will love these. I'm sure of it.

I just dropped M off for his first day of a new school year. He was only off for a week between "grades" but I felt so nervous this morning! M had a tough time adjusting to his last classroom and now he has new grownups, a new space, and some new kids to contend with. Ugh. I don't like change. That must be where M gets it.

We also have a nut allergy in the classroom this year, so I'll be more mindful of nut-free recipes for lunches and snacks.

ALSO also, after just a week off from packing lunches, I forgot what a huge drag it is. My sympathies go out to those of you getting back to it after an ENTIRE summer off. Strength to you, fellow lunch-packers.

IMG_8378.jpg

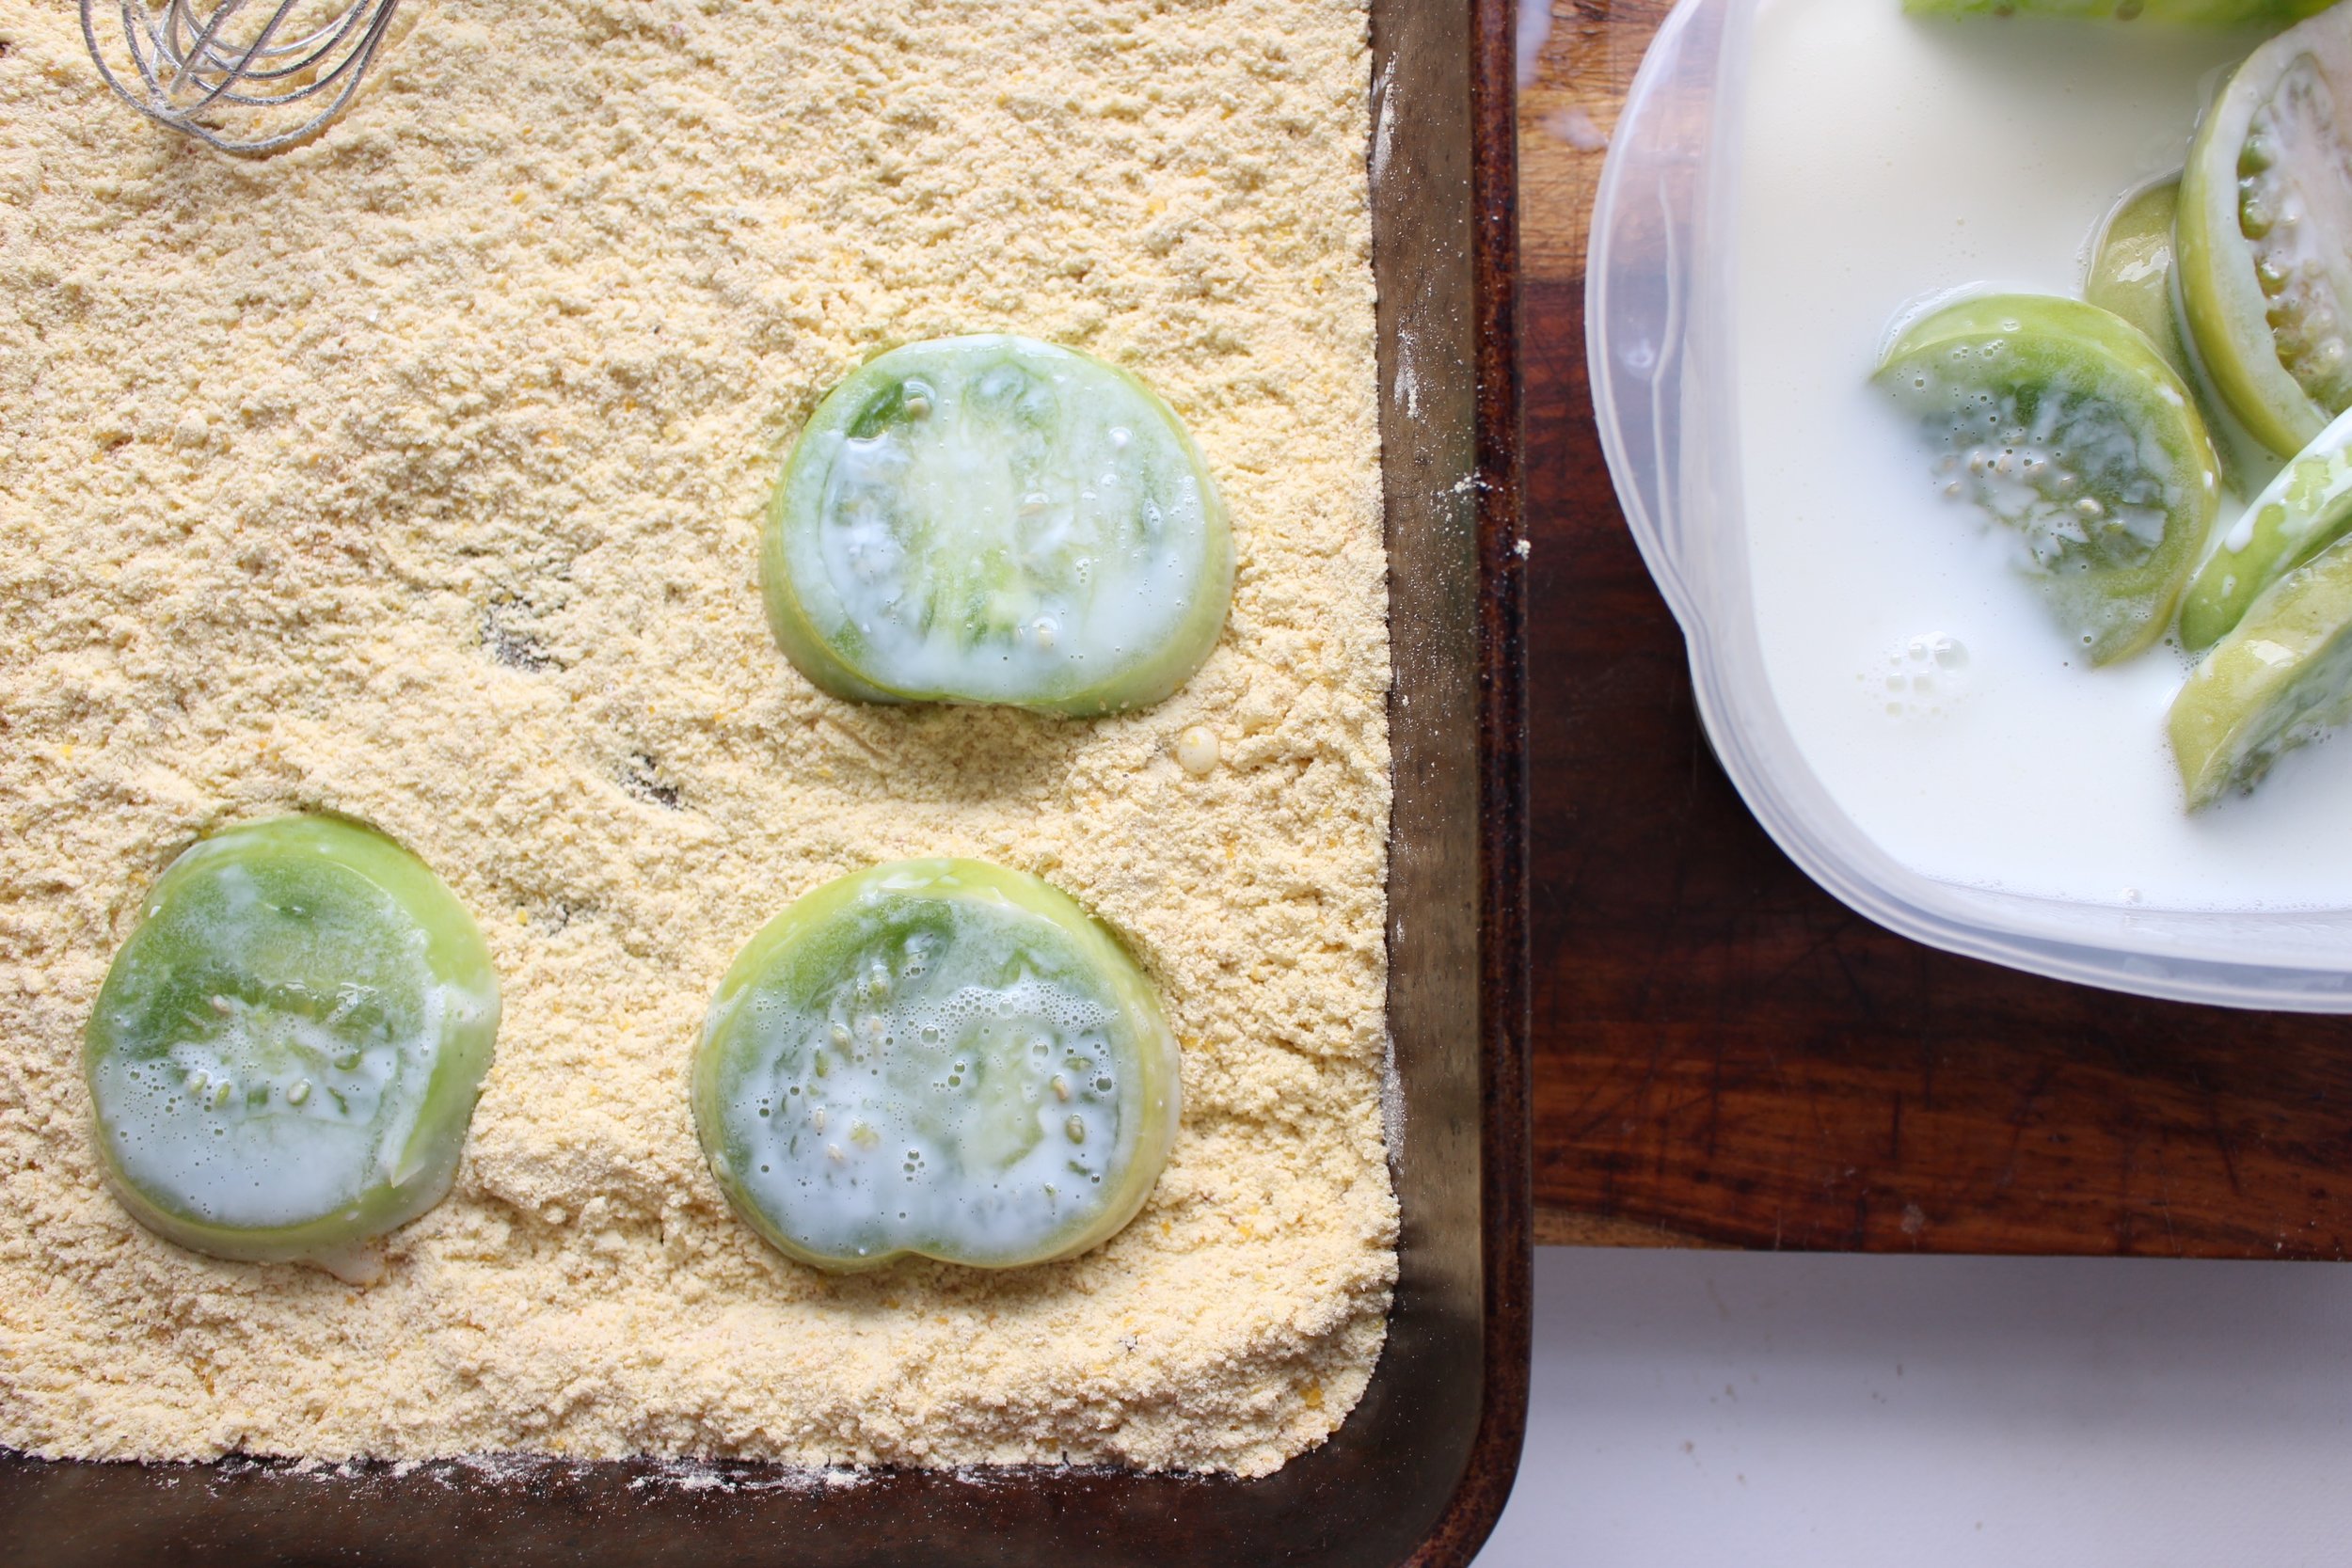
The keys to good fried green tomatoes, to me, are soaking overnight in buttermilk, and cooking with HOT oil. I've gotten equally delicious and crunchy results from using a little bit of oil and a lot of oil, but the heat seemed like the common denominator.

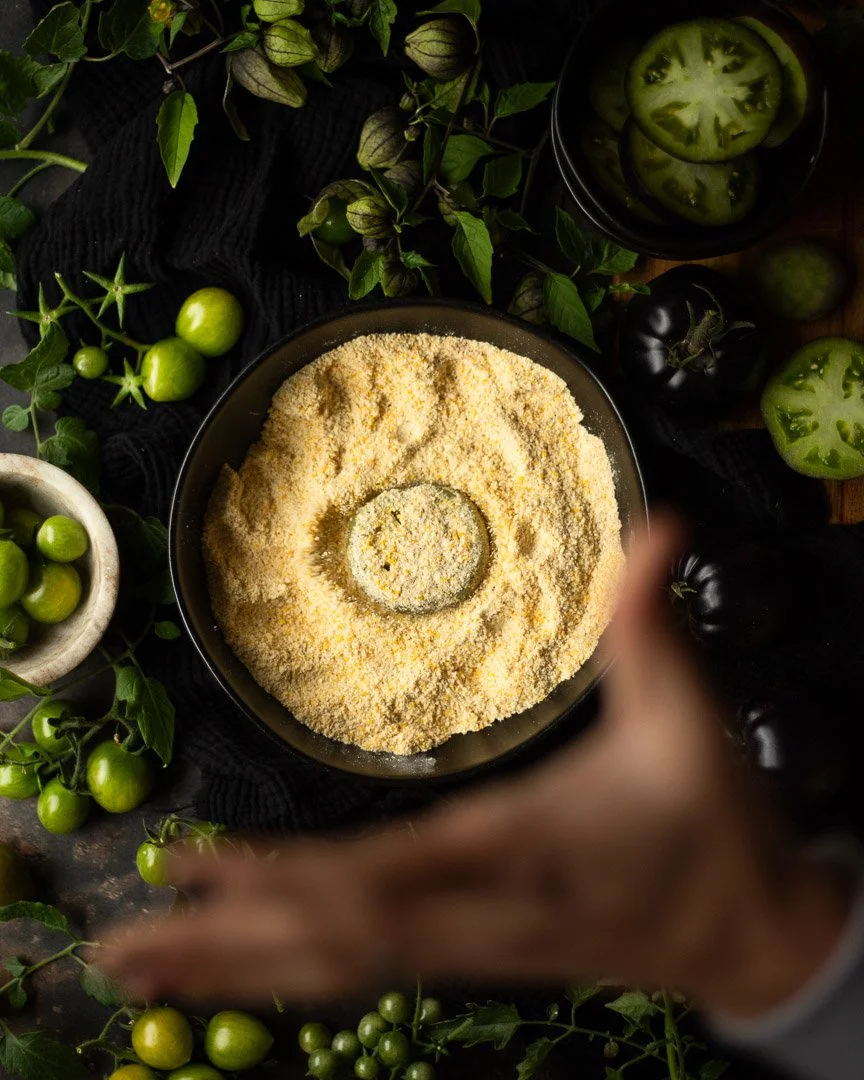
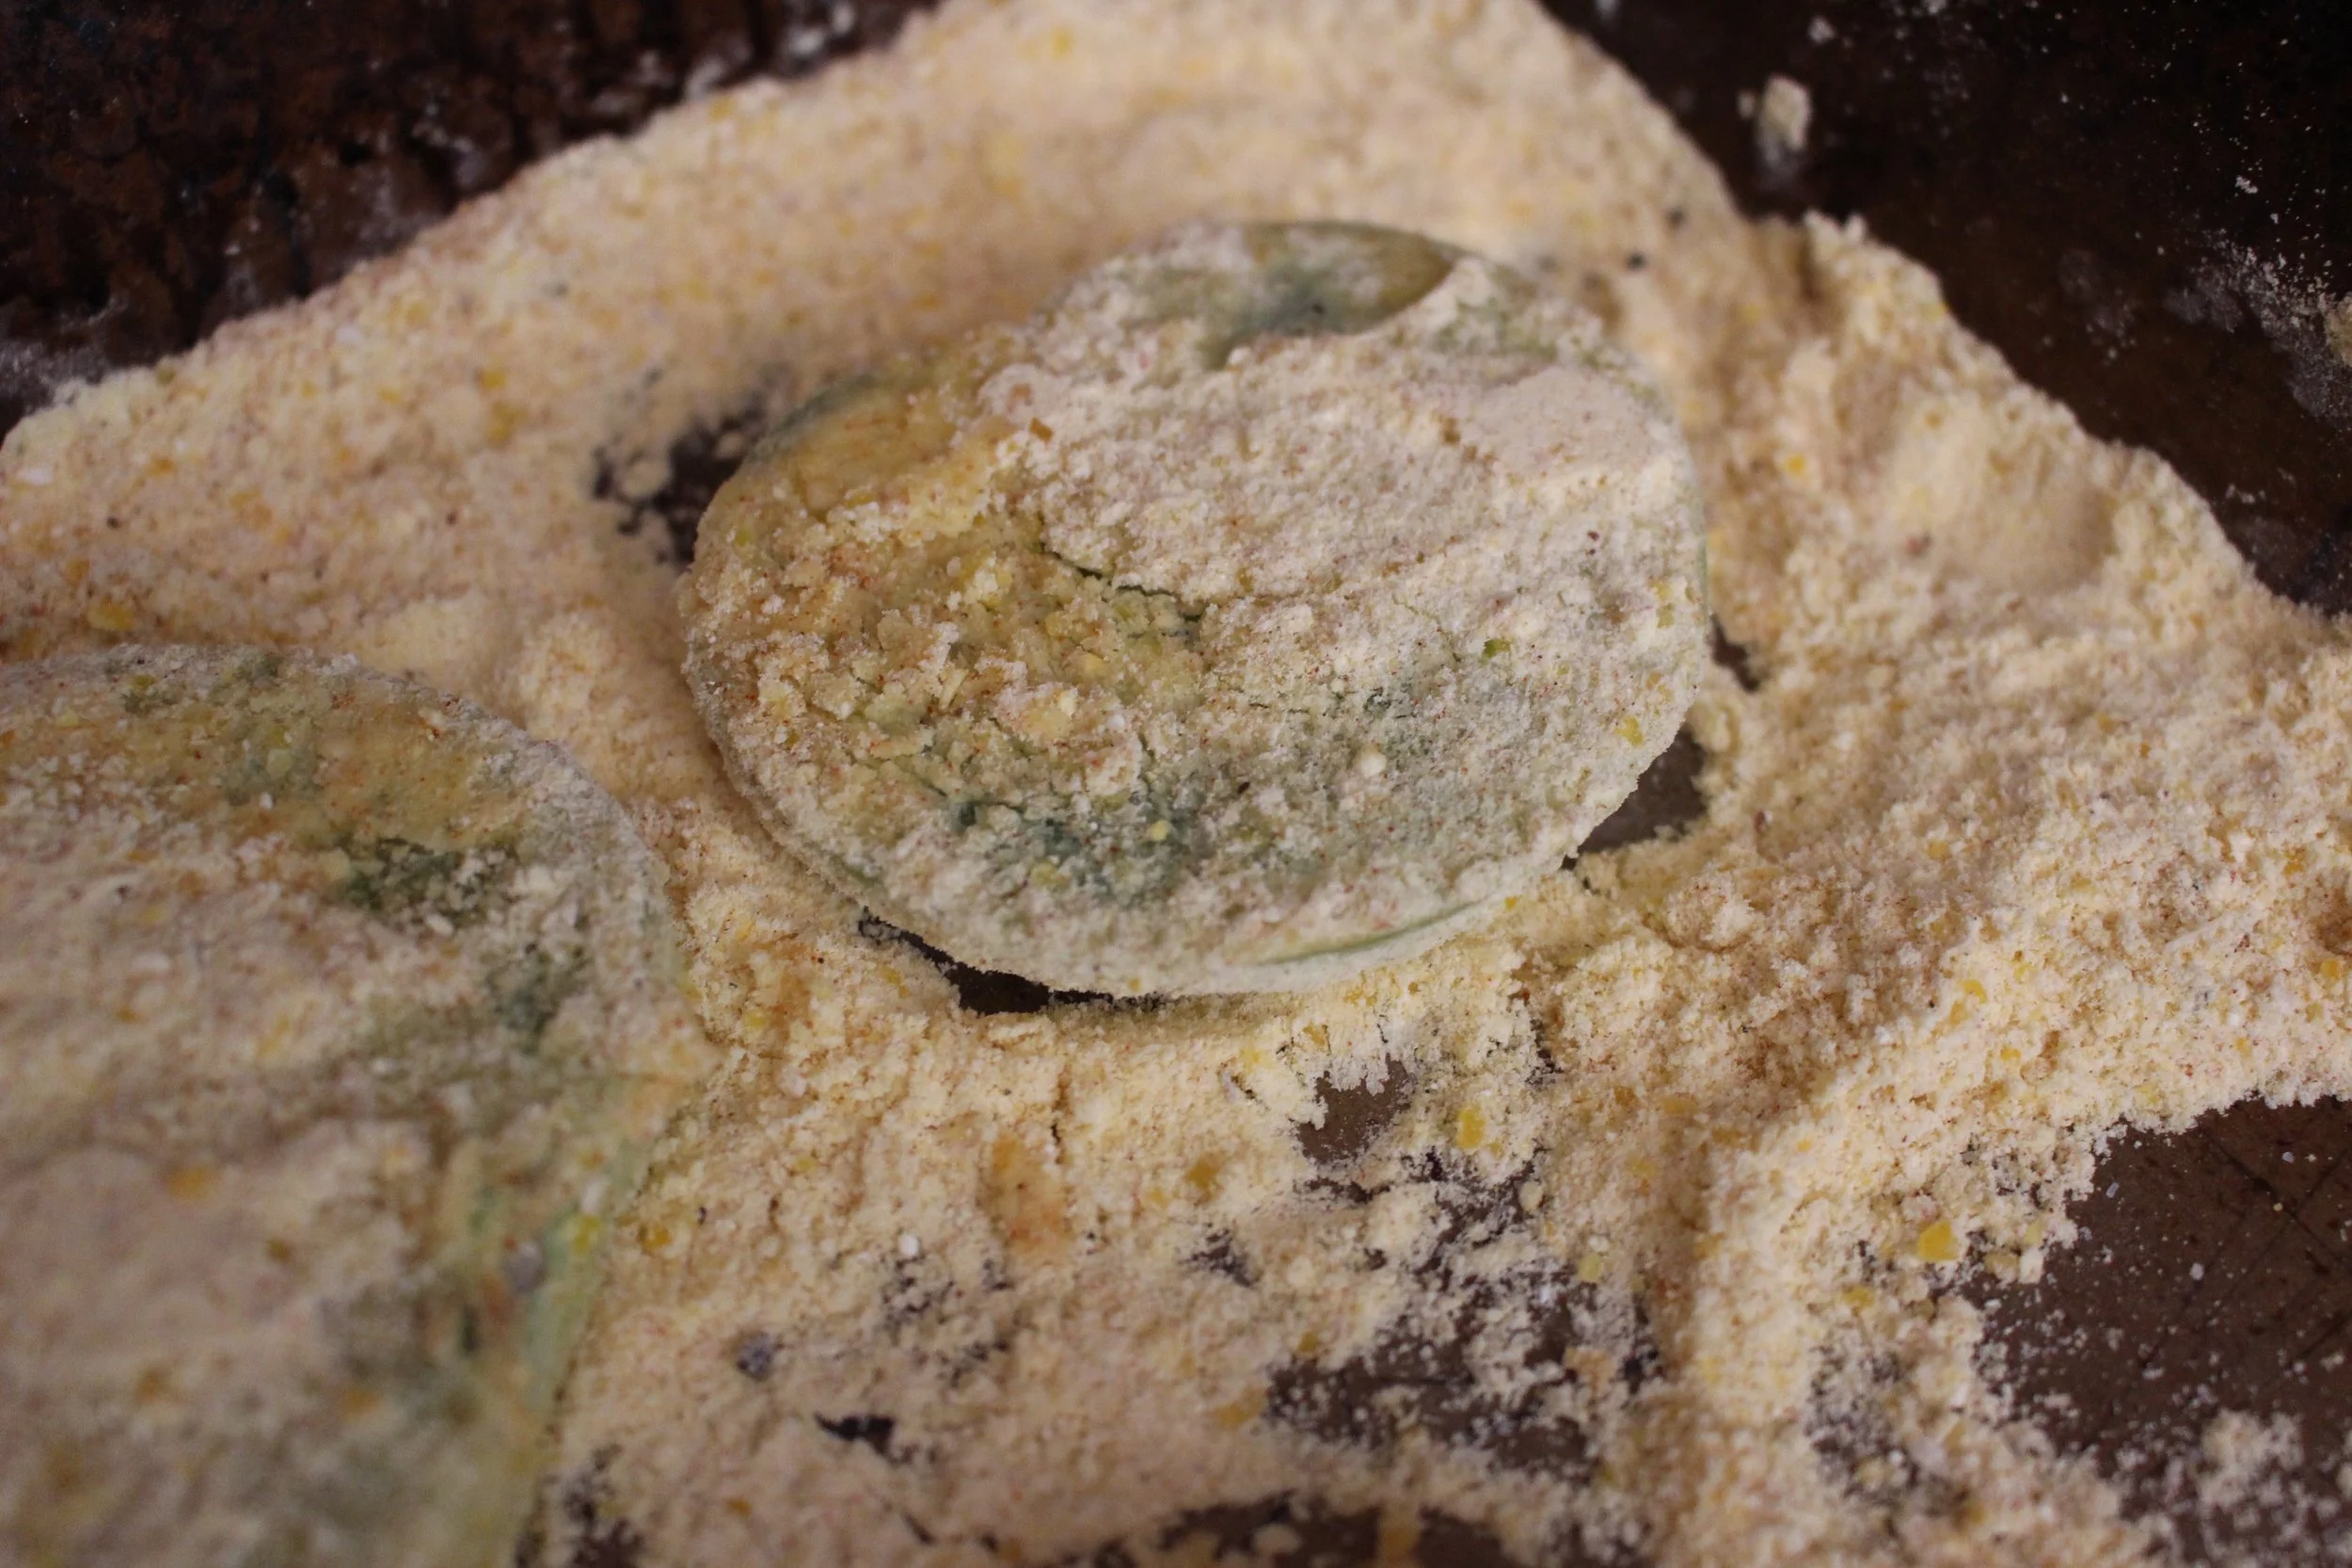
I also experimented a lot with corn flour and different grinds of cornmeal. I initially liked corn flour the best, but it's very easy to get too much flour, which doesn't cook evenly. (Picture #2 was taken BEFORE I knocked off the excess.) Ultimately, my favorite was straight-up, finely ground cornmeal.

IMG_8387.jpg

Fried green tomatoes

3-4 large green tomatoes, sliced in ¼-inch thick slices
1-2 cups buttermilk, full or low-fat (enough to cover the tomato slices)
1 tsp salt, divided
1 cup finely ground cornmeal
½ tsp paprika
Ground pepper
¼ cup avocado oil
Course sea salt

Slice the tomatoes and discard the end pieces. Place the tomatoes in a container and cover them with buttermilk. Add ½ tsp salt, cover, and shake. Refrigerate for at least a few hours and up to 1 day.

Combine the corn meal, salt, paprika, and pepper in a large container. Set aside. Heat one to two tablespoons of avocado oil at a time until very hot.

Working one at a time, shake off excess buttermilk and immediately place the tomato slice in the cornmeal mixture. Cover both sides well, but shake off the excess cornmeal as well.

When the oil is hot (when you add anything to the oil, it immediately starts bubbling), add the tomatoes (as many as will fit in your pan, but don’t crowd them; work in batches), and fry for 3 minutes. Check for brownness and flip when golden. When second side reaches golden brown, remove to a paper towel and sprinkle with coarse sea salt.

Between batches of tomatoes, pour out any leftover oil and carefully wipe off any cornmeal left in the pan. Heat two more tablespoons of avocado oil and repeat the cooking process with remaining tomatoes.

Yield: 12-16 tomato slices

IMG_8389.jpg
IMG_8394.jpg