Weeknight beef stew

A deeply flavored, rich, and cozy beef stew is usually an all-day, multiple-pan affair. But this recipe simplifies the steps so that you can have this stew, which is mostly hands-off cooking, on the table in a maximum of 2 hours. #meandthemoose #beefstew #dinnerrecipes #beefrecipes

A deeply flavored, rich, and cozy beef stew is usually an all-day, multiple-pan affair. But this recipe simplifies the steps so that you can have this stew, which is mostly hands-off cooking, on the table in a maximum of 2 hours.

Take me to the recipe!

A deeply flavored, rich, and cozy beef stew is usually an all-day, multiple-pan affair. But this recipe simplifies the steps so that you can have this stew, which is mostly hands-off cooking, on the table in a maximum of 2 hours. #meandthemoose #beefstew #dinnerrecipes #beefrecipes

Okay, so I’ve tried every beef stew recipe out there. (No, I haven’t, but I’ve tried A LOT.) The best ones require time and effort: Multiple cooking methods, multiple steps, multiple pans, etc. And the results have largely been worth the effort. BUT, if you have a busy family, young kids, a demanding job, or just don’t feel like tending a stew all day, there is a simpler beef stew option!

I did a bunch of research and tried a bunch of tricks. My goal was to achieve a rich flavor without using every pan in my kitchen and without requiring a ton of work. Some of my shortcuts worked and some didn’t. I think I’ve landed at a happy medium that isn’t exactly “set it and forget it” but that will get you a lot more bang for your flavor buck than a quick stew made in, say, the slow-cooker.

A deeply flavored, rich, and cozy beef stew is usually an all-day, multiple-pan affair. But this recipe simplifies the steps so that you can have this stew, which is mostly hands-off cooking, on the table in a maximum of 2 hours. #meandthemoose #beefstew #dinnerrecipes #beefrecipes

My first shortcut was to brown the meat in one batch in the oven instead of searing it in multiple batches on the stovetop. I know searing is the way to lock in moisture and to achieve some caramelization on the outside of the meat, but it takes me FOREVER and my hand gets very tired from holding the tongs and rotating the cubes until they’re evenly browned. So instead, I patted everything dry and roasted it at high heat in the oven for a few minutes to get that caramelization.

AN IMPORTANT NOTE ABOUT SALT: I found that if I didn’t salt the meat at all before the roasting, the end results were slightly bland. However, when I over salted the meat before roasting, it dried out because too much moisture came out during that initial cook. So, use a judicious pinch of salt before roasting and then generously salt the rest of the dish at various points in the cooking.

A deeply flavored, rich, and cozy beef stew is usually an all-day, multiple-pan affair. But this recipe simplifies the steps so that you can have this stew, which is mostly hands-off cooking, on the table in a maximum of 2 hours. #meandthemoose #beefstew #dinnerrecipes #beefrecipes

Then, I stirred in some flour right after that initial roast and along with the onions and carrots. I found that adding in the flour at this stage rather than at the end, allowed the flour to cook and thicken the sauce without any added fuss.

A deeply flavored, rich, and cozy beef stew is usually an all-day, multiple-pan affair. But this recipe simplifies the steps so that you can have this stew, which is mostly hands-off cooking, on the table in a maximum of 2 hours. #meandthemoose #beefstew #dinnerrecipes #beefrecipes

My next major shortcut was to whizz a majority of the ingredients in a blender and pour it all over the meat and veggies before a long, slow braise. Less chopping! No garlic fingers! Win win! But, if you don’t want to dirty your blender or food processor (which I completely understand) a traditional chop will do just fine.

A deeply flavored, rich, and cozy beef stew is usually an all-day, multiple-pan affair. But this recipe simplifies the steps so that you can have this stew, which is mostly hands-off cooking, on the table in a maximum of 2 hours. #meandthemoose #beefstew #dinnerrecipes #beefrecipes

Weeknight beef stew

Time: 1 3/4- 2 hours
Yield: 4-6 servings

2 lbs stew beef cubes
1 Tbsp kosher salt, divided (see note above)
3 Tbsp butter 
2 Tbsp flour 
2 cups beef stock 
1 cup red wine 
2 anchovies 
6 large garlic cloves, divided 
1/2 tsp dried thyme 
1/2 tsp black pepper 
1 large onion 
2 large carrots 

Optional topping:
1/2 lb mushrooms (optional) 
1 Tbsp olive oil or butter, or a combination
1 tsp balsamic vinegar


Preheat oven to 500. Pat the beef cubes dry. Add in a single layer to a large Dutch oven. Top with 3 Tbsp of butter cut into 6-9 small cubes. Sprinkle very lightly with salt. Roast, uncovered, for 15 minutes. Remove from the oven.

While the beef is roasting, add the beef stock, wine, anchovies, 3 cloves garlic, thyme, 1-2 very large pinches of salt, and pepper to a blender or food processor and whizz for 30 seconds.

Once the beef is quickly caramelized, turn the oven down to 375. Sprinkle 2 Tbsp of flour over the meat and mix. Add the onions and carrots and remaining 3 large garlic cloves to the pot. Sprinkle with another judicious pinch of salt. Stir.

Top with the liquid and bake in the oven, uncovered, for 1¼-1½  hours, stirring once halfway through the cooking time. The dish is done once the liquid has cooked down and thickened into a gravy-like consistency.

Optional topping:
While the beef is cooking, chop or slice the mushrooms and sauté in butter and olive oil. Once they have released their water and that water has evaporated, add the vinegar and cook for 1-2 more minutes until the vinegar has also evaporated.


Pumpkin and persimmon butter

Cooking down some canned pumpkin and a few persimmons with maple syrup and spices will make your house instantly smell like the holidays and spice up even the most basic meals. #meandthemoose #pumpkinrecipes #persimmonrecipes #dessert #fruitbutter

Cooking down some canned pumpkin and a few persimmons with maple syrup and spices will make your house instantly smell like the holidays and spice up even the most basic meals.

Take me to the recipe!

Cooking down some canned pumpkin and a few persimmons with maple syrup and spices will make your house instantly smell like the holidays and spice up even the most basic meals. #meandthemoose #pumpkinrecipes #persimmonrecipes #dessert #fruitbutter

I’m a sucker for persimmons. I can’t help myself when they arrive in the grocery stores. But I never know what to do with them. I love baking with them, but I’m trying to have fewer baked goodies hanging around in preparation for baked-goodies-hanging-around season. And if I’m going to eat them on their own or in a salad, they need to ripen, which, in my frozen kitchen, takes forever and a day.

This is my grand compromise: A cooked down “butter” that’s thick and slightly sweet that pairs with toast, graham crackers, apple slices, pretzels, Dutch babies, regular babies, cornbread, muffins, oatmeal. etc. One could also use this “butter” as a fruity addition to an autumnal cheesecake or mix it with an ice cream or other custard. My favorite way to use it is mixed with mascarpone and a couple of eggs and then baked with a pie shell for a spin on pumpkin pie.

The best part about this concoction is that you don’t need to ripen the persimmons. You heard me. As long as you use fuyu and NOT HACHIYA*, you’re fine with unripened persimmons. Of course, the more you let them ripen, the better they taste, so it does behoove you to wait at least a little while before making this butter.

*Why not Hachiya, you ask? Well, those are the larger, more ovular persimmons and if you don’t wait until they’re almost completely mushy to eat them, the tannins in the fruit make your mouth feel gluey and dry. It’s awful, trust me.

Anyway, whatever you choose to do with it, you’re only 20-30 minutes away from the endless possibilities, so get to it!

Cooking down some canned pumpkin and a few persimmons with maple syrup and spices will make your house instantly smell like the holidays and spice up even the most basic meals. #meandthemoose #pumpkinrecipes #persimmonrecipes #dessert #fruitbutter

Pumpkin persimmon butter

Time: 25 minutes, mostly active
Yield: 2 cups, depending on how much you cook down the mixture 

1 can pumpkin puree
4 fuyu persimmons 
1 Tbsp dark brown sugar (light is also fine)
¼ cup maple syrup
½ tsp cinnamon
¼ tsp ground ginger
1/8th tsp ground cloves
1 tsp vanilla extract or vanilla bean paste
1 large pinch of kosher salt
½ cup water

Peel the persimmons and cut into quarters. 

Add all ingredients to a blender or food processor and blend until smooth. Transfer to a large pot. 

Heat over a medium-low flame until just beginning to bubble. Turn the heat down to low and cook, stirring frequently to prevent burning, until the persimmons totally break down and the mixture has thickened slightly, about 20 minutes.

Browned butter and leek mashed potatoes

These browned butter and leek mashed potatoes are ultra creamy and decadent. A spring-y, quick, and special take on a comforting side dish for your holiday tables. #mashedpotatoes #springrecipes #holidayrecipes #easterrecipes #passoverrecipes

These browned butter and leek mashed potatoes are ultra creamy and decadent. A spring-y, quick, and special take on a comforting side dish for your holiday tables. #mashedpotatoes #springrecipes #holidayrecipes #easterrecipes #passoverrecipes

What’s better on your Easter or Passover table than some decadent (browned butter! cream!), spring-y (leeks!) mashed potatoes?

Take me to the spuds!

These browned butter and leek mashed potatoes are ultra creamy and decadent. A spring-y, quick, and special take on a comforting side dish for your holiday tables. #mashedpotatoes #springrecipes #holidayrecipes #easterrecipes #passoverrecipes

These browned butter and leek mashed potatoes are ultra creamy and decadent. A spring-y, quick, and special take on a comforting side dish for your holiday tables. #mashedpotatoes #springrecipes #holidayrecipes #easterrecipes #passoverrecipes

Spring holidays are the best. They feel like a gateway to blue skies, warmer weather, and, this year, like we’re one step closer to some sense of safety and normalcy. Maybe that’s overstating it, but last year’s holidays were SO WEIRD, right?. I was about 5 minutes postpartum with Z, so I’m sure everything felt worse in that state, but I remember being so afraid. We knew so little about Covid and how it spread. We wiped down our groceries with BLEACH. I was afraid to go in our front yard. We left our mail outside for WEEKS. WHAT THE FUCK.

Anyway, this year has been wild. I was actually imagining talking about it in the future. It’s going to be one of those conversations where the other people all went through the same thing, but we all need to talk about it like we were the only ones.

These browned butter and leek mashed potatoes are ultra creamy and decadent. A spring-y, quick, and special take on a comforting side dish for your holiday tables. #mashedpotatoes #springrecipes #holidayrecipes #easterrecipes #passoverrecipes

These browned butter and leek mashed potatoes are ultra creamy and decadent. A spring-y, quick, and special take on a comforting side dish for your holiday tables. #mashedpotatoes #springrecipes #holidayrecipes #easterrecipes #passoverrecipes

Anyway, about the potatoes. These are so quick and easy, but a little fancy and extra, which is what I like on a holiday table.

But let’s talk about ricing your mashed potatoes for a sec, shall we? I’m an avowed lazy cook/cleaner. I think it was years of dishwasher-less NYC kitchens that conditioned me to avoid extra dishes at any cost, so I really resisted using a ricer for a long time (and I still don’t use it unless it’s a special occasion). Some people are ricer devotees for achieving those ultra fluffy, creamy potatoes. And when you’re making straight-up, unadorned mashed potatoes, I do think the ricer makes a difference.

However, there are going to be lumps in these potatoes because we’re adding leeks, so I recommend skipping it and saving yourself some time and dishes.

Want to make these extra decadent and fancy? Add a drizzle of cream on top of the potatoes along with a sprinkle of flaky sea salt and some Aleppo pepper to finish it off. It’s *chef’s kiss*.

These browned butter and leek mashed potatoes are ultra creamy and decadent. A spring-y, quick, and special take on a comforting side dish for your holiday tables. #mashedpotatoes #springrecipes #holidayrecipes #easterrecipes #passoverrecipes

These browned butter and leek mashed potatoes are ultra creamy and decadent. A spring-y, quick, and special take on a comforting side dish for your holiday tables. #mashedpotatoes #springrecipes #holidayrecipes #easterrecipes #passoverrecipes

These browned butter and leek mashed potatoes are ultra creamy and decadent. A spring-y, quick, and special take on a comforting side dish for your holiday tables. #mashedpotatoes #springrecipes #holidayrecipes #easterrecipes #passoverrecipes

These browned butter and leek mashed potatoes are ultra creamy and decadent. A spring-y, quick, and special take on a comforting side dish for your holiday tables. #mashedpotatoes #springrecipes #holidayrecipes #easterrecipes #passoverrecipes

Brown butter and leek mashed potatoes

Time: 20 minutes, all active
Yield: About 4-6 side servings

1 lb Russet potatoes, peeled and chopped into 1-inch pieces
¼ cup heavy cream + more for drizzling 
1 tsp kosher salt, divided
4 Tbsp butter
1 small leek, trimmed, quartered and sliced
¼ tsp pepper 
Pinch of Aleppo pepper (optional)

In a medium soup pot, cover the peeled and chopped potatoes with cold water. Bring to a boil over a high flame. Once boiling, continue cooking at a rolling boil (you may need to turn the flame down if the water threatens to boil over) for 8-10 minutes or until the potatoes are fork tender.

While the potatoes are boiling, clean and chop your leeks and set aside.

Add the butter to a small pan or pot and heat over a medium flame until the butter has melted and begins to bubble vigorously and pop slightly. If the popping is too much or too dangerous, turn the flame down slightly, but you want to maintain the bubbling. Let the butter cook for 1-2 minutes and check to see if little brown bits are separating and falling to the bottom of the pan beneath the bubbles. The butter should smell nutty. This may take a few minutes longer depending on your pan and how cold your butter was to start, so keep checking regularly.

Once the browning has begun, add the leeks and ¼ tsp salt to the pan and cook, stirring occasionally, for about 5 minutes, until the leeks also begin to brown. If the browning happens too quickly, turn down the flame.

Drain the potatoes and add ¼ tsp salt. Mash well. 

Add ¼ cup heavy cream to the mashed potatoes and whip vigorously with a spatula or whisk. When the leeks and butter are sufficiently browned, add them to the potatoes. Season with the remaining ½ tsp of kosher salt and ¼ tsp of pepper, or more to taste.

Almond and coconut energy balls

These coconut and almond energy bites are a quick snack to throw together, easy to eat, and last for weeks in the fridge. #meandthemoose #energyballs #energybites #snacks #almonds #dates #easysnacks

These throw-together snacks are easy to make and store for a filling, quick bite on the go.

Take me to the recipe!

These coconut and almond energy bites are a quick snack to throw together, easy to eat, and last for weeks in the fridge. #meandthemoose #energyballs #energybites #snacks #almonds #dates #easysnacks

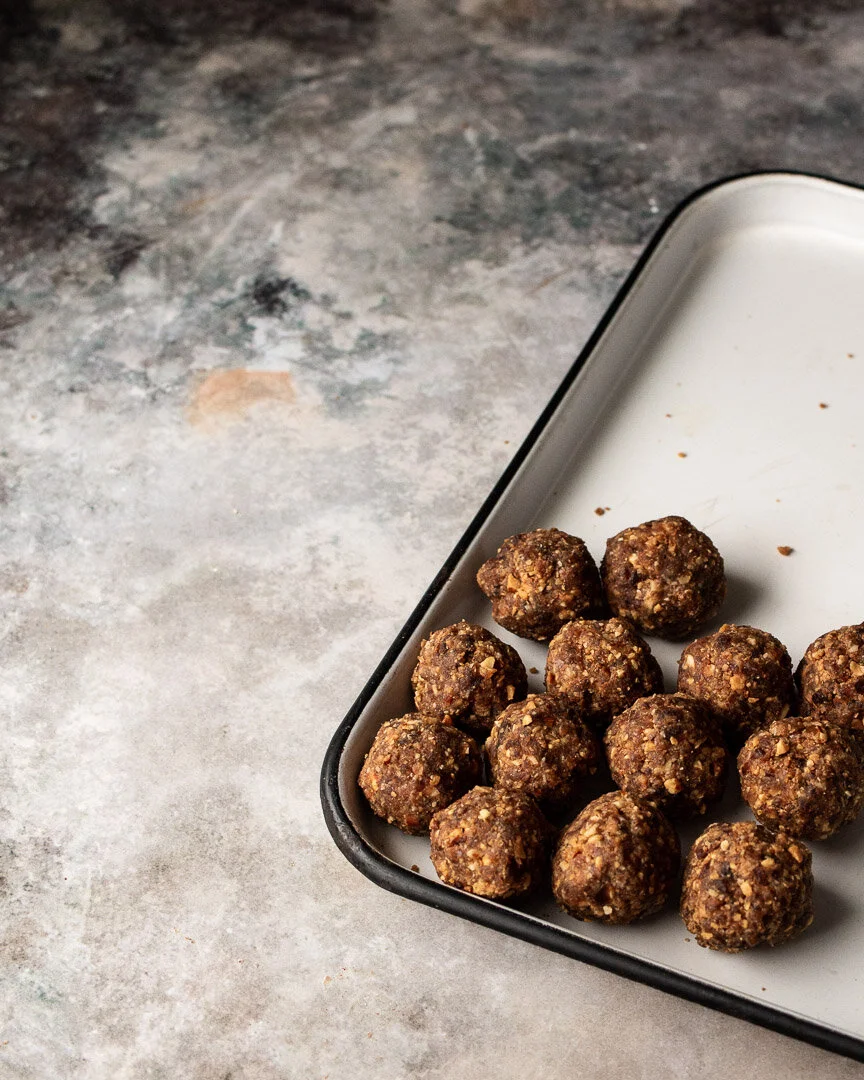
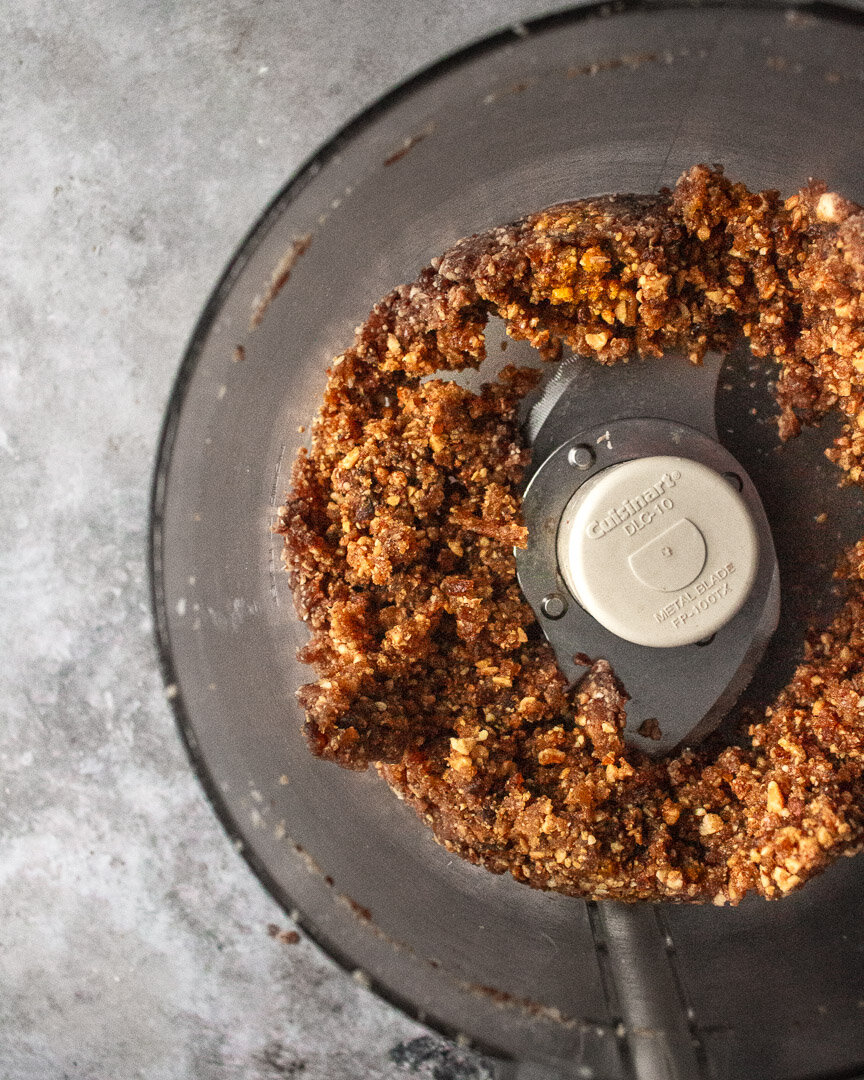
Let’s talk energy balls, shall we? Sometimes called “energy bites,” these sticky, two-bite goodies are naturally sweetened with dates and come together in a food processor in minutes. They require minimal ingredients, can be modified to suit your tastes, and are surprisingly filling for such a tiny treat. Best of all, when stored in the fridge, they last for weeks.

These coconut and almond energy bites are a quick snack to throw together, easy to eat, and last for weeks in the fridge. #meandthemoose #energyballs #energybites #snacks #almonds #dates #easysnacks

This is the thing I grab when I absentmindedly open the fridge, looking for something (in both food and existential senses).

These coconut and almond energy bites are a quick snack to throw together, easy to eat, and last for weeks in the fridge. #meandthemoose #energyballs #energybites #snacks #almonds #dates #easysnacks

A couple of notes:

  • Make the balls small! The mixture is pretty caloric, so I make them no more than about 1 Tbsp each.

  • Do toast the almonds and coconut. That little bit of browning really enhances the flavor and makes the balls less sweet.

  • Test your dates before using. If they don’t squish almost effortlessly, they may be a bit too tough or dry. If that’s the case, cover them with boiling (or just really really hot) water and let sit for 5 minutes.

These coconut and almond energy bites are a quick snack to throw together, easy to eat, and last for weeks in the fridge. #meandthemoose #energyballs #energybites #snacks #almonds #dates #easysnacks

Almond and coconut energy balls


Time: 15 minutes
Yield: 16 balls

1/2 cup raw almonds
1/2 cup unsweetened shredded or flaked coconut
16 pitted dates, rehydrated if too tough or dry
2-3 Tbsp almond butter
1/8 tsp almond extract
Pinch of salt
Water, as needed

Preheat the oven or toaster oven to 350. Spread the almonds and coconut out onto a baking sheet and toast until the coconut is just beginning to brown on the edges and the mixture smells nutty, about 3 minutes. Keep a close eye on the mixture to ensure that it doesn’t burn.

Put the toasted almonds and coconut in a food processor along with the dates, almond butter, almond extract, and salt. Whizz in the processor until the mixture comes together in one large mass, about 4-5 minutes. If the mixture doesn’t come together, sprinkle in about 1/2 tsp of water and try again, repeating about every 30 seconds until you have a large mass.

Scoop about 1 Tbsp of the mixture into wet hands and roll into a ball.

Chill the balls in the refrigerator to help them set.

Koginut squash soup

Koginut squash, a cross between butternut and kabocha, makes a creamy, herby, warm, and comforting soup. #meandthemoose #squashsoup #koginut #koginutsquash #squashrecipes #squashsouprecipes

This soup is so creamy, herby, warm, and comforting—everything a bowl of soup should be. I use Koginut, which is a cross between the butternut and kabocha varieties of squash, but use anything you have on hand!

Yes, soup for you!

Koginut squash, a cross between butternut and kabocha, makes a creamy, herby, warm, and comforting soup. #meandthemoose #squashsoup #koginut #koginutsquash #squashrecipes #squashsouprecipes

The koginut is my new favorite squash. It has the thick, creamy flesh of a kabocha squash but the mellow, sweet flavor of a butternut. If you can’t find one, have no fear. Basically any winter squash variety would be perfect here and all roast in roughly the same way. I’ve also used 2 extra large sweet potatoes in a pinch and the soup turned out equally delicious.

A note about roasting: One important element of this roasting method is to NOT trim the tops and bottom of the squash. Leaving them whole means that the steam gets trapped in the cavity of the squash so that it roasts and steams at the same time.

Also! In the recipe, you’ll note that I put the milk high up on the ingredients list even though we don’t add it until the end. That’s because, bringing it to room temperature and even microwaving it a bit makes it less likely that the milk solids will separate, which can happen if the cold milk is shocked by the hot soup. You can warm it in a pan on the stove while the soup simmers, but who wants to make another dish or worry about something scalding?

Koginut squash, a cross between butternut and kabocha, makes a creamy, herby, warm, and comforting soup. #meandthemoose #squashsoup #koginut #koginutsquash #squashrecipes #squashsouprecipes

Koginut squash soup 


Time: About 90 minutes, less than half of it active
Yield: 10 cups of soup 

3 cups roasted squash, about 1 medium winter squash or 2 very large sweet potatoes 
½ cup heavy cream or half and half 
1 Tbsp olive oil
½ large onion or 2 large shallots, roughly chopped 
5 large garlic cloves, roughly chopped 
1 Tbsp butter 
3 stems fresh thyme or ¼ tsp dried 
Heaping ¼ tsp cumin
Heaping ¼ tsp paprika 
1 tsp sea salt 
4-6 cups low sodium chicken stock 
2 Tbsp brown sugar (optional)

Heat oven to 425. Halve the squash and scoop out the seeds and stringy flesh inside. Place the squash cut side down on a parchment-lined baking sheet and roast for 30-45 minutes, until the squash is fork tender. 

Using a kitchen towel or oven mitt to protect your hands, scoop out the cooked flesh from the inside of the squash and set aside.

Measure out the cream or half-and-half. Let sit at room temperature while you prepare the rest of the soup.

In a large stock pot, heat the olive oil over a medium-low flame and then cook the onion until beginning to brown, about 5-6 minutes. Add the garlic and cook for 1 minute until fragrant. 

Add the butter and let melt and bubble slightly. 

Add the spices, stir well, and cook for 1 minute until fragrant. 

Add the squash and stir well to combine. Add the stock, stir well again, increase the flame to high, and let the liquid come to a boil.

Turn down the flame to low and let simmer for 15 minutes.

Puree the soup. 

Add the puree back to the original pot. Test the milk to see if any chill remains. If it feels cool to cold, microwave it for 30 seconds at a time until it feels room temperature or warmer. Add to the soup and stir.  

Test for seasoning and adjust as necessary. If desired, add 2 Tbsp of sugar (brown or white) and stir to combine.