Tomatillo gazpacho

This barely cooked soup combines the best of summer vegetables like tomatoes, cucumbers, and zucchini and manages to be both light and filling. #meandthemoose #summer #nocookrecipes #soup #gazpacho #tomatorecipes

Make the most of summer produce with a tangy gazpacho that manages to be both light and surprisingly hearty.

Take me to the soup!

This barely cooked soup combines the best of summer vegetables like tomatoes, cucumbers, and zucchini and manages to be both light and filling. #meandthemoose #summer #nocookrecipes #soup #gazpacho #tomatorecipes

The calendar has turned to September, friends. Most years I’m desperate for the fall to come. I’d be happy if it was sweater weather and apple season all year round.

But this year I sort of wish I could freeze time (but also, skip over the next bit entirely). We still have a week before Kindergarten starts for M, which means, I’m not yet worrying about an email from the school saying that someone has Covid. And Z is at the perfect baby stage where he’s sleeping more, crying less (sort of), and has a personality, but isn't yet mobile.

I hate this instinct of mine to imagine that whatever is coming will be bad. Or that if I imagine all the possible bads, that I can stop them from coming. What is that? Did I inherit some DNA from great great great great-grandmother Esther who escaped the pogroms?

Anyway, I’ve been dealing with all this dread by eating gobfulls of not-great food. I’m not even trying to food shame myself. I don’t think anyone would classify my current eating regimen as “balanced.” And I’m certainly not eating only things that taste absolutely delicious. I’m eating for the sole purpose of thinking about something other than my fears. It’s not great, Dan.

Consequently, I’m trying to come up with meals that are a little more veg-heavy while still being fun and tasty and most importantly, simple. Because, though I’m cooking and eating to stop myself from worrying, I’m also deeply committed to worrying and thus, don’t want to take too much time away from the task of imagining any and all worst-case-scenarios. You know, in case I CAN stop them from happening with my imagination.

This barely cooked soup combines the best of summer vegetables like tomatoes, cucumbers, and zucchini and manages to be both light and filling. #meandthemoose #summer #nocookrecipes #soup #gazpacho #tomatorecipes

So, this gazpacho. I used to hate gazpacho. As Lisa Simpson described, it’s tomato soup served ice cold. But when it’s good, it’s oh so much more than that. Our favorite farmstand had tons of beautiful tomatillos, so I bought some and threw them into the toaster oven (but you can obviously use a real oven too) and then threw them into the soup. The rest is really your standard Spanish gazpacho with none of the American faff that we often add. Think veggies at their peak, aromatics, salt, vinegar, and lots of olive oil.

I also realized that, while straining is a pain and you end up throwing out a lot of stuff that you could otherwise eat, it also makes the texture SO MUCH BETTER. So now I strain even though it’s a pain. But you certainly don’t have to. It saves time and this recipe yields a lot more soup when it includes the tougher stuff.

This barely cooked soup combines the best of summer vegetables like tomatoes, cucumbers, and zucchini and manages to be both light and filling. #meandthemoose #summer #nocookrecipes #soup #gazpacho #tomatorecipes

A couple of notes:

  • Please don’t reduce the oil content in this soup. It gives the dish its body and staying power. Without it, you might as well open a can of V8.

  • Tomatillos are a little sour and as such, give another dimension to the soup. But you can absolutely skip them and use all tomatoes.

  • Start with 1/2 tsp of kosher salt. I’ve found that this soup can easily taste too salty if you go overboard.

Tomatillo Gazpacho

Yield: about 3.5 cups (depending on how juicy your veggies are) 
Time: 25 minutes, all active (less if you choose not to strain the soup)

¼ lb tomatillos, husks removed, rinsed of the sticky residue, and halved
1¾ lb heirloom, plum, or other red tomatoes
1 small cucumber, peeled and roughly chopped
1 small zucchini, roughly chopped
3 large scallions, green and white parts roughly chopped
2 Tbsp red wine vinegar
1/2-1 tsp fine sea salt
½ cup olive oil

Preheat the oven or toaster oven to 350. On a parchment or foil covered baking sheet, place the halved tomatillos face down. Bake for 5-7 minutes or until the tomatillos have softened a bit, but aren’t completely mushy.

While the tomatillos are cooking, roughly chop the rest of the vegetables.

Add the tomatillos, tomatoes, cucumber, zucchini, scallions, vinegar, and salt to your blender and blend on high for 2 minutes. 

While the blender runs, add the olive oil in a slow stream until it’s completely incorporated, about 2 more minutes. 

Strain the soup through a fine mesh sieve.

Test for seasoning and add more salt or vinegar if needed.

Chill for 2 hours or up to 1 week.

Creamed broccoli

Creamed broccoli is a quick way to use up that bag of broccoli in your freezer and to get your kids to eat something green. #meandthemoose #vegetables #healthykids #cream #comfortfood #sidedishes #quicksidedishes #broccoli #broccolirecipes

A little garlic, cream, and parmesan transform ho hum frozen broccoli to a delicious side dish that even my 5-year-old, hot-dogs-for-breakfast kid will eat.

Take me to the recipe!

Creamed broccoli is a quick way to use up that bag of broccoli in your freezer and to get your kids to eat something green. #meandthemoose #vegetables #healthykids #cream #comfortfood #sidedishes #quicksidedishes #broccoli #brocollirecipes

I don’t actually feed my kid hotdogs for breakfast, but he WISHES that I would. I’m pretty sure he’s cried about it at least once this week.

How are you all feeling about your kids’ nutrition during quarantine? I know I’ve been eating like a maniac for a few reasons. First, I’m nursing, so I need at least 10,000 calories a day, right? Second, we can’t go anywhere or do anything, so we’ve definitely been using food as recreation, pleasure, and fun; all of the things we used to get outside of our house and with people besides one another. Third, I’m awake so many more hours per day with a newborn that I have more time to graze in a fatigued stupor.

All of this has set a really bad example for my kid. He wants to eat only comfort, pleasure foods and I’m too tired to fight it a lot of the time. Also, he’s kind of a jerk when he’s hungry, which I’m pretty sure is genetic. This broccoli has been helpful because I feel good about him eating something green and he feels good about eating something with cream and cheese.

I’m really trying not to sweat the eating too much. I think we’re all feeling like some degree of failure if the number of “It’s okay to______ or not to _______during quarantine” think pieces I’ve seen is any indication. It’s hard to do anything all the time. Like I always say, too much of a good thing is still too much. Family time is great, but no one gets a break from each other. I like being a homebody, but what I wouldn’t give for a playdate so my kid could destroy someone else’s house for a change.

If eating a fourth cookie means I can laugh at the AWFUL haircut my husband gave M and not cry with rage because he looks like Eleven from Stranger Things, so be it.

Creamed broccoli is a quick way to use up that bag of broccoli in your freezer and to get your kids to eat something green. #meandthemoose #vegetables #healthykids #cream #comfortfood #sidedishes #quicksidedishes #broccoli #brocollirecipes

A couple of notes:

  • This recipe is barely adapted from one I found on epicurious. Some commenters didn’t love it, but extra Parmesan and garlic really help, I think.

  • This is a little soupier than other “creamed” things like spinach or corn. A lot of recipes call for a roux, which I opted against because I wanted this recipe to be fast and also, AP flour is about as scarce here as toilet paper or hope. What? Too dark??

  • I kind of like the soupyness because we all have enough homemade bread to last until the next pandemic, right? So we need something to sop up with all those carbs. This is also nice tossed with some noodles or zoodles or the like.

  • I use frozen broccoli for this recipe because I feel like that might be more accessible currently, but you can definitely use fresh broccoli.

  • If you don’t have a shallot, sub in some really finely minced onion or just another clove of smashed garlic.

  • When I say “well-smashed” I really want you to give the garlic a good squish with the side of your knife. Get aggressive. You want each clove to be in several pieces.

Creamed broccoli is a quick way to use up that bag of broccoli in your freezer and to get your kids to eat something green. #meandthemoose #vegetables #healthykids #cream #comfortfood #sidedishes #quicksidedishes #broccoli #brocollirecipes

Creamed broccoli

1 bag frozen broccoli or 1 large head of raw broccoli (about 4 cups of florets and stems)
1 Tbsp butter
4 large garlic cloves, smashed well
1 large shallot, thinly sliced
1 cup heavy cream  
½ cup grated parmesan cheese
Salt and pepper to taste

Yield: About 3-4 cups of broccoli
Time: 15 minutes, all active

In a large bowl, microwave the frozen broccoli until completely defrosted, about 4 minutes. Drain and place the broccoli on a paper towel while making the sauce.

If using fresh broccoli, bring a large pot of water to a boil and drop in the florets. Cook for 3-4 minutes and drain. Set on a paper towel to dry while making the sauce.  

In a medium pot, melt butter over a medium flame. Add the garlic and shallots and cook until fragrant, about one minute, reducing the heat if the shallot or garlic start to burn.

Add the cream and allow it to bubble. If it isn’t coming to a boil, increase the heat slightly. Similarly, if the cream is scalding or bubbling too fast, reduce the heat slightly. You want the cream to bubble pretty vigorously and it’s okay if it bubbles up and seems to expand, but we don’t want browning or burning.

Keep a close watch and stir occasionally until the cream has reduced and thickened so that when you scrape the bottom of the pot, the liquid doesn’t immediately re-cover the metal, about 4-5 minutes.

Add the parmesan and stir until melted, about 30 seconds.

Carefully taste the sauce (don’t burn your mouth!) and season with salt and pepper.

Add the broccoli and cook, stirring, until the sauce has covered the broccoli to your liking. The broccoli will release some water and thin out the sauce.     

Rainbow Chard Galette

Rainbow Chard Galette | Me & The Moose. This galette is a super-easy show stopper for Easter and beyond! we ate it for dinner last night and the preschooler didn’t bat an eye at the heaps of greens. #meandthemoose #rainbowchard #sidedishes #vege…

This Rainbow Chard Galette is so good (I mean, there’s cheese and puff pastry, what’s not to love) and a serious show stopper for your Easter feast (or any day, really).

Take me to the recipe!

OVENS, amiright? It recently occurred to me that the real secret to successful baking is knowing your oven well. I mean, measuring and experience and bringing things to room temperature and patience are also important, but seriously, if you know that your oven runs hot or cool or that it has uneven spots, you can really up your baking game.

As you can tell, I’m still adjusting to our oven even though we’ve lived in our current house for almost two years.

Luckily, I’ve found that store-bought puff pastry is fairly forgiving. As long as your filling isn’t too wet and the oven is at least 400 degrees, you’re pretty safe.

Which makes this easy galette a reliable option for your holiday table.

Rainbow Chard Galette | Me & The Moose. This galette is a super-easy show stopper for Easter and beyond! we ate it for dinner last night and the preschooler didn’t bat an eye at the heaps of greens. #meandthemoose #rainbowchard #sidedishes #vege…

A couple of notes:

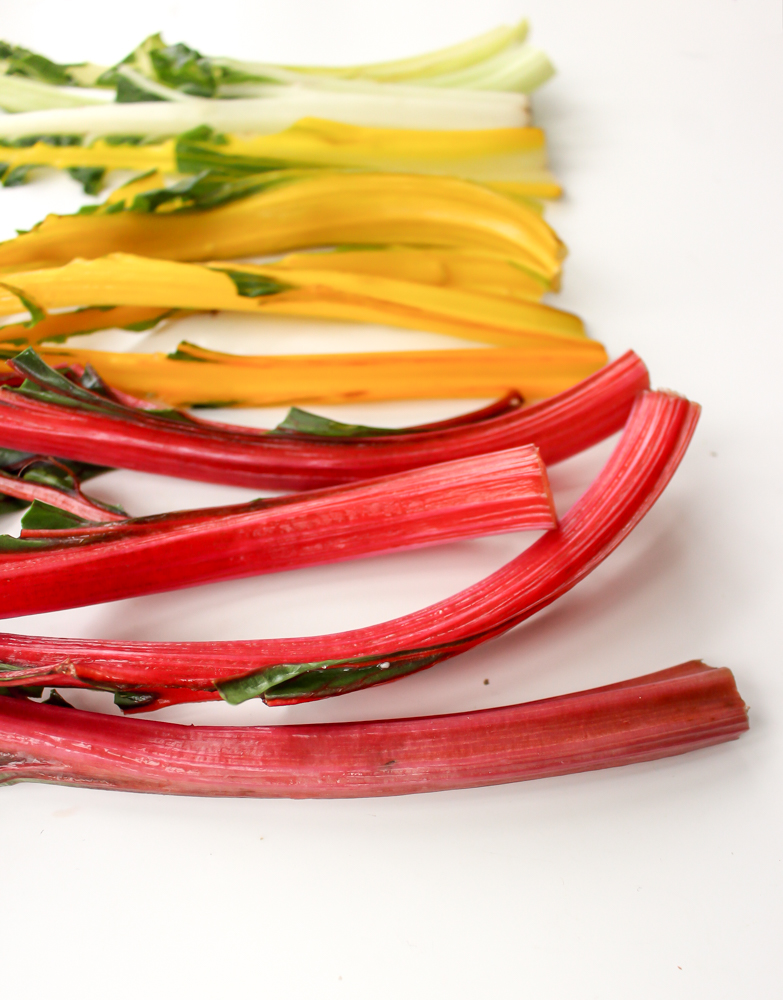
  • I like to rip the greens off of the stems and then arrange the stems in a way that flexes my OCD muscles. HOWEVER, you can opt to chop everything together to save time and that’s perfectly acceptable.

  • Roasting garlic makes the flavor mellow and mild, which I like here because it lets the chard sing. But if you like a stronger garlic flavor, chop the cloves and saute them with the spring onions and greens instead of roasting. Or you can do half and half.

  • This galette really needs salt. I salt at the beginning and end of wilting the greens and then finish with some more salt. I like salt. If you don’t, I urge you to salt at the beginning and end of wilting (and taste test to make sure it’s not too much) and then skip the final salting rather than waiting to add salt at the end.

Rainbow Chard Galette | Me & The Moose. This galette is a super-easy show stopper for Easter and beyond! we ate it for dinner last night and the preschooler didn’t bat an eye at the heaps of greens. #meandthemoose #rainbowchard #sidedishes #vege…

Rainbow chard galette


Time: 50-60 minutes (about 30 minutes active time, depending on how intense you get about arranging the chard stems)
Yield: 9 medium pieces


4 large garlic cloves
2 Tbsp olive oil + more for roasting the garlic (about ½ cup)
2 large spring onions (white/purple and green parts), chopped (about 1 heaping cup) sub scallions if necessary
10 cups chard leaves, measured after chopping, lightly packed (about 2 medium bundles)
2 tsp balsamic vinegar
1/4 tsp kosher salt (a few big pinches)
A few cracks of black pepper
1 cup ricotta
3/4 cup nutty cheese like gruyere or aged Gouda, shredded
1 puff pastry sheet
1 Tbsp roasted garlic oil (from earlier roasted garlic)
1 egg, whisked

Preheat oven to 425.

Smash four garlic cloves (no need to remove the skin) and place in an oven-safe ramekin. Add enough olive oil to cover the garlic. Cook in the oven for 6-8 minutes, or until you start to smell garlic and the cloves are fork tender.

Meanwhile, heat 2 Tbsp olive oil in a very large skillet. Add the spring onions and sauté until translucent and fragrant, about 2 minutes.

Add the greens and a large pinch of salt. Cook until wilted, about 8-10 minutes.

Add the balsamic vinegar, another large pinch of salt, and a few cracks of fresh black pepper and stir a few times.

Once wilted, place the onions and greens into a large bowl. Add the cheeses and roasted garlic. Mix well.

On a floured surface, roll out the puff pastry dough to a thickness of 1/8th to 1/16th of an inch (about 1/3 bigger than original packaging). Move the dough to your sheet pan.

Spread the greens and cheese on the puff pastry, leaving a 1-inch frame. Fold the bare edges over onto the greens and cheese mixture.  

Arrange the chard stems in your desired pattern.

Brush the chard stems with 1 Tbsp roasted garlic oil.

Brush the lightly beaten egg over the visible parts of the pastry crust.

Bake for 18-20 minutes or until the bottom and the edges are golden brown.

Rainbow Chard Galette | Me & The Moose. This galette is a super-easy show stopper for Easter and beyond! we ate it for dinner last night and the preschooler didn’t bat an eye at the heaps of greens. #meandthemoose #rainbowchard #sidedishes #vege…

Carrot, ginger, and tahini dressing

IMG_7906.jpg

Salad! Do your kids eat it? M will inexplicably stuff his face with raw kale sometimes and then turn around and gag on anything leafy or green. The dressing is a factor. Also, if he gets to mix the salad, he is much more likely to eat it. I recommend putting your salad bowl on a rimmed baking sheet to catch any greens that escape (read: all of the greens) and letting the little ones have a go.

IMG_7893.jpg
IMG_7903.jpg

Since M is currently SO PASSIONATE about sushi, we've eaten at A LOT of Japanese restaurants lately. Sometimes that ubiquitous carrot and ginger dressing is a revelation, but more often, it's watery or too acidic. This version is neither of those things. There's a fair amount of liquid and acid in this recipe, but the load of carrots and the little bit of tahini mellows the vinegar just enough and adds a touch of creaminess.

I won't lie: It's a little chunkier than your average salad dressing, but it coats the lettuce beautifully and instead of just being oil, you're sneaking in some extra goodness in what is essentially a condiment. So if your toddler deigns to eat a mouthful, they're eating EVEN MORE VEGETABLES.

Also, this dressing is sweet and tangy, but happens to be free of gluten, dairy, and sugar. And it lasts FOREVER. Pretty sure I'm still eating a batch that I made three weeks ago. But, you know, use your judgment.

IMG_7872.jpg

Creamy carrot and ginger tahini dressing

¼ apple cider vinegar
1 Tbsp white vinegar
2 Tbsp tahini
2 extra large carrots or 4 medium/small carrots
1 inch piece of fresh ginger, peeled and roughly chopped
¼ white onion
1 large clove garlic
2 Tbsp lemon juice
½ cup olive or avocado oil
salt
pepper

Place all ingredients (except the oil) in a blender or food processor. Start blending and slowly pour in the olive oil while the machine is running. Blend until you've reached your desired consistency. If the mixture feels too watery, add another tablespoon of tahini. If it feels too thick, add one tablespoon of water and blend.

IMG_7877.jpg
IMG_7886.jpg

Turkey and kale spanakopita

IMG_7561.jpg

Aack! Monday! (I am a Kathy comic, in case you were wondering.)

Monday, you're a bummer. What should be a fresh start is always an uphill climb for me. Weekends with a toddler are exhausting and getting back on schedule is tough after two days of loosening the reigns. Enter, spanakopita: An easy, healthy, and totally customizable way to keep your food making and eating on track.

IMG_7544.jpg
IMG_7552.jpg

Spanakopita is a traditional Greek dish that usually employs spinach and a lot of spices (dill, oregano, etc). However, while I love spinach, M does not. And dill is my MORTAL ENEMY. So, this is my version, which uses kale, turkey, feta, oregano, and Aleppo pepper and wraps everything up in a freeform galette.

The beauty of this dish is in its adaptability. Skip the meat for a veggie version or use ground lamb, ground beef, or shredded rotisserie chicken. If you can't find frozen kale, any frozen greens will do. But, definitely use frozen veggies that you thaw and squeeze dry instead of anything fresh.

IMG_7555.jpg

Don't be intimidated by filo dough. While it can dry out and crack relatively fast, we're talking about a few minutes, not a few seconds. Some people recommend covering the dough with a lightly damp towel while others recommend brushing butter or olive oil on each layer. I say, if you organize your ingredients and work fast, you don't need to do any of those things. At least, not for this recipe.

*One quick note: I completely forgot to add the eggs when I made this dish for the photos! See also: "Aack! Monday!" So, yours will be considerably less crumbly than these photos imply. However, if you happen to forget the eggs in yours, it will still be delicious.

IMG_7568.jpg


Turkey and kale spanakopita

1 lb frozen kale (or spinach or collard greens or mixed greens, whatever you like), thawed and squeezed
2 Tbsp olive oil, divided
1 lb ground turkey
2 cloves garlic
¼ tsp aleppo pepper or ¼ tsp smoked paprika + 1/8 tsp cayenne
½ tsp oregano
6 oz crumbled feta (or about 1½ cup)
3 eggs
6-8 sheets of filo dough

Preheat oven to 350.

If the kale is straight from the freezer, empty the bag into a large bowl and microwave for 2-3 minutes, just until the ice has melted. Squeeze well with a cloth or paper towel to get out as much moisture as possible. Set aside.

Saute the turkey just until no pink remains, breaking into tiny pieces with the back of a spoon while cooking. Add the garlic, Aleppo pepper, oregano, and salt and cook for one more minute, or until fragrant. Add to the bowl with the squeezed kale.

Add feta to the large bowl and mix well. Taste for seasoning before adding the eggs and adjust accordingly. Add all three eggs and mix well.

Prep your workspace before opening your filo package. Cut a piece of parchment and place on a baking sheet. Have your bowl of fillings and a small bowl and brush or spray can of olive oil ready.

Next, unwrap and unroll the package of filo and, working quickly, lay out one sheet of the dough. Then, take the next sheet and rotate it slightly so that the points of the sheet underneath stick out. Repeat, rotating the third sheet of filo in the other direction. Repeat the first three steps again exactly until you have six sheets of filo in a rough star shape. (See photos to better illustrate what I mean.)

Dump the filling mixture into the middle of the six filo sheets and spray or brush the filling and the filo with olive oil. Then, wrap the sides of the filo over the filling. If there is a very large gap in the center revealing a lot of the filling, crinkle up one or two more sheets of filo and stick them on the top. Spray or brush the whole packet with olive oil.

Bake for 25-30 minutes or until the top is golden brown.

Yield: 4-6 servings

IMG_7565.jpg
IMG_7571.jpg
IMG_7576.jpg